
I learned something about myself this morning (when I was called to substitute at the last minute). I can get myself ready (including a shower) and to the kids' school in less than a half an hour. So why does it sometimes take me half the day to get dressed? Hmmm. Now that the kids are all in school, it seems way too easy to postpone getting ready for the day. Anyone else suffer from the same illness? Sorry, I'm rambling . . . you are really here to learn my secret to blending thrifted furniture!
Blending Thrifted Furniture
RELATED: DIY Bunk Bed Fort, DIY Bunk Bed Pocket Bookshelves
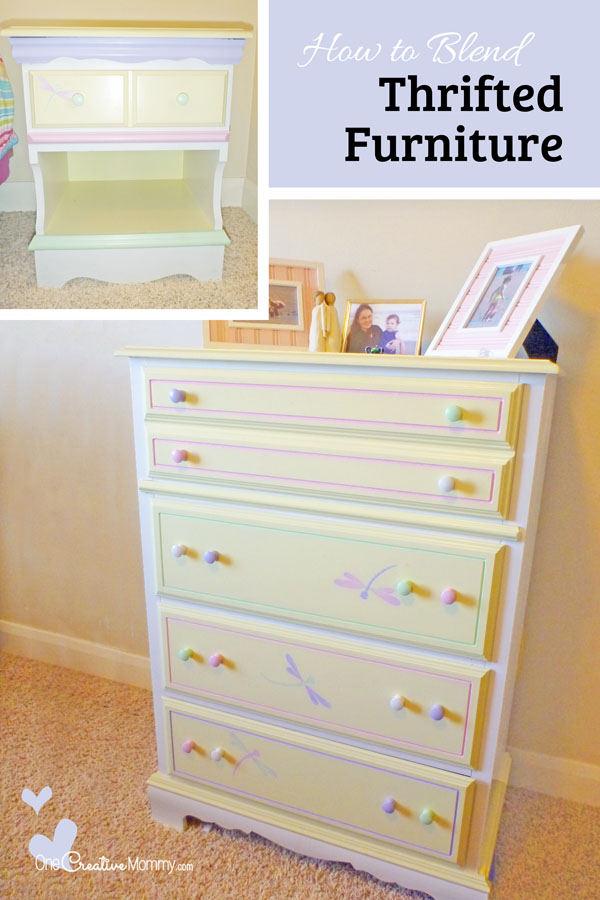
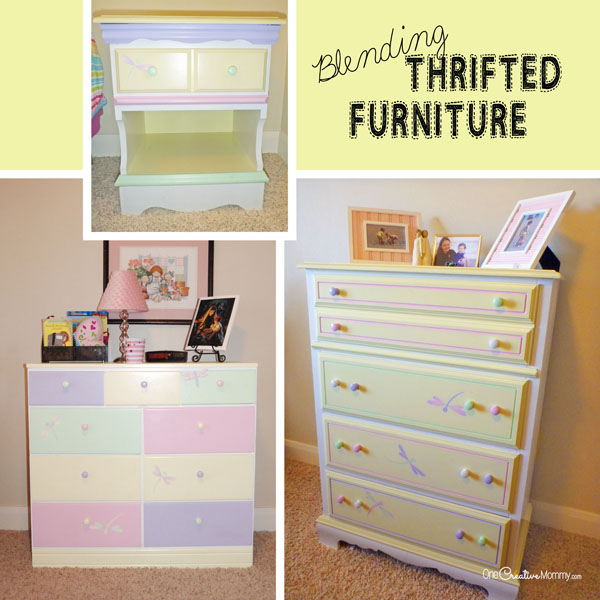
We all love free furniture, but sometimes it doesn't quite match the decor or the rest of the furniture. Let me share how I solved the problem and created fun, unique pieces for my children.
My hubby and I were blessed with free furniture for our girls' rooms when they were very little. There was just one problem. They didn't match each other -- at all. (I wish I had before pictures, but it's been 10 years. These furniture redos were done long before I had any thoughts--or time--for blogging.) One dresser was cream, while the other two were white. One had outdated gold frilly handles, another painted knobs, and the other simple drawer pulls. Two pieces were in perfect condition, while the third sported at least six layers of paint and had been repaired several times. They did have one thing in common, though. They were each perfect for little girls.
Since the dressers will soon need to be changed to match new rooms, I thought I'd show you my trick to make them look like they belong together. The secret? Paint, matching drawer pulls, and a coordinating motif.
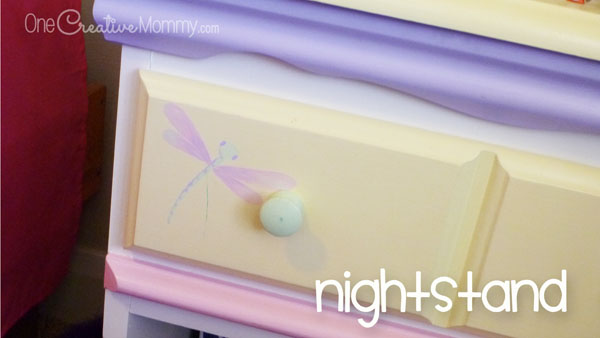
- Replace all drawer pulls with matching hardware. I chose simple wooden drawer knobs from a craft store. (A very inexpensive choice!)

- Paint the furniture in the same color (or colors). These three pieces had very different styles--so I had to get creative with my painting! If you like a more simple look, there's no need to go crazy with the colors like I did. At the time I painted this furniture, we were apartment dwellers with no real chance to decorate. I chose to add color to the furniture instead of to the walls. That way, the decor could travel with us as we changed apartments--which we did at least once a year!
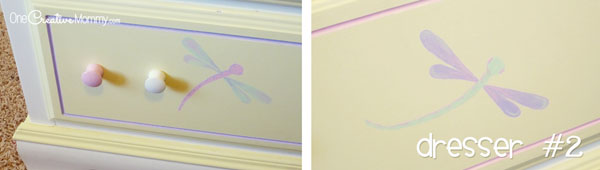
- Add a fun motif that ties the pieces together. I chose dragonflies. I even used a wooden dragonfly to cover a drawer repair on dresser #1.
- Most importantly--have fun! (Especially if the furniture is for kids.) Kids' rooms are great places to decorate with color and whimsy.
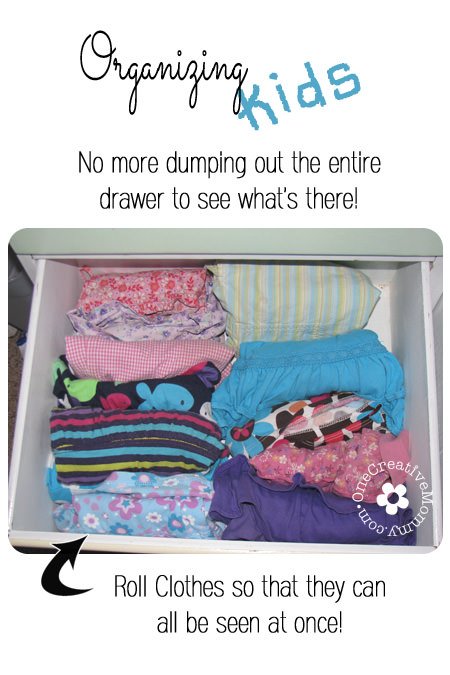
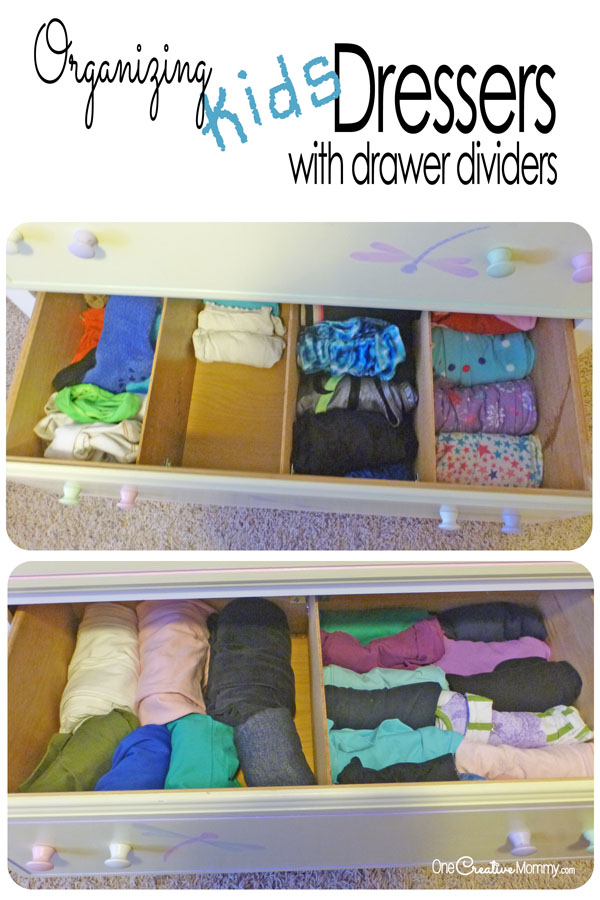
Visit both of my Organizing Drawers for Kids posts to see how I made these dressers even better! (Click on the images below to visit the posts.)
Thanks for visiting!


Patty
Great tips! I love that the dressers are mutlicolored. Very cute.
javeriyasayeedsiddiqui
Hey there :D
Found your post on one of the link parties and I just LOVE re-purposed stuff so I just had to check out yours! The dragon flies look super cute. It would be so awesome if you share this at my link party on Saturday at my blog http://believeninspire.wordpress.com.
Have a nice day!
Javeriya
Jill @ Create.Craft.Love.
Those are such great tips! Thanks for sharing at the Keep Calm and Link Up party! Hope to see you back next week!
Diana Rambles
So pretty! I love your use of colors!! The nightstand I used for my Nightstand Doll Closet was nearly identical, but I just just one color. Thanks for linking up to Pin Me! I've pinned it!
Rose :: Fine Craft
Love how you made it all match. Adorable. It's all beautiful. Thank you for sharing it on our blog at the Wednesday linky party!
Kelly - Two Kids Cooking and More
What an adorable idea!
Thanks for stopping by and sharing it at our linky Party!
Kelly
Christine
LOVE this post!! Soooo useful!! And the drawers.... GENIUS!!!!
Thanks so much for sharing this at The DIY Dreamer... From Dream To Reality!
Liz
ahh, i totally needed this tutorial. i never know how to make my thrift finds seems cohesive. thanks!
tanya
I have two girls who would absolutely love this! I really love the dragonflies! I too cannot seem to get going in the morning. I find my 4 year old and myself won't get dressed until 10 or 11! I love it!
Charity Johnson
That's absolutely adorable. I'm trying to work my way up to painting furniture. but as an apartment dweller I feel rather limited in what I can do. (nowhere to sand down or remove old finishes and things like that.) maybe this summer I can drag something out to the balcony and try sanding outside. I really like the color combo you have going there.
Heidi Fowler
Thanks, Charity. Apartment living is exactly why I started painting furniture. I couldn't paint the walls, but I could do the furniture. I painted this furniture in my parent's garage. It would have been tough to do it inside an apartment. I did refinish a rocking chair in the backyard of my four plex once, though! I guess you just make do with what you have! I hope you can find a way to make it work. It's worth it! (I went to college with a Charity Johnson. You didn't attend BYU by chance, did you?)
PETRIFIED WOOD SPHERE
woow very inspiring thanks