

They say good things come to those who wait. Well, if you've been waiting for the rest of my iMovie party ideas, they're finally here! When school started, I shared our Mad Libs/iMovie party game, and now I'm finally ready to share the iMovie Birthday cake. Seriously. You're not going to believe how easy it is to make. (And, yes, I have a cutting file to help you out.)
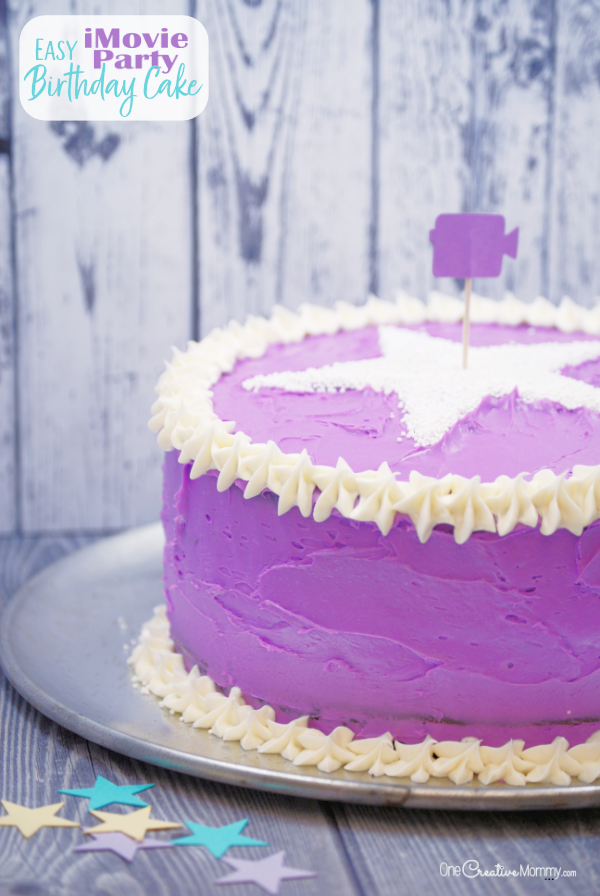
Amazing iMovie Birthday Cake
Choosing a party theme for teens and tweens is tough. When my daughter asked for an iMovie themed birthday party, I was stumped. Once we had the idea to combine Mad Libs and iMovie trailers, the ideas started flowing, and we had the makings of a great party. (And the kids had so much fun making their own crazy movie trailers.) Unfortunately, I still had to figure out a cake! I finally decided to recreate the iMovie logo. Who knew it would be so simple! Here's what you do:
First, bake a two-layer round cake. You can use a box mix or your favorite homemade recipe. It's been a while, but I think this cake is probably two chocolate Better Crocker gluten free cake mixes. If you're new to making double layer cakes, it's a lot easier than it looks.
You will need:
- Ingredients for your preferred cake mix or recipe
- Round cake pans (Mine are 9")
- White frosting
- Purple frosting (or white with food coloring)
- Toothpick
- Small scrap of purple cardstock
- My Silhouette cutting file for the star and camera, or my camera printable file and your own star stencil (download links at the end of the post)
- A sheet of 12 x 12 cardstock, parchment paper or waxed paper
- Cake decorating tips (I use this set from Pampered Chef)
- White round sprinkles (I used these white sugar pearls because the round shape worked best to fill in the points of the star.)
Before filling your round cake pans, trace the pan onto parchment paper and cut out two circles. Lay the parchment paper inside your pans and then spray the sides with non-stick spray. (You can flour the sides, too, if you'd like, but I don't do it.) Pour in your cake batter, and bake as usual. When they are done baking, lay a cooling rack over the cake layer, and then flip it over to empty the cake onto the cooling rack without breaking it. Peel off the parchment paper.
Once the layers are cool, place a cake plate over one of the layers and flip the cooling rack over to place your layer onto the plate. You'll notice that the top of your layer will be very rounded instead of flat. Use a large serrated knife to slice off the rounded part to give yourself a nice, flat surface to work with. (Bonus--you get to eat the part of the cake you cut off!)
Put a layer of frosting on top of the first layer, and carefully place the second layer on top. Level off the second layer for a flat surface. Eat the extra!
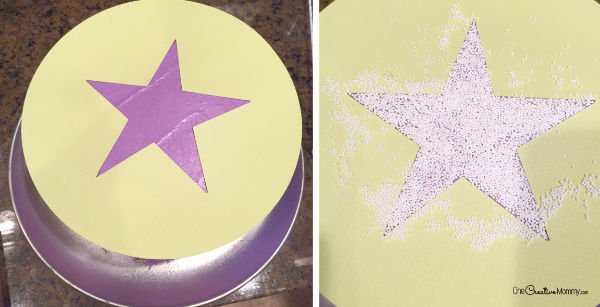
Before frosting the cake, use my cutting file to cut a star out of the middle of a 12 x 12 piece of cardstock to create a stencil. If you don't have access to a Silhouette or other paper cutter, try tracing a large star onto a piece of cardstock and cutting it out. Just tape the paper back together where you had to make an extra cut to get to the center. You need to have this ready before you frost. If you let the frosting sit too long, the sprinkles won't stick to it.
I haven't tested it, but you can try using parchment paper or waxed paper for your stencil instead of cardstock. It may cause less damage to the frosting when it's removed. I wish I had thought to try that when I made my cake.
Frost the entire cake purple, and gently lay the star stencil on top of the cake. Now, pour the sprinkles into the star shape. Work quickly, because your stencil will stick to the cake. Carefully peel off the stencil and resmooth the frosting back in to place in any places it was damaged by the paper.
Using your decorating tips, pipe any design you are comfortable with around the bottom and top edges of the cake.
*Pay attention to the color of your accent frosting before you buy it. My frosting appeared white on the package, but it was actually cream. I'm sure the kids didn't notice, but I noticed that the white frosting was not the same color as the white sprinkles. It's that annoying perfectionist in me sneaking through!
Finally, cut out one or two copies of the camera, tape them to the toothpick, and poke the finished camera into the center of the star. (If you are not picky about the tape showing on the back of the camera, just cut out one. If that bothers you, cut out two copies, and sandwich the toothpick between them with double-sided tape.)

You're done! I think that's one of the easiest decorating jobs ever!
Shop this post:
Now all you need are the download links for the stencils. If you have a cutting machine, click the download button below to download a zip file containing the cutting file for the star and camera.

If you don't have a cutting machine, try drawing your own star and click the download button below to open a pdf file of a couple of different sizes of the camera to print. I used the smaller size.

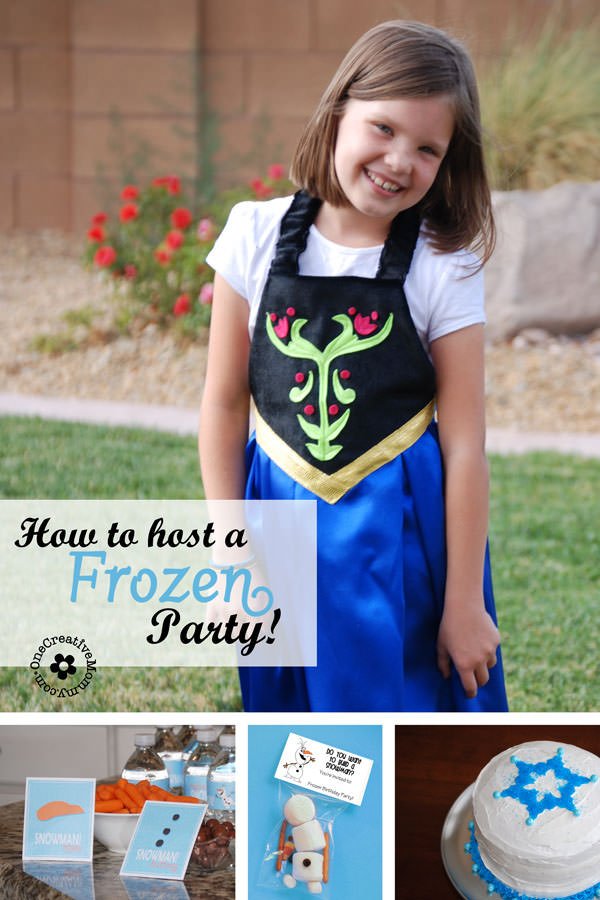
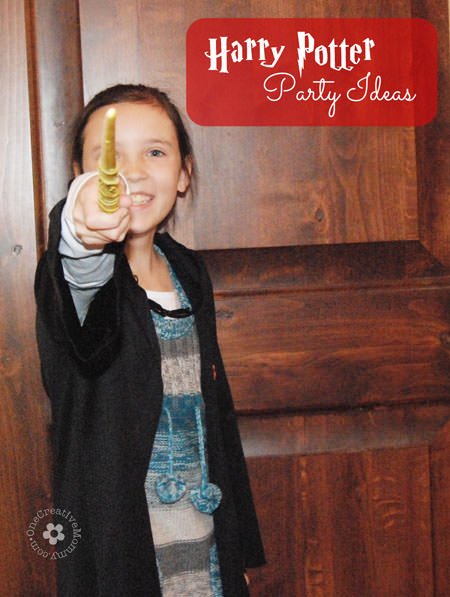
Thanks for stopping by today! Don't forget to check out more party ideas by clicking on the images below. The images are linked to the posts.


Dalene Ekirapa
Choosing themes for teens can definitely be tough; you had a lot of work to do but yes, you did it! I love your IMovie birthday cake...well, it does look delicious and the purple color is just nice for your daughter.
Heidi
Thanks, Dalene. I'm actually not a huge fan of crazy frosting colors, but the purple matches the iMovie logo.
Cristina Coroiu
This cake looks so cool. I want to make a cake or something sweet to celebrate the new Avengers movie. My husband loved that movie and I know he would appreciate it. Do you have any ideas?
Heidi
Thanks, Cristina. That's a tough one because there are so many different characters in the Avengers movie. I think it would be pretty easy to decorate a cake like Captain America's shield, but the other characters might be a little more tricky!
Amber Myers
I love how this cake turned out! And it looks delicious. My son uses iMovie often to edit his videos. I am slowly learning more about it!
Heidi
Thanks, Amber. The kids made silly iMovie trailers for the party. It was really fun.
Tammy
Cute cake. Love all the other film baking ideas too.
Heidi
Thanks, Tammy. The cake was a hit, and the party was really fun.
Aashima
This indeed is a cool cake. I don;t think I have seen an all purple cake before, looks amazing.
Heidi
Thanks, Aashima. I don't usually like crazy frosting colors, but the purple matched the iMovie logo.
Natalie
This just gave me a major sweet craving! I shoud really attempt decorating my own homemade birthday cake - this one look great and not too complicated.
Heidi
Thanks, Natalie. It's really fun to do themed birthday cakes, and this is one of the easiest I've made so far. (Harry Potter was by far the easiest, though. Duplicating Hagrid's squashed b-day cake is pretty simple!)
Sarah Bailey
OK that make is absolutely amazing! What a great idea for people who love films to have as a birthday cake, I quite fancy a slice now!
Heidi
Thanks, Sarah. The party and the cake were a success. (It's not too hard to please a bunch of 10-year-old girls!)
Kimberly C.
What a great cake idea. So pretty too. I will not try to mimic this, because I'm a disaster in the kitchen, but I do enjoy watching your pics. Going to browse around your blog some more now.
Heidi
Thanks, Kimberly. I guess not everyone enjoys making things on their own. That's what keeps bakeries in business, right?
Alison Rost
That's a pretty easy cake decor! I appreciate the tutorial very much. I've never been awesome with the piping bag and that's why I've always steered clear of the decorating part. This makes everything easier.
Heidi
Thanks, Alison. I'm not great at using piping bags, either. I use the decorating kit from Pampered Chef, and it's really simple to use and not messy like the piping bags.
Mayuri Saxena
Loved that cake! I will try to steal this idea and use it on my daughter's 4th birthday celebration...I am sure she will love it! :)
Heidi
Thanks, Mayuri. Good luck with your daughter's birthday celebration!
Sam | Ahead of Thyme
This cake is so cool! Love this idea, and thanks for the recipe!!
Heidi
You're welcome, Sam. Thanks for stopping by and leaving a comment.
Renee @ The Good Hearted Woman
Such a pretty cake! You did a great job of breaking it down and making easy to do, too!
Heidi
Thanks, Renee. Making creative cakes for the kids is so much fun!
kim
That's such a fun idea! My daughter would love this!
Heidi
Thanks, Kim. It was definitely a hit at the party.
LavandaMichelle
This is a wonderful idea! I'd love to attend a party like this and I know my kids would like this, as well. Thanks for sharing! :)
Heidi
Thanks, LavandaMichelle. The party was a lot of fun.
Julia
Thank you for sharing this. The cake looks cool...I will love to try this soon...
Heidi
Thanks, Julia. Have a great weekend. Thanks for stopping by.
Duck life
Your birthday cake is very beautiful. You've probably spent a lot of time making this cake.
Jay Philip
Awesome!!