• Skip to primary navigation
  • Skip to main content
  • Skip to primary sidebar
  • Skip to footer
onecreativemommy.com
  • DIY/Crafts
    • DIY for the Home
    • DIY for the Garden
    • Crafts for Kids
    • Sewing Projects
    • Felt Food Tutorials
  • Parties/Gifts
    • All Party Ideas
      • Frozen Party
      • Harry Potter Party
      • Spy Party
      • Un-Slumber Party
      • Minion Party Ideas
      • Art Party
      • Princess Party
    • All Gift Ideas
  • Holidays
    • Valentine's Day
    • Halloween
    • Christmas and Winter
    • Thanksgiving and Fall
    • Fourth of July
    • New Year
    • Easter and Spring
    • St. Patrick's Day
    • Mother's Day
    • Father's Day
  • Recipes
    • Gluten Free
  • Tips & Tricks
    • Organization Tips
    • Cleaning Tips
    • Parenting Tips
    • Back to School
    • Cooking Tips
    • Gardening Tips
  • Printables
    • Bingo Games
    • Lunchbox Printables
    • Educational Games
    • LDS Printables and Lesson Ideas
  • Navigation Menu: Social Icons

    • Facebook
    • Instagram
    • Pinterest
    • YouTube
menu icon
go to homepage
search icon
Homepage link
  • Home
  • DIY & Crafts
  • Parties & Gifts
  • Holidays
  • Recipes
  • Tips & Tricks
  • Printables
    • Facebook
    • Instagram
    • Pinterest
    • YouTube
  • ×

    Home » Blog

    How I Tamed Our Lego Disaster

    Published: Jan 29, 2021 by Heidi. This post may contain affiliate links 14 Comments

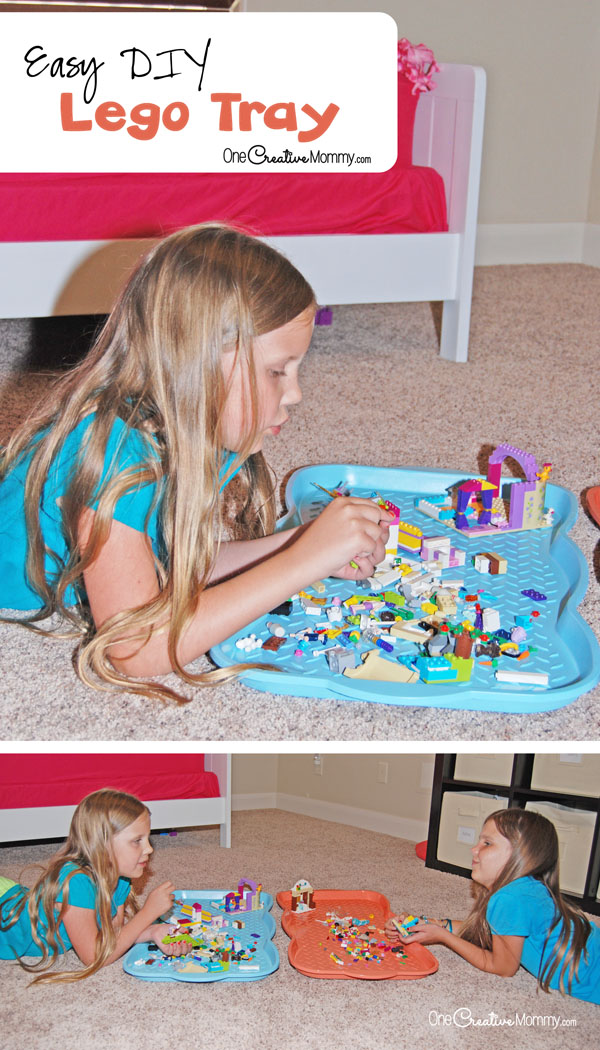
    Do you live in a family of Lego addicts? I do. Legos are totally fun, but they can be so messy! It seems like they're always under foot. They get stuck in the carpet and turn up in the strangest places! This summer, I tamed the kids' Lego mess with a super simple DIY Lego Tray. Seriously, you won't believe how easy it is to transform the bedroom or playroom!

    Tame the Lego mess with this simple Lego tray. No more Legos everywhere! {OneCreativeMommy.com}

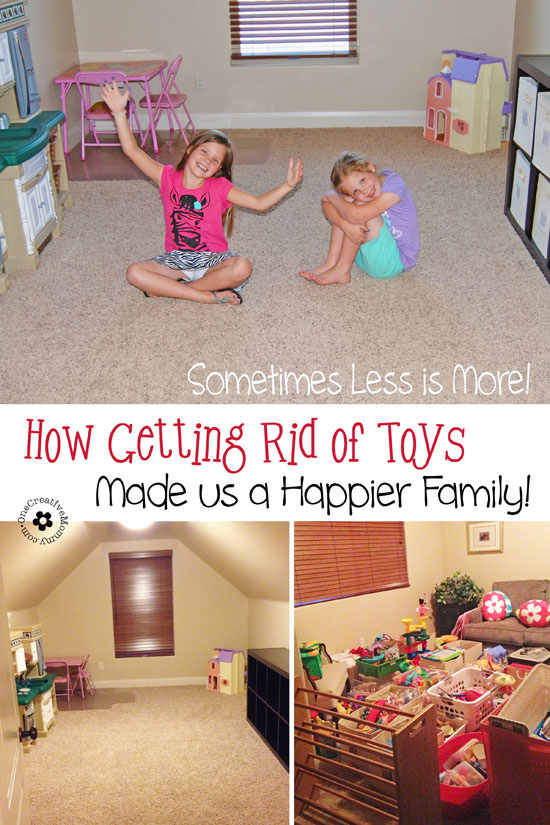
    Until this summer, this is what the floor of the girls' bedrooms often looked like: Lego disaster!

    The best part of this Simple Lego Tray is that it slides under the bed for easy storage! The Legos don't get lost, and kids can clean up in a flash. {OneCreativeMommy.com}

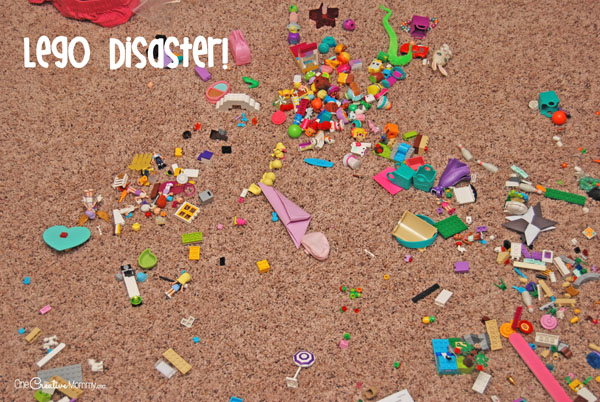
    (Imagine that spread all over the room. That's actually on a good day!)

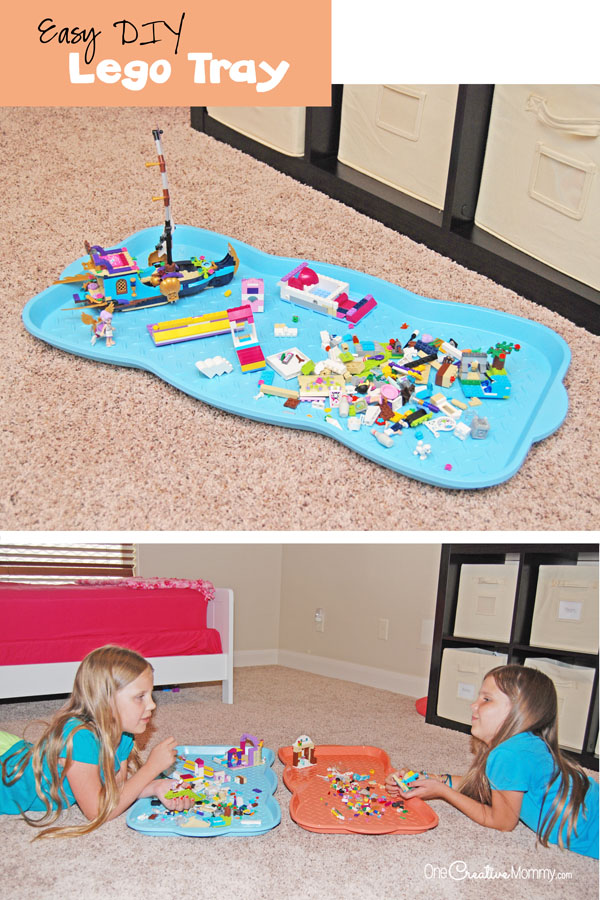
    Now, this is what the room looks like: Ahh. Bliss!

    The best part of this Simple Lego Tray is that it slides under the bed for easy storage! The Legos don't get lost, and kids can clean up in a flash. {OneCreativeMommy.com}

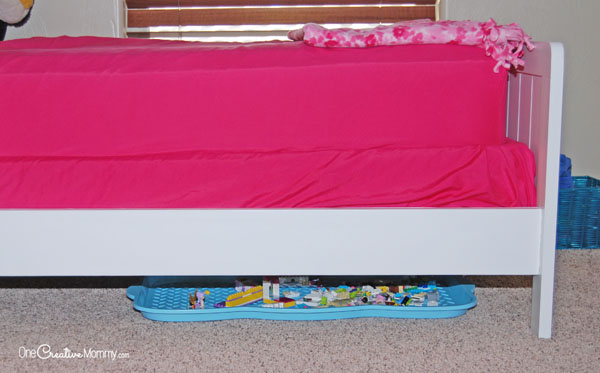
    When the kids aren't playing with the Legos, cleanup takes just seconds, and the toys slide right under the bed! Of course, the Lego sets that are put together are nicely displayed all over the room. It's the Legos that are in progress that are always all over the place! Now the Legos stay on the tray. They come out to play and get put away when the kids are finished.

    Tame the Lego mess with this simple Lego tray. No more Legos everywhere! {OneCreativeMommy.com}

    The best part of this Simple Lego Tray is that it slides under the bed for easy storage! The Legos don't get lost, and kids can clean up in a flash. {OneCreativeMommy.com}

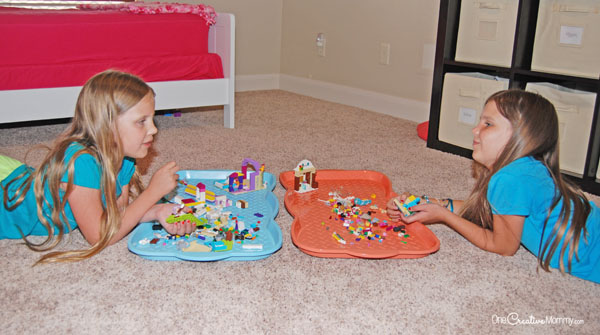
    I made two trays, so now the girls can easily take their Legos from room to room for "Play Dates." This is so much better than losing Legos in the carpet!!!

    Just two simple products to make this easy Lego Tray! {OneCreativeMommy.com}

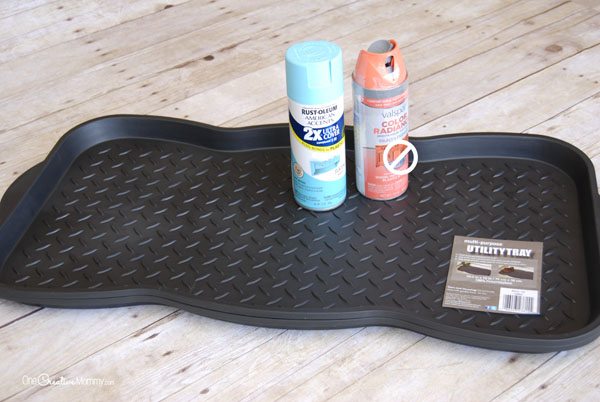
    Want to learn how to make one? It's so easy! Here's what you need:

    • A Utility Tray (also called a Boot Tray)
    • Any brand of FLAT or SATIN spray paint that is made to adhere to plastic. DO NOT, I repeat, DO NOT use glossy paint. It will remain tacky and stick to the Legos. More about that later!

    Just two simple products to make this easy Lego Tray! {OneCreativeMommy.com}

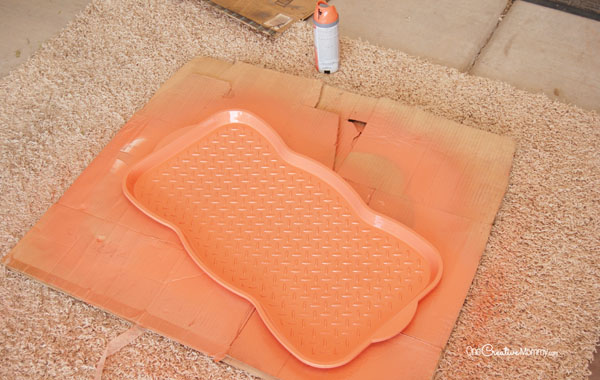
    Find yourself a well-ventilated area, and give the tray a good spray. (Don't forget the sides.) Don't worry about covering the bottom of the tray. (As you can see, I put a piece of our old carpet to good use as a drop cloth in the garage!)

    See that beautiful coral orange color? Unfortunately, it only comes in glossy paint. I learned the hard way not to use glossy paint. That tray is now sitting in the garage filled with automotive junk. The glossy paint stuck to the Legos and peeled off. Bummer! Stick to flat or satin paint.

    I'm totally sad that spray paint colors only come in one finish. They have a set of colors that come in satin and a set of colors that come in glossy. The colors my older daughter wanted are all glossy, so we just left her new tray black. (Don't care about color--save time and money, and just leave yours black, too!)

    The best part of this Simple Lego Tray is that it slides under the bed for easy storage! The Legos don't get lost, and kids can clean up in a flash. {OneCreativeMommy.com}

    So, that's it! Easy, peasy. Now, just train your kids to keep the disassembled Legos on the tray. No more Legos all over the house, and the kids can find the pieces they need when they need them. Win, win!

    P.S. Have you ever stepped on a Lego? Not fun! I'm so glad to be done with that!

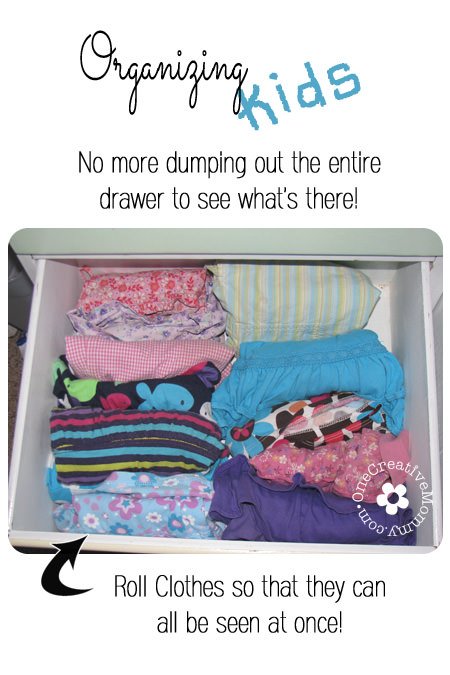
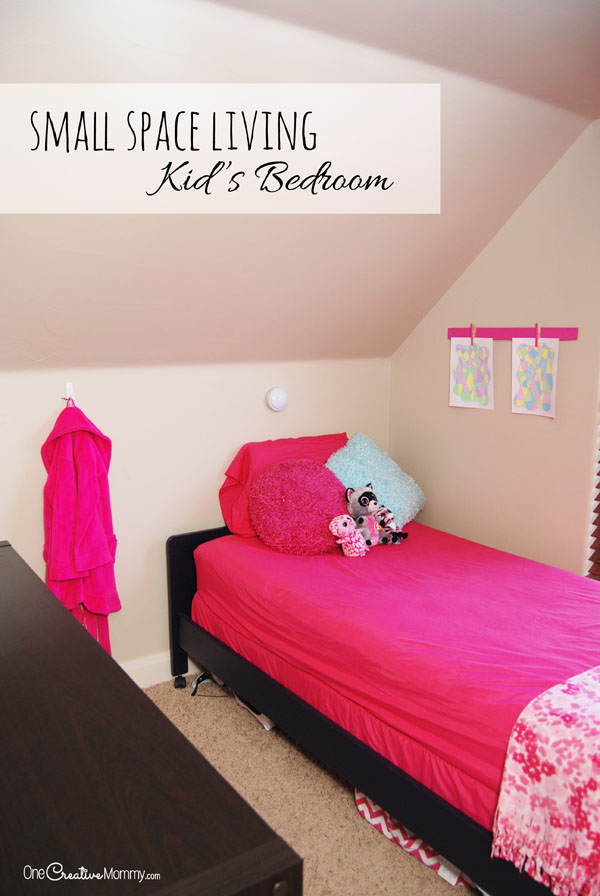
    Thanks for stopping by today. Be sure to browse around and check out some of my other ideas. You'll find more ideas for organizing kids' rooms by clicking on the images below.

    It is possible for kids to have too much of a good thing. Find out how getting rid of most of our toys made us a happier family! {OneCreativeMommy.com}

    Dress Up Storage Ideas for Kids {OneCreativeMommy.com}

    Simple and Effective Tip for Organizing Kids Clothes--Roll them! {OneCreativeMommy.com} #organization #kidsLove this creative idea for small space living! She was tired of her kids fighting over keeping their room clean, so she created an extra bedroom. You'll never guess where she put it! {OneCreativeMommy.com}

    Heidi


    MORE IDEAS FOR YOU

    • Recipes
    • DIY & Crafts
    • Holidays
    • Parties & Gifts
    • Printables
    • Tips & Tricks

    Reader Interactions

    • Facebook
    • Instagram
    • Pinterest
    • YouTube

    About Heidi

    Hi! I’m Heidi, the sometimes scatterbrained, but always creative mind behind One Creative Mommy. I'm a retired teacher, wife, and mom of three beautiful teenage girls and one adorable fur baby. In my spare time, I love to share my ideas (mistakes and all) with anyone who will listen.

    Learn more about me →

    Comments

    1. tanya

      August 24, 2016 at 11:04 am

      These trays are a genius idea! How awesome. I am so going to do this with my son's room. I hate stepping on legos that are left on the floor :)

      Reply
      • Heidi

        August 24, 2016 at 9:51 pm

        I'm so glad you like it, Tanya. I'm seriously wondering why I didn't think of it years ago! It's so nice to have everything contained and easy to clean up. I hope it works for you, too!

        Reply
    2. Samantha

      September 19, 2016 at 3:47 pm

      Cute. Good idea for current lego projects.

      Reply
      • Heidi

        September 20, 2016 at 10:24 pm

        Thanks, Samantha. It sure does keep the mess contained!

        Reply
    3. Beeb Ashcroft

      September 19, 2016 at 5:28 pm

      That is so smart! Not only does it provide easy cleanup, but it gives a more stable base for the LEGOs to build on so it would be more fun to play with, too. I remember when I was a kid and would dump LEGOs all over the floor, and the prospect of putting them all back in the box seemed soooo daunting to me at 7 years old. LOL!!

      Reply
      • Heidi

        September 20, 2016 at 10:25 pm

        The dumping toys all over the floor kills me! I think every kid loves to do that. At least this keeps the Legos contained!

        Reply
    4. Nicole

      September 19, 2016 at 7:47 pm

      This is actually a brilliant idea. Thank you for sharing!

      Reply
      • Heidi

        September 20, 2016 at 10:26 pm

        Thanks, Nicole. I wish I had thought of it years ago! It would have stopped a lot of arguments about room cleaning!

        Reply
    5. Barb Webb

      September 20, 2016 at 7:06 am

      Love this awesome, clever idea! I need to make one of these for my granddaughter to match her bedroom. I know my daughter will be super appreciative!

      Reply
      • Heidi

        September 20, 2016 at 10:27 pm

        Thanks, Barb. I hope you can find a matching color. Just remember--flat paint--not glossy!

        Reply
    6. Kim Croisant

      September 20, 2016 at 12:21 pm

      What a great DIY. I've been there and am still there. My son's LEGO's are seriously going to get thrown in the trash and vacuumed up...which ever occurs first!!!

      Reply
      • Heidi

        September 20, 2016 at 10:27 pm

        I know exactly how you feel, Kim. If the Legos weren't so darned expensive, I'd throw every piece that got left out in the trash!

        Reply
    7. Nancy Shaw

      October 26, 2017 at 9:37 am

      This is so inspiring! My kid's toy is all over the floor now :(This is so inspiring! My kid's LEGO is all over the floor now :(

      Reply
    8. happy room

      July 06, 2018 at 1:15 am

      These trays are a genius idea for current lego projects. Thank you for sharing!

      Reply

    Leave a Reply Cancel reply

    Your email address will not be published. Required fields are marked *

    Primary Sidebar

    Hi! I’m Heidi, the sometimes scatterbrained, but always creative mind behind One Creative Mommy. I'm a retired teacher, wife, and mom of three beautiful teenage girls and one adorable fur baby. In my spare time, I love to share my ideas (mistakes and all) with anyone who will listen.

    More about me →

    Subscribe

    Popular

    • Olaf Sock Snowman Tutorial
    • Frozen Olaf Valentines {Free Printable}
    • Make your own storage lockers! {Perfect for kids}
    • 27 Creative Classroom Door Decorations for Valentine's Day

    Save Money

    Footer

    Privacy Policy

    Footer

    ↑ back to top

    About

    • Privacy Policy
    • Printables Terms of Use

    Newsletter

    • Sign Up! for emails and updates

    Contact

    • Contact

    As an Amazon Associate I earn from qualifying purchases.

    Copyright © 2022 OneCreativeMommy

    »
    «