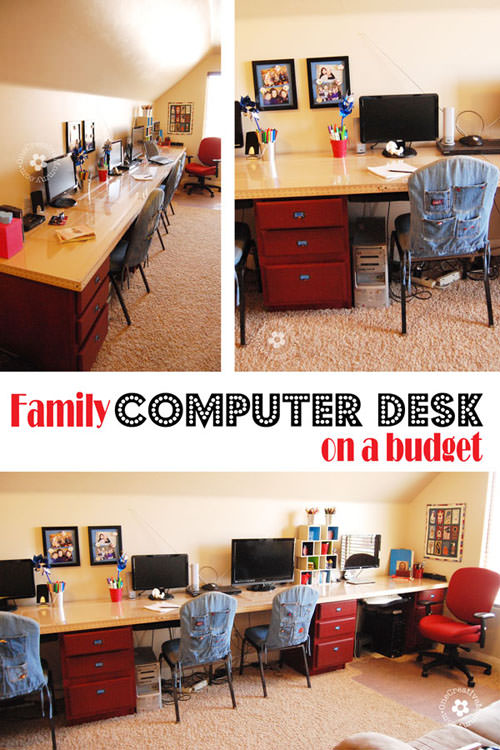
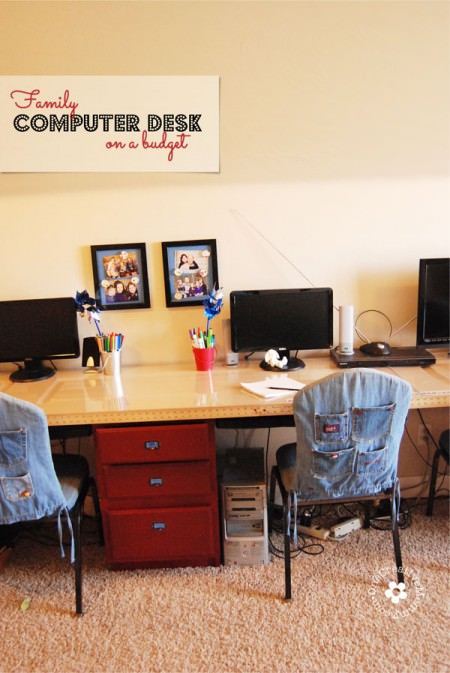
I love my home, but it has a few narrow rooms that are difficult to work with. When I decided to turn one long narrow room into a den with a family computer desk station, I faced a major challenge in finding affordable desks. I gave up on buying them, and made my own instead!
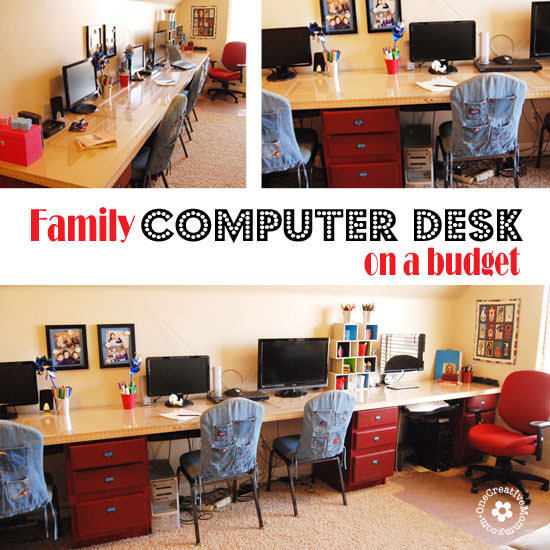
DIY Family Computer Desk Station on a Budget
I started out with an inspiration picture and a plan. I wanted to create four desks, but there was no way I could pay to purchase four of these desks that I loved from Pottery Barn Kids!
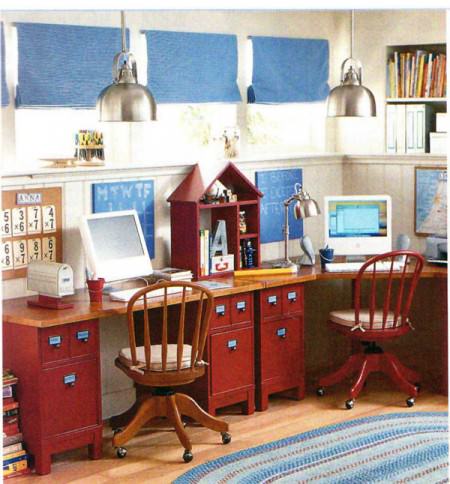
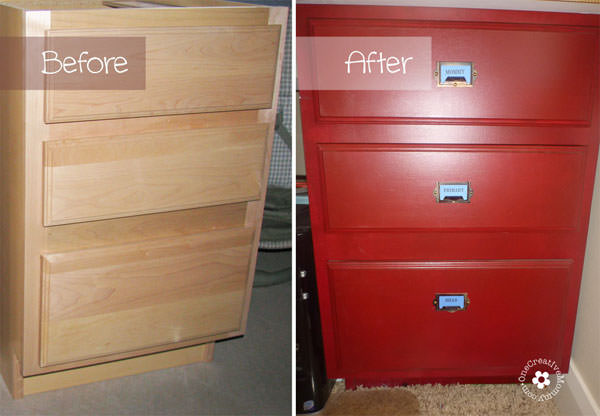
So, what parts of this desk could I create myself? The red sets of drawers with the cute retro drawer pulls. Here's how I did it (using almost completely recycled materials!)
Step 1: Scour the internet for inexpensive drawer pedestals or file cabinets. FAIL! They were still too expensive. Check cabinet makers to see how expensive they would be to build. FAIL! Still too expensive.
Just as I was about to give up, I found one more cabinet store to try. No drawers for sale, but guess what?? The owners next door wanted to get rid of some unfinished drawer pedestals they wouldn't need! What??? They sold me four for $25 each! (I almost did a happy dance right there in the store!)
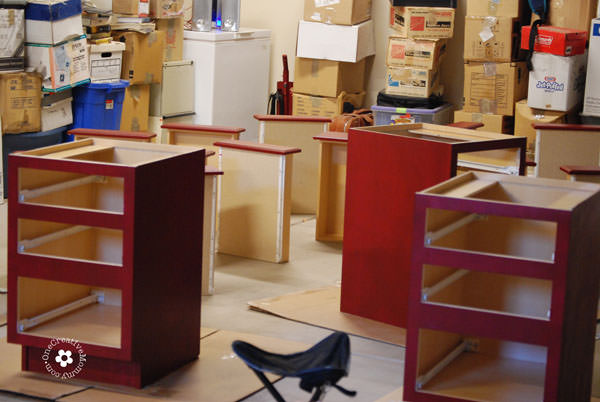
Three coats of paint (1 primer, two red), a huge mess in the garage, and lots of sore muscles later . . . . . I turned boring into beautiful! (This is before the garage makeover. It's much more organized in there now!)
The sides of these pedestals are laminate, so I used BIN Primer by Zinsser, under my regular paint.
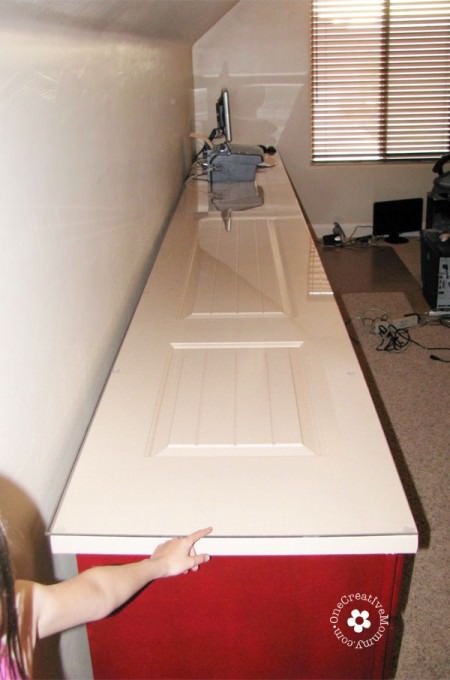
Step 2: Find an inexpensive desk top. Solution? I went to my local Habitat for Humanity Restore and purchased two used tall, narrow closet doors. (8' x 2' -- Hollow doors)
I painted the doors a honey yellow--hoping to match my inspiration desktop, but it was another FAIL! It looked more like a desk for Ronald McDonald than the school-room look I was going for.
Step 3: Repaint doors, and then touch up the drawers because paint splatters when you pound on the lid!
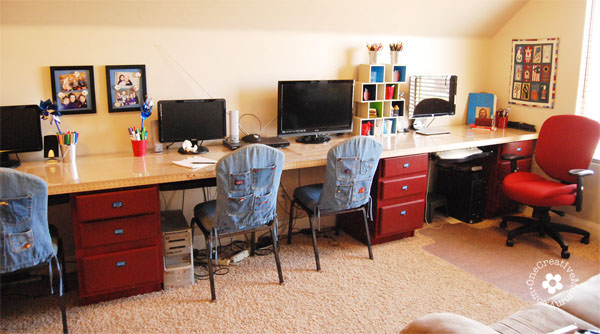
Step 4: Since the desk top needs to be flat, top the doors with plexiglass. (Sorry--no inexpensive solution for that one!) The fun thing about using the plexiglass on top is that you can change the desk top any time you want by rolling out some wrapping paper between the door and the plexiglass. Instant new look! I slid some penmanship letter strips under the plexiglass so that the girls had a quick reference as they were learning to write.
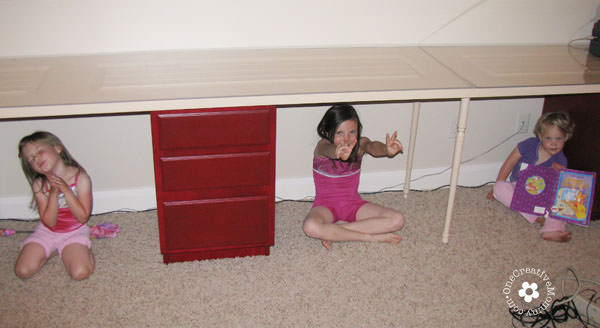
Step 5: Put it all together! Be sure to let your kiddos "help!" (I can't believe how much the kids have grown since then!) If you need extra stability, you can purchase table legs at any hardware store. We found that they really just got in the way, and ended up removing the front leg. If you'd rather skip them, as long as you're not putting huge loads on the table, you won't need them. (You could also put your pedestals at each end instead.)
Step 6: Add some fancy drawer pulls! Rubbed brass hardware is pretty pricey. I ordered the cheapest drawer pulls in the style I wanted and then turned them into rubbed brass with this tutorial. (I know--you probably would have done this as step 5, but I wanted the desks done! I didn't want to wait until I figured out what to do with the handles.)
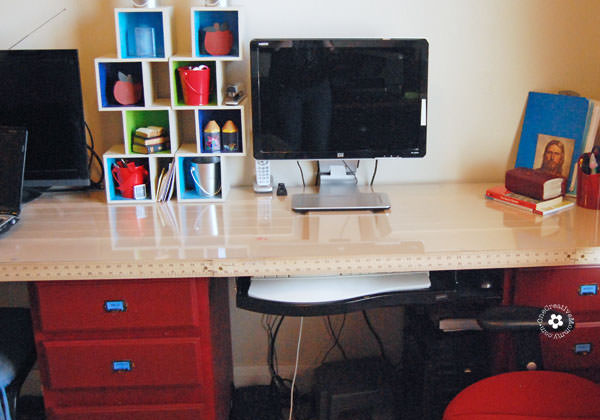
Final step? Since I still wasn't a huge fan of the door color, and I was going for a school house look, I added yardsticks across the front of the desks. As an added bonus, the kids always have a ruler handy when they are doing their math homework!
So, what do you think? Will you tackle making your own computer desk? Next time you see some short file cabinets at a garage sale, snag them and get to work on a fun DIY desk!
*Because this desk is for computers and homework, we also purchased some keyboard trays online and attached one below each desk. Don't let the fancy computer monitors fool you. The kids' computers are all hand-me-downs. The only expense was the flat-screen monitors.
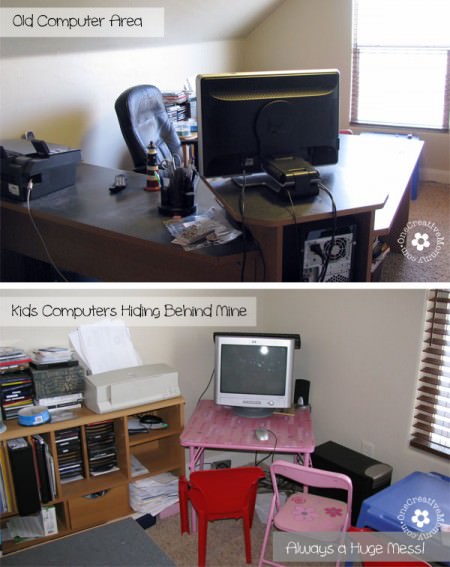
If you are a before and after fan, here's the den before:
Remember those giant monitors? Once you put one of those on a desk, there's not much room for anything else!
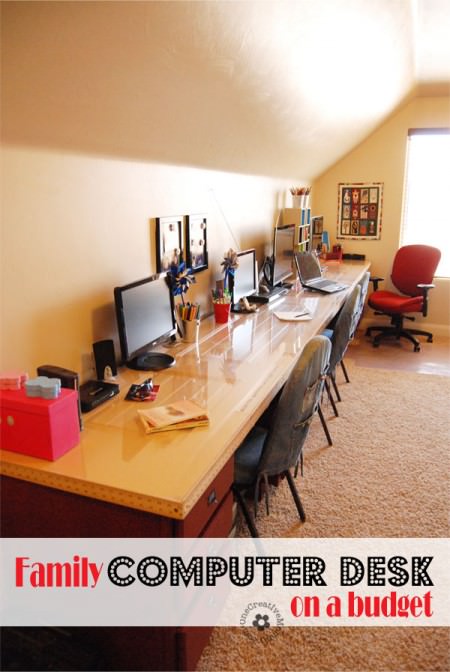
. . . and here's the den after:
Check out the other projects from the room: The images are linked. (These projects are from my first days of blogging. I hope my photography skills have improved since then!)
Have you seen my favorite building project?
Thanks so much for stopping by! I hope you'll stick around and browse!





Pam @ Over the Big Moon
I still can't get over how awesome this room turned out! It's even better in person too! I can't wait to create a kids computer area in my new house! Thanks lady for the inspiration!
Heidi
Thanks, Pam! And thanks for the kick in the pants to get it posted! I'm so excited for you and your new house, but I'll miss you around here!
Michelle
Heidi, I <3 this. I am posting as a DIY share on my site tomorrow. This is a great ideal and this summer I plan to tackle this with my sons in my basement! Kudos! That Chic~
Heidi
Thanks so much, Michelle! I hope it works for you!
Vanessa
This is fantastic! When my husband and I buy a house eventually I will be keeping this in mind. Awesome job!
Heidi
Thanks, Vanessa! Good luck with the new house---eventually!
Carmody
Pretty impressive! What a great job.
Heidi
Thanks so much, Carmody!
DIYDanielle
This looks great! Love the red. I want to do this at some point, probably once we finish the extra room in our basement to turn it into an office.
Heidi
Thanks, Danielle. Good luck with the building project! I wish I had a basement!
kristinethefoleyfamblog
Looks awesome! Can't believe that's a door! So clever!
Heidi
Thanks, Kristine! I love turning something old into something new!
Margo
Love this idea! It's such a great way to use a narrow space efficiently!
Heidi
Thanks so much, Margo!
Erica Manoz
This is such a great idea! Thank you for posting this. I have 4 kids and a very small house. We'll be moving soon so I'm definitely pinning this under ideas. :)
Heidi
Thank you, and congrats on the move, Erica! It's so fun to move into a new place and try new things! Enjoy it!
Gwen
Hey there, Heidi!
I just wanted to let you know that I LOVE your DIY Kids Computer Desk station and am featuring it as one of this week's Rockstars at Creativity Unleashed Week 16! It'll be on the blog tonight at 8:00. Grab your peeps and come vote so you can be the MEGA Rockstar. Shoop!!!
Heidi
So excited, Gwen! Thanks so much!
Melissa @ Simply Sweets by Honeybee
I love this project! Your post made me smile because you kept it real. Sometimes I see DIY projects that are presented perfectly as if nothing went wrong. I think for the majority of us something is going to go wrong. I can relate to the sore muscles when working on a project like this. I recently refinished a table for my kitchen and it caused a muscle spasm in my back that nagged me for a good two months.
Heidi Fowler
Ouch, Melissa! I hope the sore muscles were worth it. Mine were! I'm so glad you like my project. Thanks for taking the time to comment!
Kim @ The Cookie Puzzle
OMG Heidi...I could just KISS you! This is the perfect solution for me. We are building a new house, and my cookie/craft room is pretty small, I have been looking all over for a table solution...THIS IS IT. And guess what...I have a whole stack of doors, vintage ones, just waiting to be used...all I need is some bases or filing cabinets. Oh...I am sooo happy! Thank you for linking up at Party in Your PJ's! I am sooo pinning this to my house board!
Heidi Fowler
So glad I could give you an idea, Kim! I'd love to see your project when you're finished! The bases were the hard part for me, but filing cabinets would work great. Good luck!
Rachel @ RMD Jewellery
Hi Heidi
This was a great idea, love the use of the doors, I am about to move my studio out of my house and once I do wanted to revert the space to a craft room and my daughter and me and am looking for a two person desk so this would be perfect. PS, what I really want to know is where did you get the little cubes on the desktop as I love them and would be perfect storage for a craft room desk? Rachel
Heidi Fowler
Thanks so much, Rachel! Good luck with your craft room. Unfortunately, the cubes were purchased at a garage sale. They are actually two sets of four linked cubes that are probably meant to go the other direction and hang on the wall. I'm guessing they came from the Target kids room area quite a few years ago. They may still have something similar, though. Good luck!
Allyson Kelly
This is a great idea for those "Young-Adult Sons
who move back home-Gamer's" bedrooms! Two or three serious gamers could get lost in the virtual world and play for days (or wait, they do that already!)
Heidi
That made me laugh, Allyson! I'm sure you're right, but I think if I had a young adult moving back home, I might not want to make their bedroom so much fun! They might not ever want to move out!!! :-)
Jennifer @Making Our Life Matter
Heidi, what a terrific project. There are four of us working at the computer now, so this would definitely help things out! I am going to show this to hubby, maybe it can be a project we can do together!
Heidi Fowler
Thanks, Jennifer. I think it's really fun to do projects together. My hubby and I built garage shelves together, and it turned out to be really fun. (Including the three extra trips to Home Depot!) I hope you can make this project work for your family. Good luck.
Megan
I absolutely LOVE THIS!!
Heidi Fowler
Thanks so much, Megan!!!
krystalskitsch
This is such a huge difference! It looks awesome. A great way to maximize your space.
Heidi Fowler
Thanks, Krystal. It really does make a difference. We started with a different setup, and this is so much better!
Katelyn
Wow! this is an awesome Idea executed beautifully! I Have a similar homemade desk in my house made with prefab cabinets But when my kids get older we will have to upgrade to this! What an awesome way to keep an eye on their homework and internet use:) Ps.thanks for letting me use this on my round up it should go live monday:)
Sarah
Hi! I don't know if you will see this comment, since this in an old post. I found this on Pinterest while planning out how to do this exact same thing! One part I have been struggling with is height. I was thinking about using drawer bases from kitchen cabinets, but they are nearly 35" high. And a desk for an adult is usually 29" high, which would already be high my kids right now (ages 9,7, and 3). How did you work around that? Or have your children been fine with a higher desk? Maybe you managed to find drawer bases that are shorter. IKEA sells drawer bases for desks, but those are $100 each and out of my budget! Anyway, it was great to see this post, since it is exactly what I want to create in my head! Nice work!
Elisabeth
It looks wonderful! I want to do what you have done too. Thank you for sharing it.