• Skip to primary navigation
  • Skip to main content
  • Skip to primary sidebar
  • Skip to footer
onecreativemommy.com
  • DIY/Crafts
    • DIY for the Home
    • DIY for the Garden
    • Crafts for Kids
    • Sewing Projects
    • Felt Food Tutorials
  • Parties/Gifts
    • All Party Ideas
      • Frozen Party
      • Harry Potter Party
      • Spy Party
      • Un-Slumber Party
      • Minion Party Ideas
      • Art Party
      • Princess Party
    • All Gift Ideas
  • Holidays
    • Valentine's Day
    • Halloween
    • Christmas and Winter
    • Thanksgiving and Fall
    • Fourth of July
    • New Year
    • Easter and Spring
    • St. Patrick's Day
    • Mother's Day
    • Father's Day
  • Recipes
    • Gluten Free
  • Tips & Tricks
    • Organization Tips
    • Cleaning Tips
    • Parenting Tips
    • Back to School
    • Cooking Tips
    • Gardening Tips
  • Printables
    • Bingo Games
    • Lunchbox Printables
    • Educational Games
    • LDS Printables and Lesson Ideas
  • Navigation Menu: Social Icons

    • Facebook
    • Instagram
    • Pinterest
    • YouTube
menu icon
go to homepage
search icon
Homepage link
  • Home
  • DIY & Crafts
  • Parties & Gifts
  • Holidays
  • Recipes
  • Tips & Tricks
  • Printables
    • Facebook
    • Instagram
    • Pinterest
    • YouTube
  • ×

    Home » Tips & Tricks » Blogging Tips

    You won't believe this easy set up for white background photography!

    Published: Jan 29, 2021 by Heidi. This post may contain affiliate links 2 Comments

    Have you ever wondered how bloggers and photographers get such gorgeous black or white background photography? Lighting is the key, but before you get the lighting right, you have to have a good set up. I've been propping up white foam core for months (and chasing it when the wind blows it off my table).  No more propping.  I just finished the easiest photography set up ever.  And the best part? It stores flat! No bulky mess to store.

    Create Black & White Photography like the pros with this simple and inexpensive set up! {OneCreativeMommy.com}

    RELATED: DIY Photo Light Box Tutorial

    Seriously, when you see how simple this is, you're going to slap yourself on the forehead, and say, "Why didn't I think of that?"  It's so easy!  Ready?  You only need three things, and they're easy to find.

    Create Black & White Photography like the pros with this simple and inexpensive set up! {OneCreativeMommy.com}

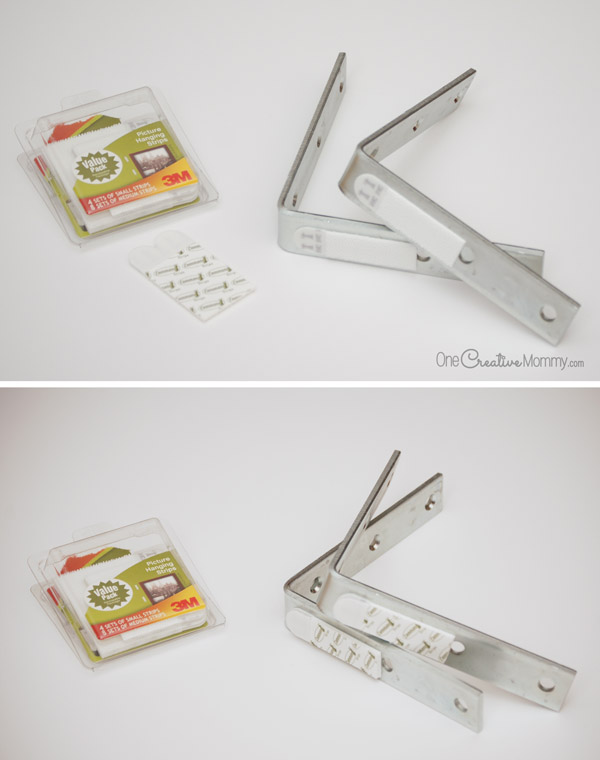
    1. Two pieces of white foam board (or black for a black background).
    2. Velcro picture hanging strips (Have you used these before? They're so awesome!  Seriously.  Everything on my walls is hung with velcro.  No more nail holes!)
    3. One large plastic or metal L bracket.  Mine is 6" x 1-⅛" (You can pick it up at any hardware store.)  It costs a few dollars, but it is so worth it! You'll notice that all of my pictures have two brackets in them.  That's because I thought I'd need two.  Nope.  One is plenty.

    That's all you need! Here's how to create the setup:

    1. Attach one set of velcro strips to the L bracket as shown. That's one strip stuck to the bracket and one strip velcroed (is that a word?) to the first strip.
    2. Next, peel the plastic off of the second strip to reveal the adhesive. Lay your foam core on a flat surface, and line the L-bracket up so that the bend in the L is level with the bottom center of the foam core.
    3. Press the L-bracket down to adhere the velcro strip to the foam core.
    4. Wait a little while, and then carefully pull the L-bracket off of the foam core. One piece of velcro should remain on the foam core, and the other should remain on the L-bracket.

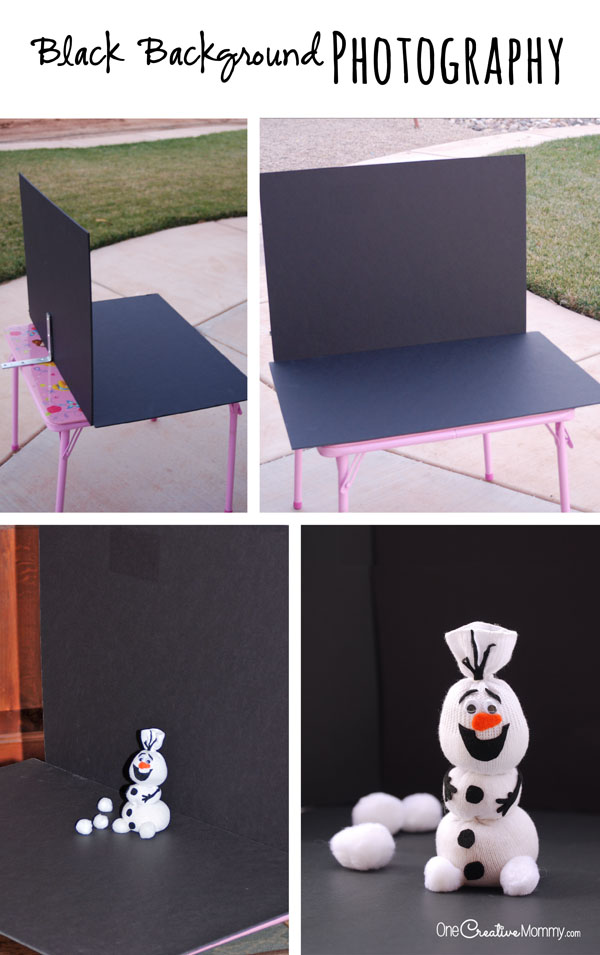
    Now, find some good lighting, stage your photo, and get to work! I use this method when I really want my subject to pop without too many distracting props. I love the way white background photography highlights the subject, and I love the way black background photography gives the subject a dramatic look. How about you?  Which style do you prefer?

    Create Black & White Photography like the pros with this simple and inexpensive set up! {OneCreativeMommy.com}

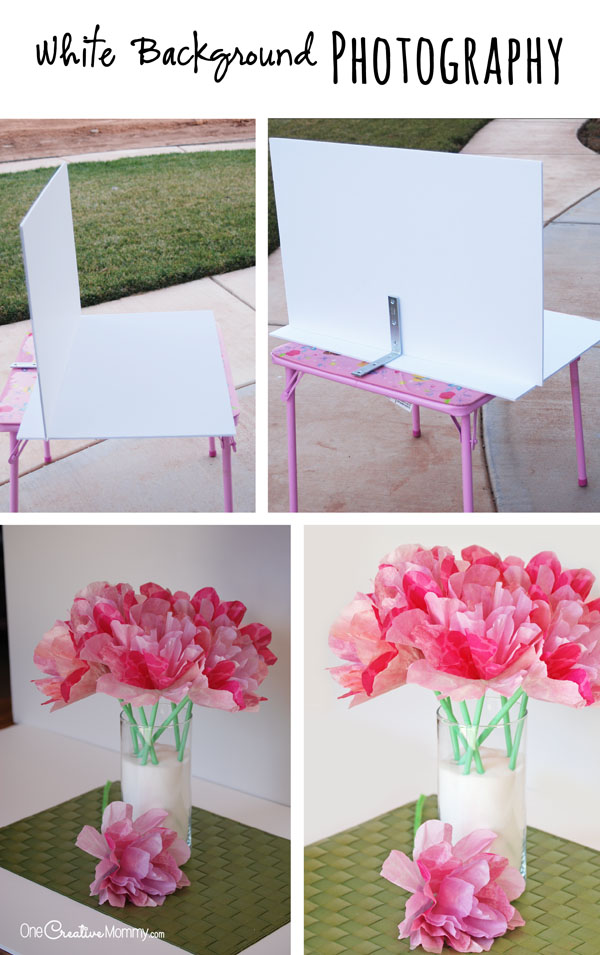
    Since I am horrible at using my camera and finding good lighting, I still have to do quite a bit of editing in Photoshop. You can see examples of the before and after photoshop pics in the examples above and below this paragraph. My favorite tools for editing in Photoshop are the shadows/highlights feature, the screen feature, and the soft paintbrush.

    Create Black & White Photography like the pros with this simple and inexpensive set up! {OneCreativeMommy.com}

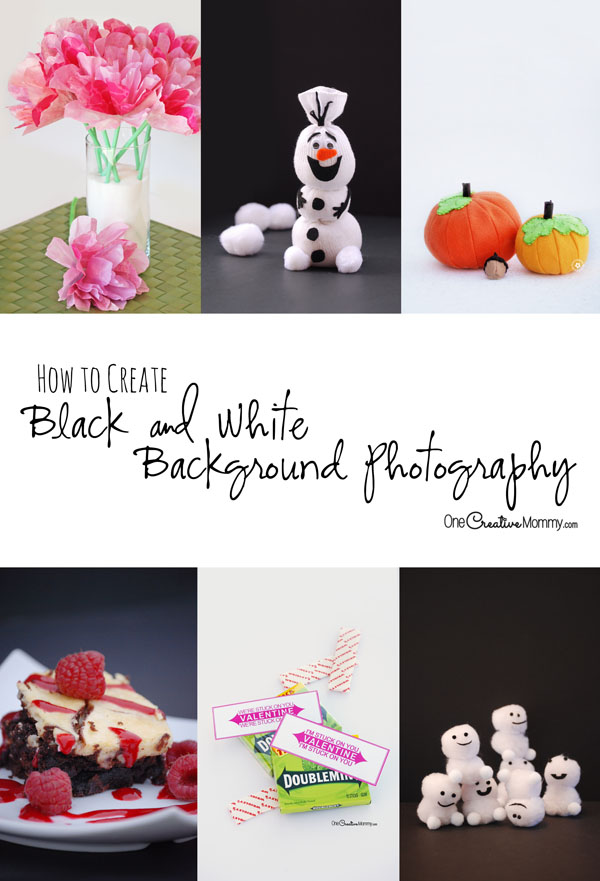
    Thanks for stopping by today, and good luck with your photography. If you are interested in visiting any of the posts in the featured image, check out the links below.

    Gorgeous Coffee Filter Flowers Tutorial

    Olaf Sock Snowman Tutorial

    Felt Pumpkins Sewing Tutorial

    Best Ever Orange Raspberry Cream Cheesecake Brownies {Gluten Free}

    {I'm Stuck on You} -- Free Printable Valentines

    Frozen Fever Snowgies Kids Craft

    Heidi


    MORE IDEAS FOR YOU

    • Recipes
    • DIY & Crafts
    • Holidays
    • Parties & Gifts
    • Printables
    • Tips & Tricks

    Reader Interactions

    • Facebook
    • Instagram
    • Pinterest
    • YouTube

    About Heidi

    Hi! I’m Heidi, the sometimes scatterbrained, but always creative mind behind One Creative Mommy. I'm a retired teacher, wife, and mom of three beautiful teenage girls and one adorable fur baby. In my spare time, I love to share my ideas (mistakes and all) with anyone who will listen.

    Learn more about me →

    Comments

    1. Kate

      April 22, 2015 at 3:16 am

      Thanks for sharing this simple tutorial. I've been trying to fine-tune my photography backgrounds.

      Reply
      • Heidi

        April 22, 2015 at 10:13 pm

        You're welcome, Kate. I hope this helps. Now I just have to learn my camera so that I don't have to do some much editing!

        Reply

    Leave a Reply Cancel reply

    Your email address will not be published. Required fields are marked *

    Primary Sidebar

    Hi! I’m Heidi, the sometimes scatterbrained, but always creative mind behind One Creative Mommy. I'm a retired teacher, wife, and mom of three beautiful teenage girls and one adorable fur baby. In my spare time, I love to share my ideas (mistakes and all) with anyone who will listen.

    More about me →

    Subscribe

    Popular

    • Olaf Sock Snowman Tutorial
    • Frozen Olaf Valentines {Free Printable}
    • Make your own storage lockers! {Perfect for kids}
    • 27 Creative Classroom Door Decorations for Valentine's Day

    Save Money

    Footer

    Privacy Policy

    Footer

    ↑ back to top

    About

    • Privacy Policy
    • Printables Terms of Use

    Newsletter

    • Sign Up! for emails and updates

    Contact

    • Contact

    As an Amazon Associate I earn from qualifying purchases.

    Copyright © 2022 OneCreativeMommy

    »
    «