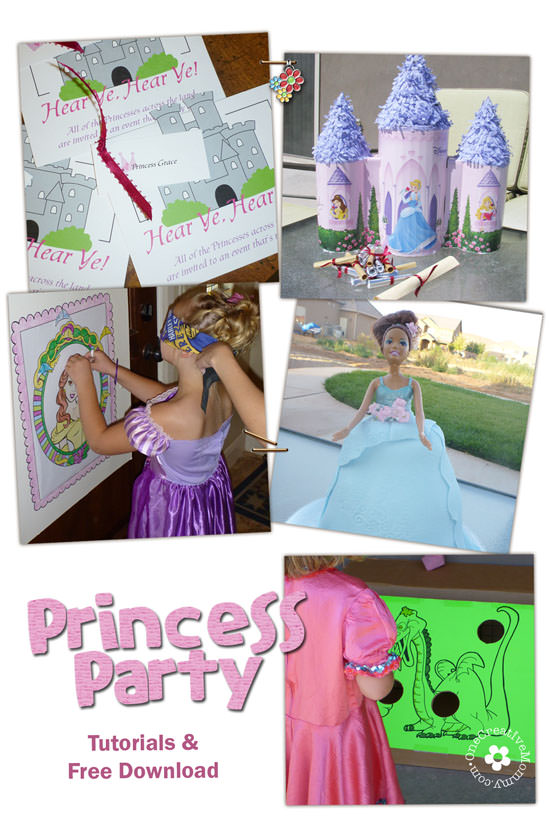
If you have little girls, chances are that you will probably get to host at least one princess party in your lifetime! So far, I'm on princess party number three (with more to come!) Today I'm sharing ideas and tutorials for most of the projects from Lu's princess-themed 5th birthday party. Printables to go with many of these projects are included at the end of the post.
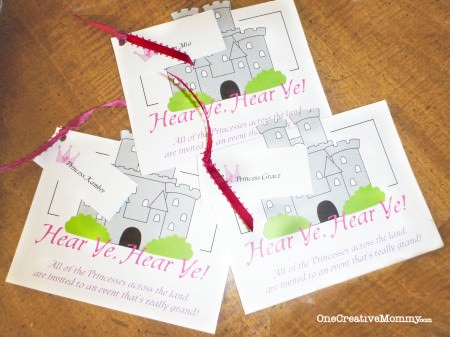
Invitations
The invitations were created in Photoshop. (I cut the top of the castle out with an x-acto knife before I folded the cards.) If you can't read the words in the picture, the outside of the card says:
All of the Princesses across the land are invited to an event that is really grand!
On the inside, I printed something like:
You are cordially invited to (Lu's) Royal Birthday Celebration!
Please have your carriage drop you off at (our address) at (time) and return for you at (time).
If you would like, please come dressed in your finest princess attire.
R.S.V.P. Regrets to (Lu’s) mother, Queen Heidi (phone number).
Finally, I punched a hole in each card and attached a personalized name card. (The font I used was Chaucer.)
Treasure Boxes
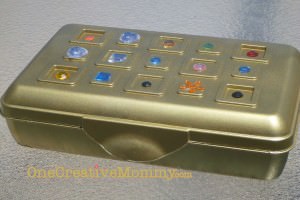
If you plan to do a party like this--plan ahead to save money! I forgot. For this project you can use empty baby wipes boxes, flushable wipes boxes, or school pencil boxes. The first time I did this party, I used a coupon to buy flushable wipes and saved tons of money. I didn't have a coupon this time, so I used what I had around the house and bought pencil boxes. If I had planned ahead, I probably could've gotten the pencil boxes half off during school supply sales.
All you need is gold spray paint, glue or glue dots, and fake jewels (or princess foam stickers). I splurged and bought a "bucket of bling" at Walmart.
At least a day before the party, spray the outside of your plastic containers with gold, silver or bronze spray paint. The paint will not be permanent unless you find a plastic spray paint that comes in metallic. I didn't find one, but so far one of our boxes from a previous party has lasted 2 years with only minor paint flaking.
During the party, give each child a strip of glue dots (from the scrapbook aisle) and put the bucket of bling where all can reach it. To adhere the bling to the box, the kids place a jewel on a glue dot, pull it off, and stick it on. Easy. (Regular glue works, too--it's just messy! Or, you can buy bling stickers. They just cost more.) The boxes are now ready to be filled with treasure!
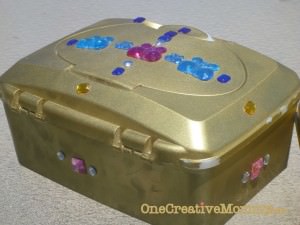
(This second box is from our princess party two years ago. You can see that the paint is beginning to come off of the edges.)
Piñata Quest
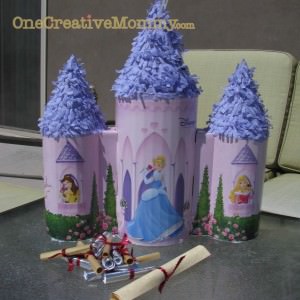
Instead of filling with candy and treasures, fill the piñata with a note from the King or Queen and one scroll for each child. (Since it was a large party, I made 6 silver scrolls and 6 gold scrolls. The color of the scroll determined the girls' "quest team.")
Each scroll contained a picture list of the missing treasures that the girls needed to find. (Merlin's crystal ball, a rope of jewels, a diamond ring, a magic wand, etc.)
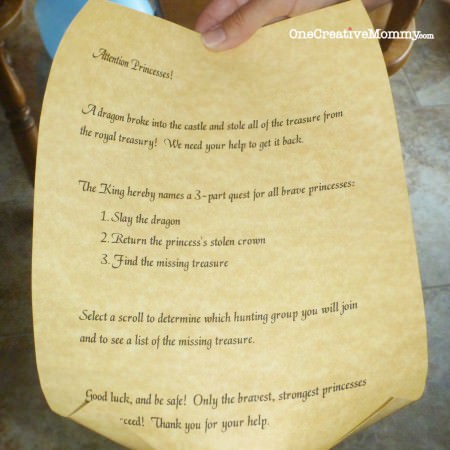
The note from the king said:
Attention Princesses!
A dragon broke into the castle and stole all of the treasure from the royal treasury! We need your help to get it back.
The King hereby names a 3-part quest for all brave princesses:
- Slay the dragon
- Return the princess's stolen crown
- Find the missing treasure
Select a scroll to determine which hunting group you will join and to see a list of the missing treasure.
Good luck, and be safe! Only the bravest, strongest princesses will succeed! Thank you for your help.
If your party is small, you will not need two quest teams. If it is large, I strongly suggest it! We had a gold team and a silver team. While one team started the quest, the other played princess bingo. (While the second team was finishing the quest, the first team played princess bingo.) My friend Megan made the game and generously shared it with me (thanks!), so I can't give you the download. I can however, give you a link to find Free Disney Princess coloring pages. You can cut and paste the ones you want into a grid to make your own game. (Or, you can print them out for the kids to color while they wait for the guests to arrive.)
Quest Task #1--Slay the Dragon (Dragon Bean Bag Toss)
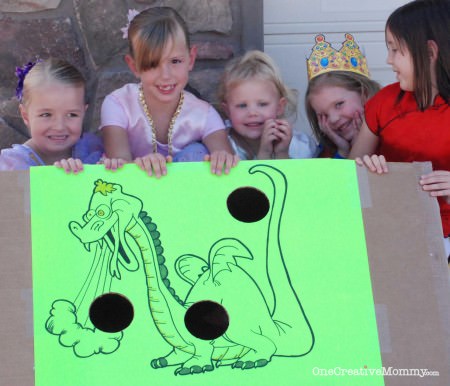
I originally made this two years ago for Boo's princess party. It held up very well! To create the dragon, I found a picture I liked online and enlarged it to fit the poster board. After coloring it and taping it to a large box, my hubby carved out the holes and invented a way to make it stand. Each time we've used it, he's made it stand a different way. My best advice--just experiment until it works! How's that for a great tutorial! Sorry.
Quest #2--Return the Princess's Stolen Crown (Pin the Crown on the Princess)
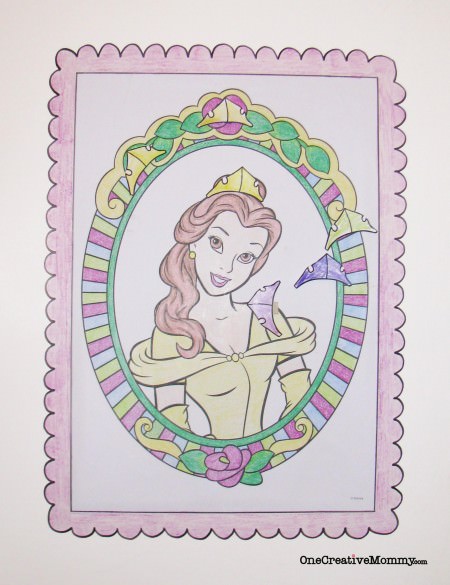
This project is surprisingly easy, and you don't have to be an artist! I knew that I wanted the kids to have something to do while the guests were arriving at the party, so I purchased a pack of giant Disney Princess Coloring pages at Walmart. (It seems like they come out with a new pack every year--but one thing stays the same--there is always a close-up head shot of some princess.) I pulled out Belle's head shot because she was not already wearing a crown. All I did was color the picture and glue it to a poster board. So that it looked bigger, I added a crayon border on the outside. (If Belle's dress looks a little different to you, it's because I like my dresses a little more modest than Disney! I added sleeves.)
I copied the crown off of Princess Aurora and adjusted the size to fit Belle. The girls played the game just like Pin the Tail on the Donkey.
Quest #3--Find the Missing Treasure
This is the easiest part! All I did was purchase some inexpensive toys that seemed like "treasure" and hid them throughout the house. The girls were to take only one of each item. I hid the tiny bubble wands inside balloons, so the girls had to pop them to retrieve theirwand.
For this party, I used:
- Merlin's Crystal Ball -- swirly bouncy balls
- A Rope of Jewels -- a crystal bead bracelet
- A Diamond Ring -- fake plastic diamond ring
- Magic Wand -- tiny bubble wand
- Gold and Silver Nuggets -- a small bag of Hershey's Nuggets
In the past, I have also used:
- A Rope of Jewels -- a crystal bead necklace
- Rare Coins -- plastic cold coins
- Merlin's Magic Potion -- bubbles
- Magic Wand -- tiny star wands
- Magic Wishing Stones -- colored shiny rocks used to fill glass jars
- Gold Dragon Egg -- plastic Easter egg painted gold
- A Crystal Ball -- Clear, glitter bouncy ball
- A Chocolate Brick -- Mini Hershey's chocolate bar
Actually, I think the favorite treasure added to the boxes was extra jewels from the bucket of bling! (My girls have been trading jewels from their boxes for a week!)
Jeweled Goblets
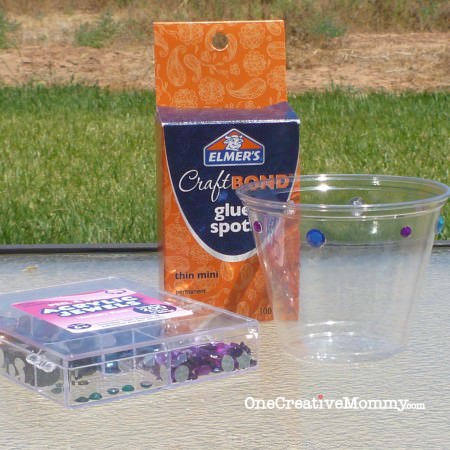
This project is super easy! The kids could even do it themselves (the same way they decorated the treasure boxes). I bought inexpensive clear plastic cups and glued jewels around the cup, about ½ inch below the rim. I think I used about 8 jewels per cup. They were a huge hit! (If you have a bigger budget, the jewels look really nice on those plastic goblets you can buy at the dollar store or in the wedding section at Walmart, but you will pay at least a dollar for three!)
Free Printables for these Princess Party Ideas!
Download includes:
- 2 versions of the birthday card front (Princesses and Princes and Princesses)
- A Microsoft Word and pdf version of the letter from the king and the Quest scrolls
- A pdf of the crowns for Pin the Crown on the Princess
You don't have to add it to your cart. Just click on the link above to download. Enjoy!
If you decide to use these ideas, I hope you have a great party! (Anyone local is welcome to borrow either poster.)
You can find my two Princess Cake Tutorials here and here. To see details from the actual party, check here.
Click here to see all the fantastic sites I like to link up with each week.




Christine
What a fabulous Princess party!!!
Thanks so much for sharing this at The DIY Dreamer.. From Dream To Reality! Don't forget to swing by this evening.. I can't wait to see what you link up! :)
Susie @Bowdabra
Hi Heidi!
Congrats! Your sweet post was one of our top crafty picks from this past week's Crafty Showcase. We are featuring you on our blog and will be giving you a shout out on Facebook, Twitter and Pinterest!
Thanks for sharing! Stop on over and link up some new ideas Sat-Thur when our Showcase opens back up!
Susie @Bowdabra
http://bowdabrablog.com/2012/07/20/feature-friday-bowdabra-top-crafty-showcase-picks-6/
Julie Moore
I have 4 nieces who would love this! :) I have a feeling my daughter will, too, in a few years! :) Thanks for the info. Passing it along! :)