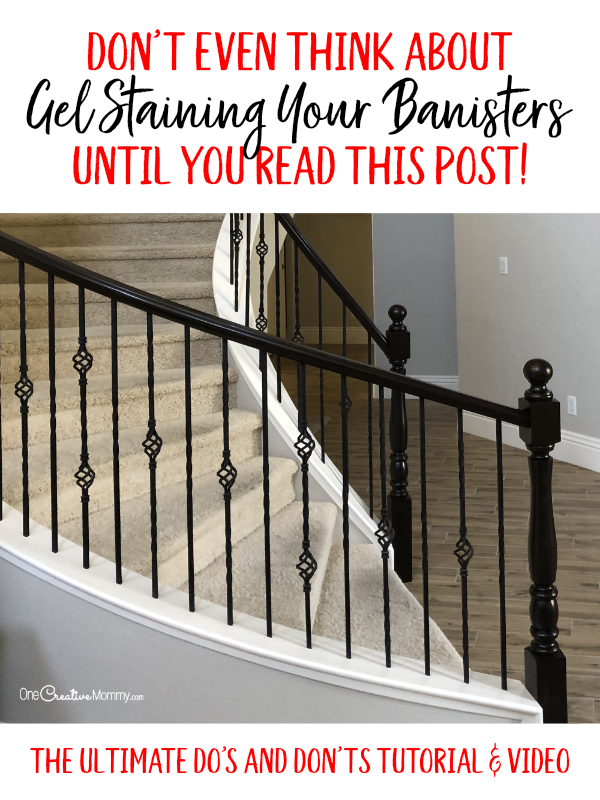
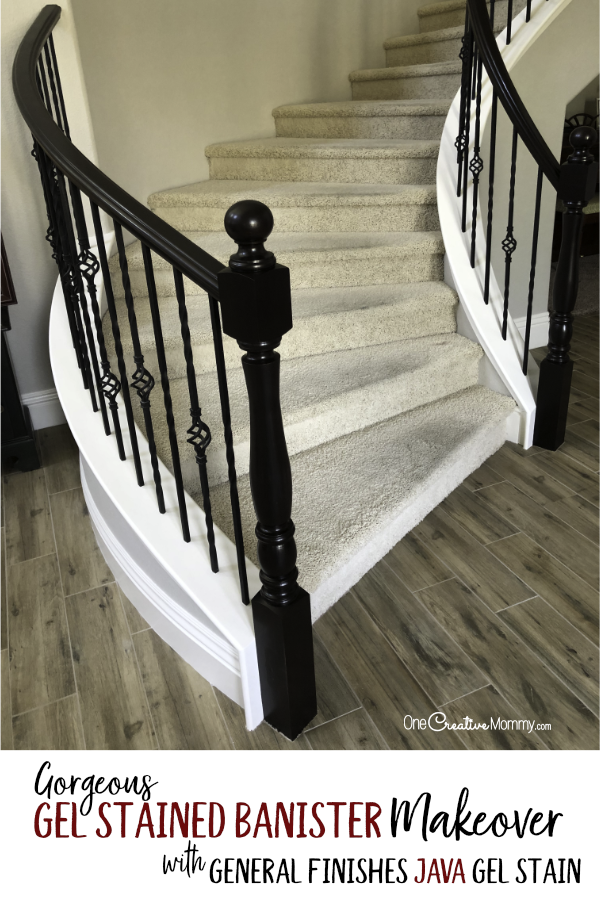
I'm finally ready to share my two-toned staircase makeover with General Finishes Java Gel Stain and paint! We've been dying to perform a banister makeover since we moved into our house almost two years ago, and it's finally done! I am so happy with the result, and I can't wait to show you. If you want to makeover your banisters, you absolutely need to read this post (and watch the videos) first. I now know all the "what to do" and "what not to do" steps for applying Java gel stain, adding an acrylic top coat, and painting the base of the staircase. I am ready to share my secrets with you!
RELATED: Update your Home in a Flash, How to Paint Furniture Like a Pro, How to Get New Carpet Without Breaking the Bank
Before and After the Transformation
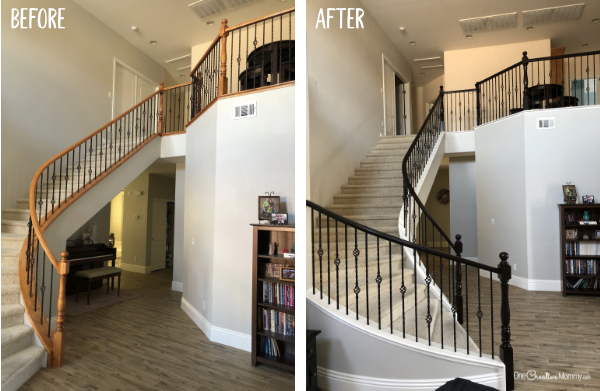
A makeover post could not be complete without before and after pictures. Almost two years ago, we moved into our new home. The entryway had extremely worn cream carpet and cream tile with almost peachy paint and honey oak banisters. It took us months to pick the new tile and even more time to choose this gorgeous paint color (Agreeable Gray from Sherman Williams) and paint the house ourselves. The two-toned staircase banisters and trim completed the look, and I am so happy! What do you think?
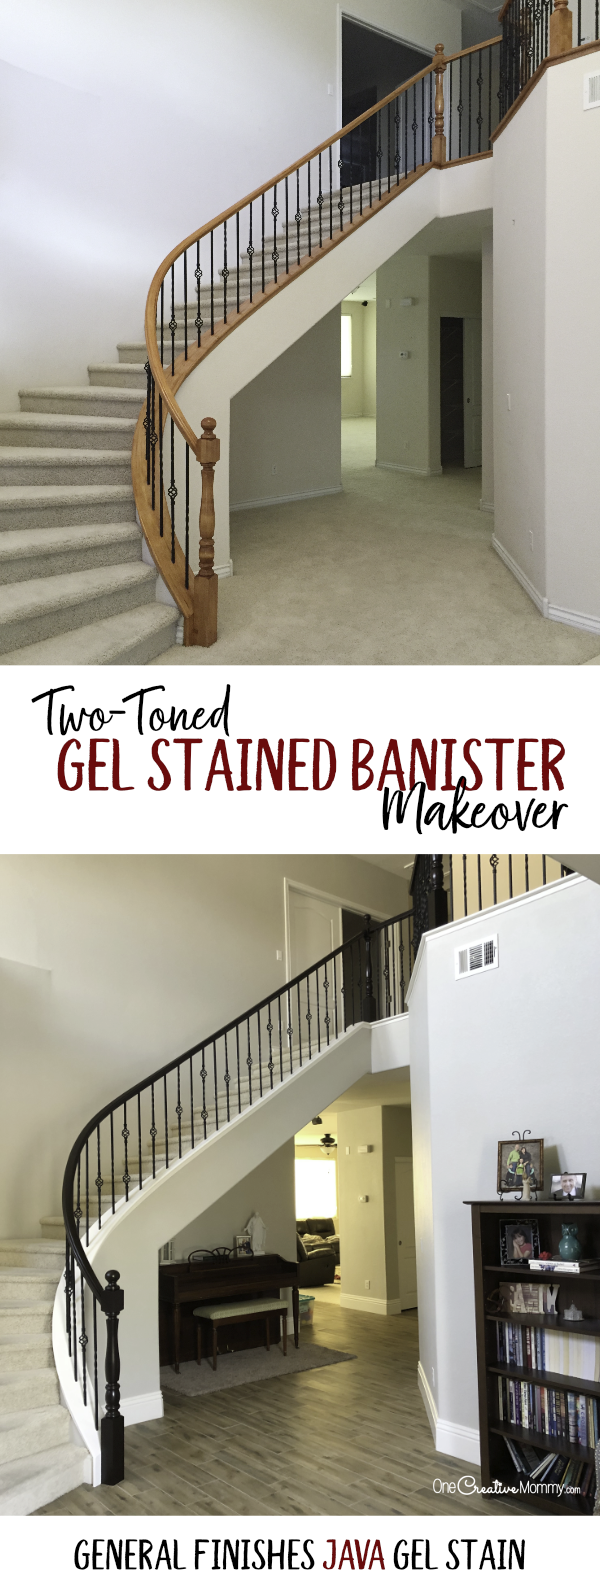
Can you believe the difference? We still have many, many projects to go, but transforming the banisters is definitely my favorite project so far. (Covering up the old carpet and paint is absolutely a close second.)
Transform Your Stairs with Java Gel Stain and Paint
It took some trial and error to get the stairs looking just right, so I'm ready to show you all of the do's and don'ts to get the look that's just right for you. And, of course, I have a 2-part video tutorial to show you how it's done!
Materials You Will Need
Here's a list of the products I used to complete this entire project (preparation, gel staining, varnishing, and painting). These are affiliate links. If you make a purchase, I will receive a tiny referral bonus, but you still get the same great price. I'm only linking you to my favorite products.
- Denatured Alcohol (for prepping the areas you want to paint)
- Mineral Spirits (for prepping the areas you want to stain--you can use denatured alcohol for the whole thing if you prefer)
- Scouring sponge (for cleaning the banister if yours is really grungy)
- Shop towels (for prepping, and gel stain)
- 220 grit sanding block (for prepping the surfaces)
- 1500 grit sandpaper (for touch up sanding in between coats)
- Tack cloth or damp paper towels (for clean up after sanding)
- Several 2-inch foam brushes (for applying gel stain and clear coat)
- Latex/Rubber Gloves (to protect your hands from the mess! Don't buy the cheap ones. They rip!)
- Old cotton t-shirt or rag (for gel stain)
- General Finishes Java Gel Stain (or the color of your choice -- but General Finishes is the best brand for sure!)
- Minwax Fast-Drying Polyurethane in Clear Satin (for protecting the gel stain)
- Primer (for the trim -- optional -- my paint had primer in it, and it worked great)
- White paint of your choice (mine is Swiss Coffee from Behr)
- Stir sticks (to stir!)
- Purdy 2 or 2 ½ inch angled white bristle brush (Don't bother with a cheap brush. It's not worth it. Invest in the good one.)
- Blue painters tape or masking tape (to protect your walls and floor)
- Protective plastic or painters tarps (to protect your carpet and floor)
- Plastic-lined bucket or garbage can (to take care of your messy clothes and shop towels)
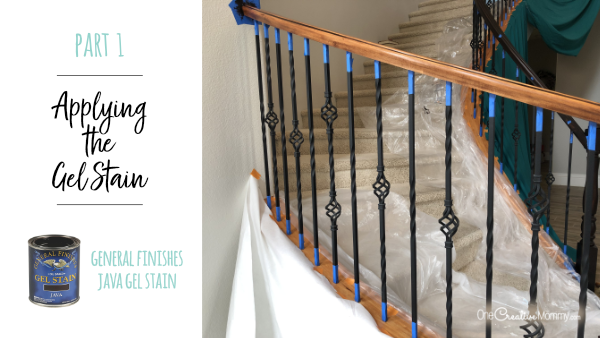
Video Tutorial Part 1 (Prep Work and Applying Gel Stain)
How to Prepare the Surface
To start your gel stain project, use mineral spirits or 50/50 watered down denatured alcohol to clean the areas you plan to stain. For light cleaning, you will only need a lint-free cloth or shop cloths. For heavy cleaning on grungy or wood-grain textured banisters, you will need a scouring sponge, and it might take several tries to get it clean. (My banister was easy, but I'm working on a friend's now, and it's taking a lot of work to get it clean.)
Next, rough up the surface of your banister with 220 grit sandpaper or a sanding block. If your banister is heavily textured, you may need a little bit stronger sandpaper. This is just a light sanding to give the gel stain something to stick to. You don't need to sand off the existing finish. Sand with the grain of the wood. Wipe off the dust from sanding with a tack cloth, damp paper towel, or lint-free cloth.
Using painter's tape, tape off all surfaces that are touched by the banister or the newel post. Don't forget the floor at the bottom of the newel posts, and be sure to tape a large area where the banisters touch the wall. When taping the spindles, be sure to tape down at least the width of your foam brush.
Cover all floors and walls around the banister with protective plastic or tarps. It may seem like you won't drip (I thought so, too), but you will. (I did.) Trust me. Java gel stain does not come out of carpet! I learned that the hard way!
How to Apply Java Gel Stain
Gel Stain Don'ts
Be very careful with your can of stain. If you have plastic covering your stairs, don't put the can of stain on that plastic above you on the stairs. As you slide down to the next step, your body will pull the plastic tight, and the stain will tip over and spill down the stairs and into your lap (been there, done that). Even if your stairs are covered, you might still get stain on the stairs when you accidentally touch them with parts of your body that you didn't know were covered in stain, like your elbow (been there, done that, too!).
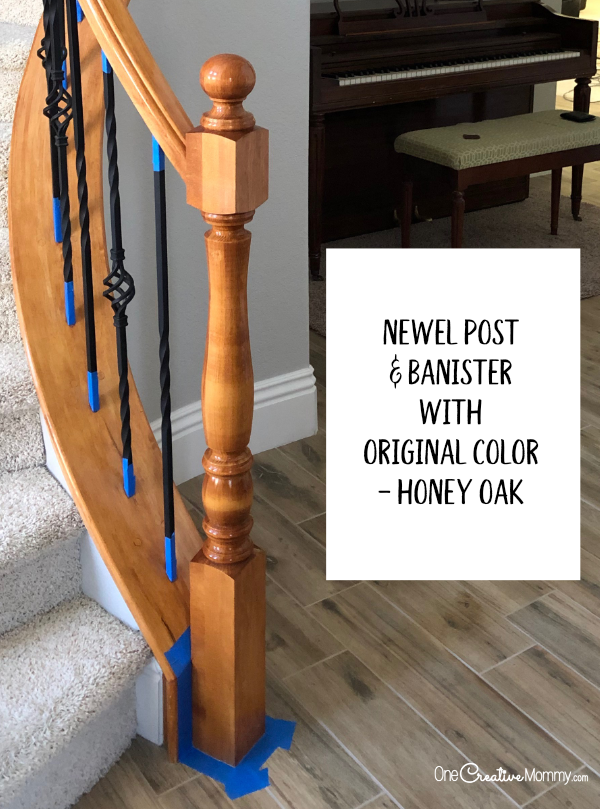
I wasn't sure what color I wanted for my final banister, and there are many different looks you can get with Java gel stain. For that reason, I started changing the color slowly until I found the color I wanted. I'll show and tell you how to achieve some different looks. Below is my before picture. Note the slightly orange tone of the honey oak.
Wipe off Method
Line a large bucket or trash can with plastic and keep it nearby. Stir your gel stain well. Use a 2-inch foam brush to brush the stain onto a small area (see the video for clear visual). Don't worry about covering every spot. Using a shop cloth, rub the stain around to cover the whole small area, and wipe most of the stain away. Your banister will change color, but the wood grain will still show through. Continue this process along the entire banister and newel post.
If your banister is smooth like mine, you will get a gorgeous new color for your banister. If your banister has a rough, textured grain, your look will be entirely different as the stain soaks into the textured areas. It really depends on your banister.
Dump your saturated cloths into your bucket as you work. (You'll go through lots of shop cloths. )
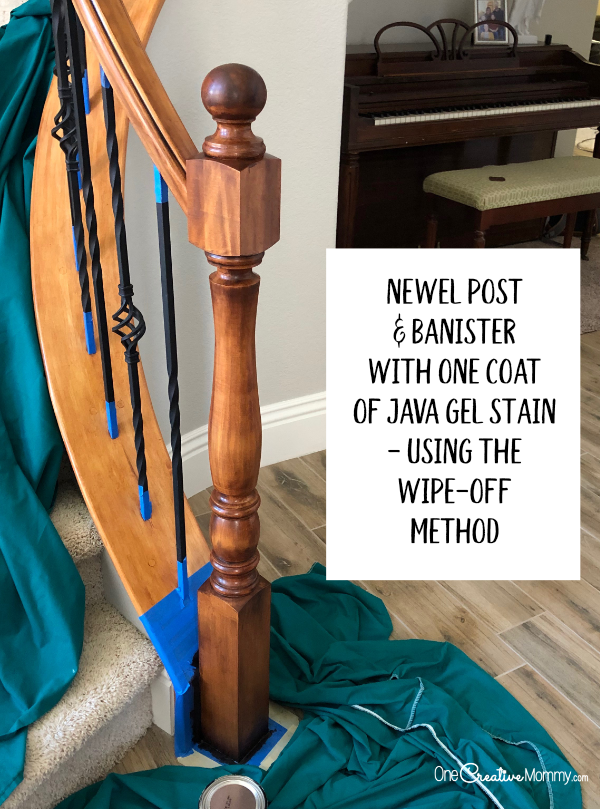
I love the color I achieved with one coat of gel stain using the wipe off method. Unfortunately, it didn't match my floor.
After your stain dries (at least 12 hours later, but possibly longer), apply a second coat. (The more humid your environment, the longer it will take to dry.) If you know you want your stain to be a solid, dark color, don't use the wipe off method again. Go straight to the painting method below. I tried two coats of the wipe off method. Here's the look after two coats:
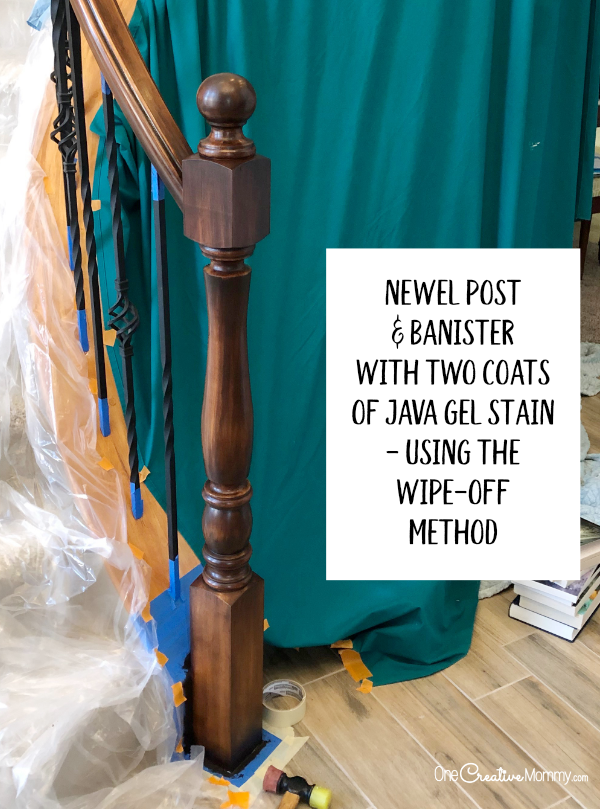
I decided I wanted to go completely dark, so I switched to the painting method for my third and final coat.
Painting Method
To get a more solid color look, paint the stain on in a thick layer (covering everything). Instead of wiping the stain off with a shop cloth, paint some stain onto a lint-free cloth and then use that to smooth the layer of stain. You are essentially spreading the thick spots out to get an even coat. Here's the look after a painted layer.
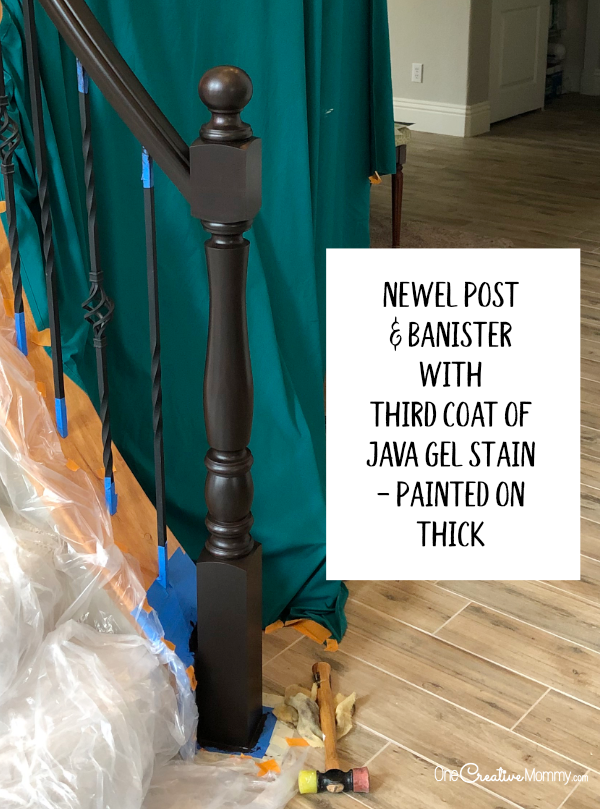
Before moving onto the polyurethane layer, wait a day or two to make sure the stain is completely dry and to give yourself a chance to check for spots you may have missed.
Video Tutorial Part 2 (Applying the Polyurethane and Painting the Trim)
How to Choose Your Protective Top Coat
There are many choices for a protective top coat for your gel stain banisters. You could use General Finishes gel top coat, Polyurethane, Polycrylic, or even protective wax. I chose Polyurethane because it dries with a super hard finish. For areas with high traffic, you need a hard, strong finish.
Polyurethane is not good for white or light colored areas because it may turn them slightly yellow. It's perfect to top Java gel stain, though, because it's too dark to discolor. Polycrilic is water based for easy cleanup, but it doesn't give you a hard enough finish.
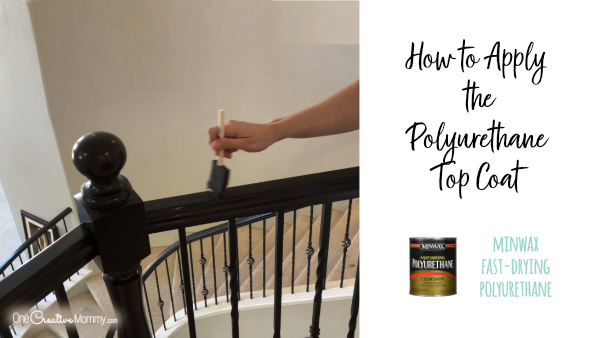
How to Apply the Polyurethane
Polyurethane Don'ts
Do not apply polyurethane when it has been raining, is raining or is very humid. The polyurethane won't dry as hard when it is humid. If you live in a humid area all the time, you might need to research some other options.
Do not use a paintbrush. Use a foam brush. I started with a natural bristle brush (which is what is recommended for oil-based products), but it was a disaster! The brush holds a ton of polyurethane, and that makes it really difficult to control the amount you apply. The coats I applied were way too heavy. When I thought I had put on a smooth coat, it would drip and run when I had moved onto a new area. The result was lots of drips that had to be sanded off before using a foam brush instead. The foam brush allows you to control the amount of polyurethane in your brush and to apply it in very thin coats.
Do not shake the can!
Polyurethane Dos:
The contents of your can may have separated into a liquid and a semisolid while sitting on the shelf at the store. It will look like the product is unusable. Don't return it. It's just fine. All you need to do is keep stirring it, and it will come back together.
When you are ready to begin, gently stir the polyurethane so that you don't add bubbles to the liquid. Never shake it! (I think that's worth mentioning twice.)
Begin at the bottom of your stairs and work up to the top. This will give you the best chance of controlling the drips. Use a foam brush to apply a thin coat of polyurethane to a very small section of your newel post or banister. Don't soak your brush. Use only a small amount at a time. Before moving on to another area, check for drips and bubbles in the polyurethane. Carefully brush them out.
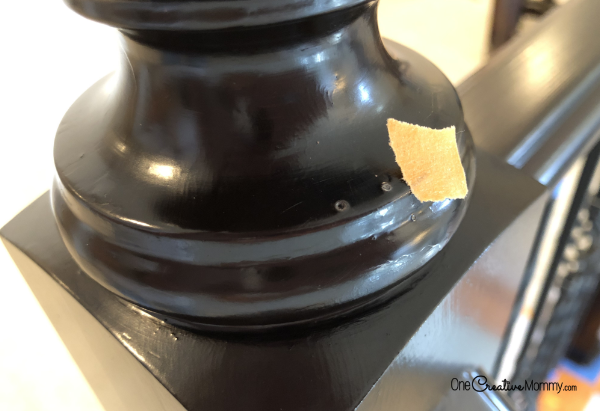
Polyurethane Fixes
If a large bubble dries in your polyurethane, it's tough to sand out. After sanding the bubble, you may be left with a ring of removed stain and need to touch it up before adding another coat of polyurethane. This only happened to me when I was using a paintbrush instead of a foam brush. Stick with a foam brush! If this still happens to you, try 1500 grit sandpaper. It sands off drips and bubbles without removing the stain.
Once the polyurethane dries, add another coat. The dry time for this finish is much shorter than for the stain. I was able to paint on two coats a day. (I think my dry time was about four hours.)
Apply at least three coats. Here's what happens if you only apply two:
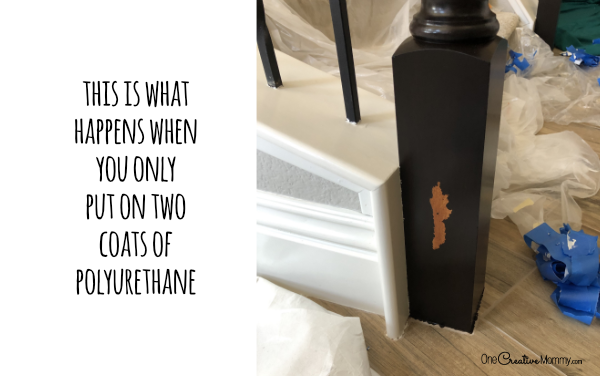
I originally applied three coats of polyurethane on my long banister (the one people actually touch), and only two coats on the short bottom banister (because no one ever touches it). Then, I taped the newel posts off before painting the white trim. After I removed the tape on the long banister side, everything was fine. When I removed the tape on the short banister, this happened. It completely pealed off an entire section of stain! Argh! Not fun.
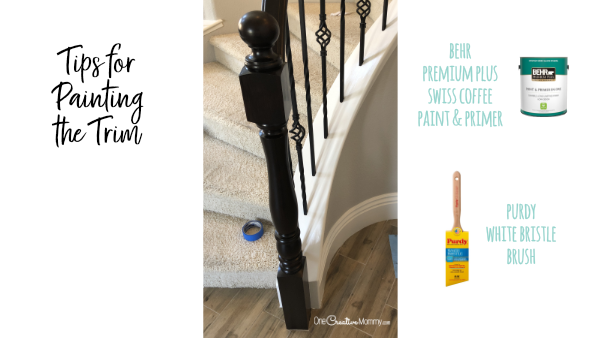
How to Paint the Trim
If your paint does not have primer in it, you may want to prime first. My paint had primer in it, and it covered beautifully without primer. I prefer Kilz primer for most projects.
Trim Don'ts:
Don't use a cheap brush or anything that is not a Purdy or Wooster brand. I don't work for either company. I just know through trial and error that it's not worth it to go cheap for this part. If you don't want brush strokes, use Purdy or Wooster.
Because Purdy doesn't make a short-handled brush (to paint between the spindles), I started with a store brand brush. It left brush strokes everywhere! I had to spend lots of time sanding before applying my second coat. On my next coat, I used a Purdy brush and had great results. I didn't even need a short-handled brush. The Purdy worked just fine. If your spindles are close enough together that you do need a short-handled brush, Wooster makes one that works great.
Don't paint thick layers. Stick to thin coats. If your paint is too thick, thin it very slightly with water.
Trim Dos:
Begin at the bottom of your staircase. If you have a really long banister, if possible, get a partner to paint one side while you paint the other. If that's not possible, do very small areas at a time so that the paint doesn't begin to dry before you get to the next section.
Work in small sections. After painting each small section, stop and watch for drips before you move on. Pay close attention to the spots around each spindle. Those spots tend to collect paint which drips as it dries. Before moving on, use the brush to carefully make sure all of your strokes are in the direction of the wood grain, and feather the new area into the old.
When it comes to removing the tape, you have three choices:
- Remove the tape immediately after painting each coat of paint so that you can wipe off any paint that sneaked under the tape. Retape before each coat of paint.
- Leave the tape on between coats and be prepared to touch up the areas where the paint sneaked under the tape. (I'll show you an easy fix in a minute.)
- Use frog tape (I've never used it) and trust that it will keep the paint from sneaking under it.
I'll let you decide what's best for you. I unintentionally chose option 2, and was left with a little bit of a mess around the bottom of the spindles and the places where each newel posts met the base. I had two problems around the spindles -- the paint got on them, and sometimes the paint peeled back a little bit when I removed the tape. Ouch! Don't worry. I found a simple fix.
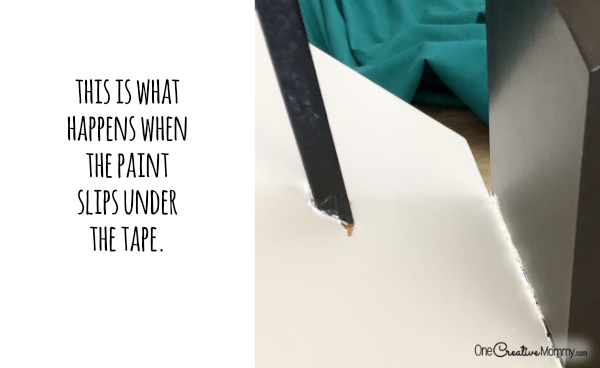
Paint Fixes
Want to know my secret for removing the paint from the spindles without accidentally removing more from the trim? I didn't remove the paint! I simply grabbed a tiny, flat brush from my kid's art supplies and painted gel stain right over the white. You can't tell at all!
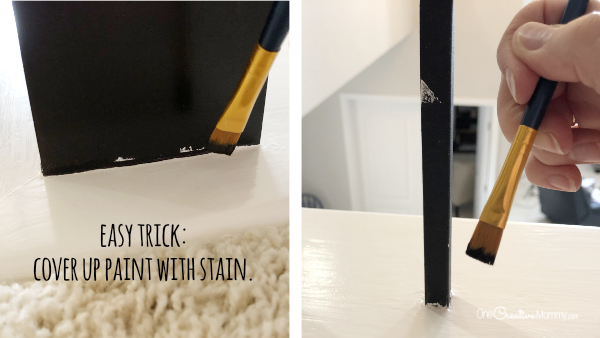
As for fixing the spots where the paint peeled off? Sorry. I don't have a great fix for that. I had to touch it up with the paint and a tiny brush.
You're finally done! I hope you are as happy with your finished product as I am with mine!
I wish I could tell you how long the project will take, but it really depends on the length of your banister, the humidity of your area, and how much time you have to devote to the project each day. I'm currently helping a friend redo her banister, and I'm finding that humidity makes a huge difference in dry time!
If you had great dry weather, a short banister and all the free time in the world, you might finish in a week, but I would never count on that. Life and weather always get in the way. Plan on your stairs being in construction mode for at least two weeks, and possibly longer.
What do you think? Would you try this in your home? I'd love to hear how yours turns out. Thanks for stopping by today. Be sure to browse around for more great projects for your home and family. I've linked a few of my favorites below. (Just click on the image to visit the post.)




Joyce
WOW! Beautiful home and beautiful transformation. Very elegant!
Heidi
Thanks, Joyce. We’re working really hard to update the house, so my life has been full of lots of DIY!
Amila
Wow! It is a complete new look after the transformation.Glad you have shared all the necessary detail.This post is helpful for anyone to do such a great staircase makeover for their home.
Heidi
Thanks, Amila. I hope it will help people, as well. That's why I even shared the details of my mistakes.
Cristina Petrini
These stairs give an unimaginable yield, what a touch of elegance to the house!
Heidi
Thanks, Cristina. All of the hard work was definitely worth it. Now onto the next project!
Amber Myers
Gorgeous! I love how the stairs turned out. Ours are pretty boring and could use a touch up.
Heidi
Thanks, Amber. Our banisters were in great shape, so it was a tough decision to redo them. I'm so happy we did!
Tara @ Candy Colored Beauty
I love the finished look. It's amazing how such a small project can make such a huge difference. I actually like the black so much, I am going to do mine. I only have the handrail, but it's white and so hard to keep clean with little hands on it all day.
Heidi
Thanks, Tara. The color is Java, which is actually a really dark brown, but it really does look black. I tried to argue with my sister that it was brown. Then I put a picture of one that was black next to it, and it was really hard to tell the difference!
Sarah Bailey
Oh wow now this sounds like a really great way to stain your staircase. It is amazing they offer different ways to make your staircase your own.
Heidi
Thanks, Sarah. It's so fun to change things up in the house. Several people in my neighborhood have the same home. Even though the original houses looked relatively the same inside, they all look completely different now. It's fun to see what everyone has done to change things up.
laurenofalltrades
I think I liked it better before! But it looks much more modern now. Thanks for your advice and tips for using this stain! Very helpful!
Heidi
Thanks, Lauren. I'm not a fan of the honey oak color, but the banisters were in really great condition. Many of my friends have kept them that color and loved them, while others in my neighborhood have done everything from painting them white to staining them a different color. It's so fun that we can all make our homes match our personal style.
Lyosha
wow! it looks massive! SO very beautiful. The color change makes impact so much greater! wow!
Heidi
Thanks, Lyosha. The staircase is one of my favorite things about our home, but the large size sure did make this project take some time!
Jessica Joachim
Your stare case makeover came out so good! I don't have stairs in my home, but I have a lot of different areas that I need to help breathe some life into and a lot of these dos and don'ts seem like they would help with a lot of home DIYs
Heidi
Thanks, Jessica. It’s amazing how small changes can really refresh a home.
Anagha
This one looks helpful with all the steps together. We are renovating one of our house. So, this is useful for me. I need to discuss it with my family. You have done wonderful work. The finishing part looks nice.
Heidi
Thank you, Anagha. Renovating is a lot of work, but so fun and worth it! Good luck updating your home.
vicky hallnewman
This is such a beautiful stair case and you have done it up so lovely, I am also doing my stairs and it seems to be taking ages
Heidi
Thank you, Vicky. I’m with you. Updating the stairs is a big time commitment. If you have perfect weather and lots of time, it won’t take forever. But, how often does that happen in real life? Almost never!
Alvern @ Success Unscrambled
Wow!! Yes, you chose the right tiles, paint and stain for the job. It turned out to be a charming combination and made the house look more welcoming.
Heidi
Thanks, Alvern! A lot of time went into choosing, so I really appreciate that.
Princess Quinn
The transformation looks incredible. It looks delicate and it will last a lifetime. It became warm and welcoming actually.
Heidi
Thank you, Princess Quinn! That was the look we were going for. Have a great day!
Ola @ WanderWithOla
Oh my, this is such an amazing transformation! I love this new look. Your post is very detailed and full with wonderful tips which will definitely be helpful for the people who would want to do a makeover as well. Awesome! ~ Ola @ WanderWithOla
Heidi
Thank you so much, Ola! I always love reading about your travel adventures.
Ivan Jose
Thank you for sharing your tips and tricks. Your staircase turned out really elegant. We do not have a staircase at home but I can try this in our terrace.
Heidi
Thank you, Ivan. If you decide to work on the terrace, be sure to get outdoor products. The products I used in my post are not weather proof. Good luck!
Jasmine Watts
The transformation is awesome! It's a complete new look. Thank you so much for the details, this is indeed very useful.
Heidi
Thanks, Jasmine. The transformation was a lot of work, but it was well worth it. It makes me happy every time I walk down the stairs.
Kiwi
I never thought about staining a banister. This look like a good renovation!
Heidi
Thanks, Kiwi. One small change can sure make a difference in the look of your home. I think this really updated things.
Alexandra Cook
Wow that turned out so nicely! I might have you come over and do mine!
Heidi
Thanks, Alexandra. It's a lot of work, but I think the end result is worth it. Wish I could come help you!
Mommy Peach
Wow! That is a nice makeover! I didn't think about staining nor doing my own stairs.
Heidi
Thanks, Mommy Peach. There are so many tutorials on the internet these days, that it's a lot easier to DIY than it used to me. It seems like you can always find what you are looking for on YouTube.
The Frugal Samurai
That looks beautiful! How long did it take to do all up? And cost?
Heidi
Thank you. Because my banisters are huge, and I ended up completely sanding off and redoing my polyurethane and I had to stop for other things going on in my life, I was probably working on this project off and on for about a month. There really isn’t a way to tell how long it will take you because there are a lot of factors to consider: How long are the banisters? Do you live in a dry or humid area? Do you have unlimited time to work? Etc.
As for cost, it also depends on which products you choose and if you already own things like brushes. The most expensive things are the gel stain and the Purdy brush for painting the white part.
Jenny
Hi Heidi!
Thanks so much for posting this turotial! I posted a lengthy, detailed, glowing review and thank you to your 2nd video's comments section, so I won't repeat much here, except to say I couldn't have done my stairs without repeatedly coming back to re-read your article, and watch your videos. You were my virtual coach, and it kept me going. My project turned out just as elegantly as your instructions alluded it would.
Thanks again!
Jenny
Heidi
You’re welcome, Jenny. I’m so happy this helped you! I hope you love your banisters as much as I love mine. Thanks for your kind words.
Krissy
Heidi,
I was wondering if you lightly sanded in between the 2 coats of the polyurethane?
Thanks!
Krissy
Heidi
Hi, Krissy. I did not sand between coats of poly unless I was smoothing up a drip in the previous coat.