

If your kids outgrow their clothes as quickly as mine, then learning how to shorten sleeves will help you stretch their wardrobe. It seems that every time I find cute clothes for my daughters, they only last a few months before they are too small or the season is over. Luckily, shortening sleeves has added new life to my daughter's Winter dresses. Turning the sleeves from long to short allows winter dresses to last all summer -- or at least until they get too short. It's a toss-up which will happen first!
Easy Dress Refashion for Summer
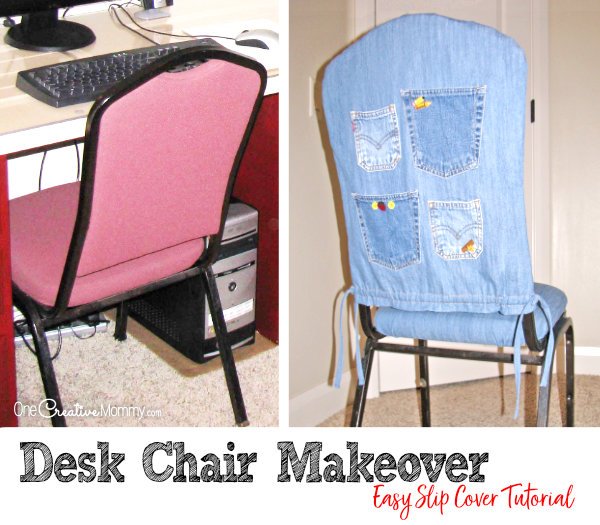
RELATED: How to Add Length to a Dress, The Simple Seatbelt Hack that Saves Your Neck, Desk Chair Makeover

My grandparents lived through the Great Depression. Even when they were elderly, they still lived the unofficial slogan of that time period: "Eat it up, wear it out, make it do, or do without." I am far from living that slogan, but I do try. I really hate to get rid of things that I know are still good. (Hence, my pack rat problem.)
This winter, I bought two of the cutest dresses for my daughter. Usually, this style of dress is shorter than we like, but since the dresses were from the teen section and my kiddo was between the kid and teen sizes, the dresses went to her knees. Now that it's summer, it's too hot for long-sleeved dresses, and they'll be way too short by next winter.
I decided that shortening the sleeves would be the perfect solution. Enough small talk. Let me show you how to shorten sleeves the easy way.
Materials:
- Sewing Machine (I used the Singer Simple Sewing Machine)
- Coordinating Thread
- Pins
- Sewing Scissors
- Measuring Tape
Directions:
Begin by deciding your new length. Once you decide how long you want the shorter sleeves, add an extra inch to that length. (The sleeves always end up shorter than you think, and you will be using the extra length for the hem.) I cut my sleeves too short, so I didn't have a full inch to use as the hem.

Cut off one sleeve.

Before you cut the other side, use the short sleeve as a pattern. If you just cut the other sleeve off by measuring the same length you did on the first sleeve, you may or may not end up with two sleeves of the same length. Measure the inside and outside length of the short sleeve you already cut, and transfer those measurements to the other side. Once you're sure you have the length right, go ahead and cut the other sleeve. 
Turn the dress inside out, fold back about ½ inch of the sleeve edge, and pin it down.

Your sewing machine settings will depend on the type of fabric you are using. For a loosely knit fabric, set your machine like my settings below. (Use the overcasting stitch or the knit stitch. See this post to learn which is which.)

Most sewing machines have a snap-in storage compartment in front of the pressure foot. Remove it so that you can fit the sleeve over the arm of the machine.

Keep your stitch close to the cut edge of the fabric (not the folded edge). If your sleeve is narrower than the arm of the machine, then you are stretching the fabric around the arm. That means that the end of your sleeves will end up slightly wavy. That's what happened to ours, and I think it adds a cute edge to the sleeves. If you're with wider sleeves, your edge should end up smooth. If your sleeve is narrow, go slowly so that you can carefully move the sleeve around the machine arm as you sew.

Remove the sleeve, trim the threads, and you're done! Now you've got a fresh summer look, and you didn't break the bank buying a new dress. You're welcome!

Products I Used
These links and the links in the materials section are affiliate links. I only link to products I think you'll love!
More Sewing Hacks You Might Like
What's your best trick to making clothes last longer? I've got a post coming about patching holes in jeans shorts. You know -- the kind that the kids love that are already worn out and already have rips and holes? They never seem to last very long before the little holes become big holes! I'd love to hear your best hack in the comments.
You might like these sewing hacks, too! The images below are linked to posts. Click on the images to check out the tutorials.













Amber Myers
Nice! It turned out awesome. I wish I could sew, but alas, I cannot. My mom can, so she'd probably help ;)
Heidi
Thanks, Amber. I wish they taught more sewing in schools these days. I'm glad your mom can help.
Tara Pittman
That is clever to make a dress last for another season. That is a great way to save money.
Heidi
Thanks, Tara. I wish I had thought of it in past years. I've given away a lot of dresses that my kids would love to have kept through the summer.
Cynthia Nicoletti
Such a great idea and looks pretty easy. I am not a sewer but I think I could do it !!
Heidi
Thanks, Cynthia. If you want to try, test it out on a scrap piece of fabric. That's a good way to start if you've never sewn before.
Agnes Dela Cruz
I always believe that hand sewing is a talent, not all can sew a sleep of a loose button. I am good at this, I used to compete at school when I in grade school.
Heidi
That's so cool that they had sewing competitions when you were a kid. I've never heard of that. I wish there was more sewing in schools now.
Waren Jean Go
This is a good idea! I think I will do this to the long sleeve dress that got burnt when I was ironing it. Nothing should go to waste!
Heidi
I'm so sorry your dress got burned. How frustrating. This would be a great way to save your dress. Good luck!
Casey
Thanks for the tip. I always want to know how to do this since I was little. I just need to borrow my granny's machine, thanks so much!
Heidi
You're welcome, Casey. You should definitely give it a try. I bet your granny would love to help you.
Alvern @ Success Unscrambled
I do enjoy making alterations to my clothes myself to get the perfect fit. As a teenager, I did not like seeing other girls in a similar outfit so I purchased material and made my own outfits and even got shoes covered to match. It was a lot of fun. Maybe I will start again once I can find awesome material at a great price.
Heidi
That is so cool, Alvern! I remember taking sewing in school as a teenager. They don't even offer the class at my kids' school. I wish more kids learned to sew. That's amazing that you made your own outfits.
Joanna
This is such a great idea, especially with clothes that have too tight sleeves. I wish I knew how to work with the sewing machine, I would modify so many of my clothes.
Heidi
I have a shirt with too tight sleeves. I didn't even think of applying this to my shirt! Thanks for the idea, Joanna!
Stephanie | Adventures in Aussieland
You did such a wonderful job shortening the sleeves on that dress! I am terrified I would stuff it up but I've always been super interested in sewing and fixing my own clothes.
Heidi
Thanks, Stephanie. If you want to try it and are afraid you will mess it up, try cutting only an inch or two off the sleeve and practicing your sewing. Once you are sure you can do it, cut the sleeve to the actual length you would like.
Sundeep
Thanks for sharing some amazing tips. And definitely this is going to help us a lot. I need to order sewing machine.
Heidi
You're welcome, Sundeep. Altering clothing is sure a great way to save money.
Kiwi
Yes I love the refashion concept! Take a fall outfit and easily turn it into a summer one by cutting off sleves!
Heidi
Thanks, Kiwi. It's a great way to save money, and my kids love that they don't have to get rid of their favorite outfits.
HolyVeggies
I also hate getting rid of things are still good. Especially clothes. Unfortunately I don't know how to sew but I do try to buy only what I need and make clothes last long.
Heidi
Hi, HolyVeggies. I love that you only buy what you need. I think that's a concept that is lost on a lot of people. It's so tempting to buy every cute outfit you see.
Enriqueta E Lemoine
OMG You're so creative. I love the adding length with ribbon thing! That was so beautiful. Regarding the sleeves, you mastered the art. You did a great job and your girl is so beautiful. Thanks for sharing.
Heidi
Thank you, Enriqueta. My daughter is beautiful inside and out. I added the ribbon to that dress years ago. I wish it still fit me. It's sitting in my closet collecting dust.
Jen
Ah, this was exactly what I needed. Your instructions and pictures capture the key tips for success in what is technically a simple fix.
* how much fabric to save at minimum for your hem
* orientation of pins to keep hem in place but allow for sew-over
* the watch-out for waviness in completed hem if it's smaller than your machine arm
I cannot even COUNT the number of "video influencers" I've watched who have over-complicated the task and shared (perhaps unintentionally) mis-information.
There is definite benefit in mastering your craft and being able to clearly outline the CORE tasks. (Dear internet, please hear this.) THANK YOU for sharing and clarity. Your teacher's heart is showing and very much appreciated.
Heidi
That’s so kind of you to say, Jen. I’m glad my tutorial was helpful. Have a great day!
ArmchairGuppy
I discovered an easier way to shorten knit shirt sleeves and hems with stretch stitches before cutting anything. Turn up the existing edge to the desired length. Then use a stretch stich -- I use "pine leaf" on my vintage Kenmore -- 5/8th from your new folded edge. Don't stretch it as you sew, just let the machine sew normally. When you're finished, carefully scissor-trim the unwanted length next to the stitches you just made. Quick and easy!