

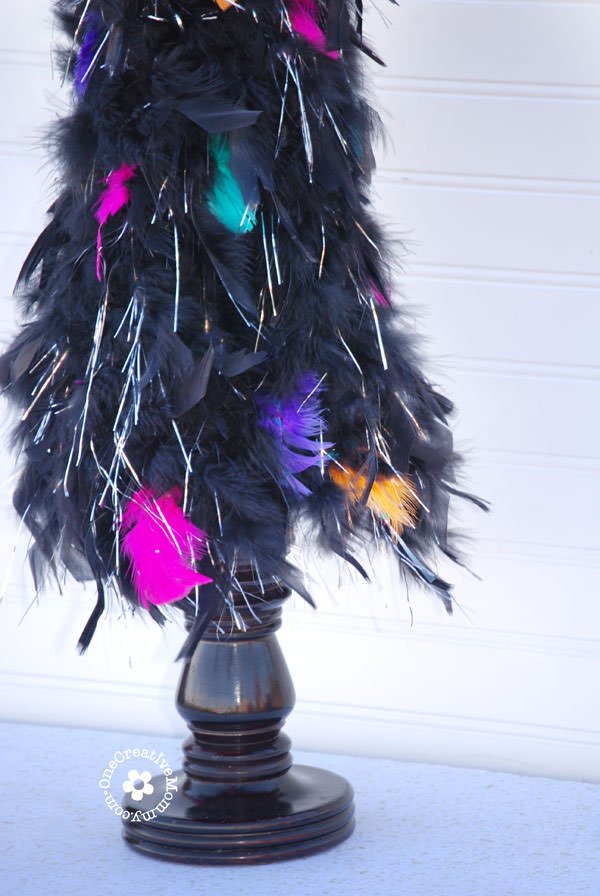
The other day, I was wandering through Pier 1 looking for some Halloween inspiration. I found a unique black and silver feather tree that I knew I could make at home. With a price of $49.99, I knew I could make it for cheaper, too! So, I headed to the craft store and picked up some supplies. I love my new Halloween Feather Tree, and I hope you will, too!
I left Joanne's with a feather boa, a bag of colored feathers, a styrofoam cone, some spray paint, and my imagination whirring! (Thank goodness for 40% off coupons!) The beautiful wooden candlestick was salvaged from my mom's pantry. I could have painted it black, but I opted to leave it in case I wanted to use it for another holiday. Thanks, Mom!
Halloween Feather Tree
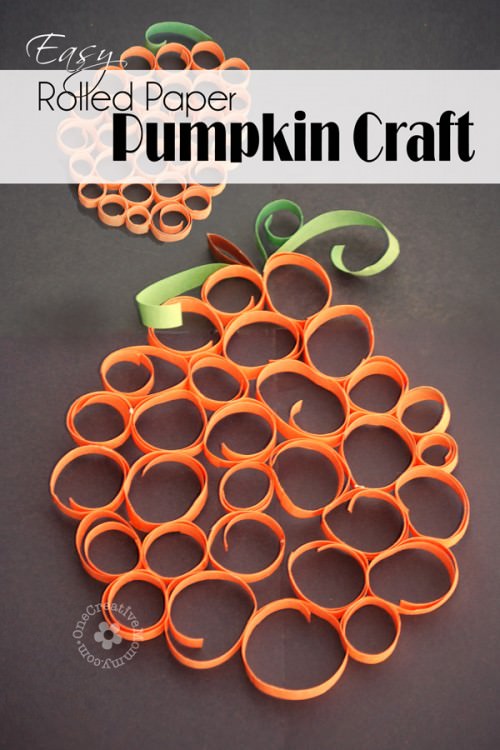
RELATED: Fast and Frugal Fall Decor, Cardboard Spinning Ghosts, Terra Cotta Pumpkins
Here's my inspiration from Pier 1:
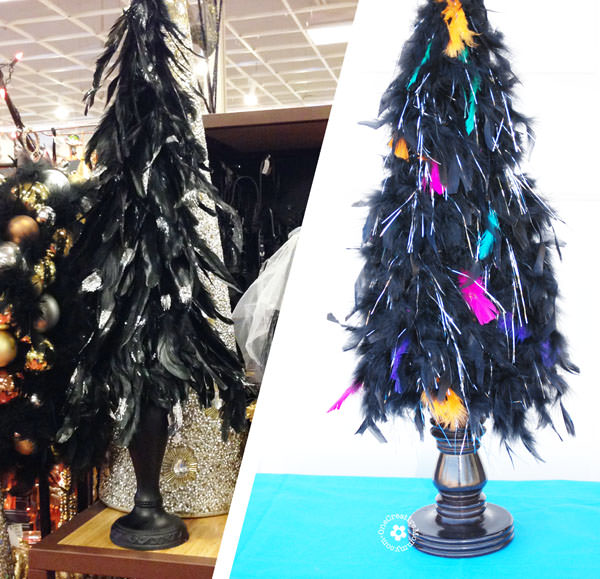
Could I have made mine look more like the original? Yes. Easily. My version is a lot less time consuming, though, and I love the splash of color!
Ready to make your own? Here we go!
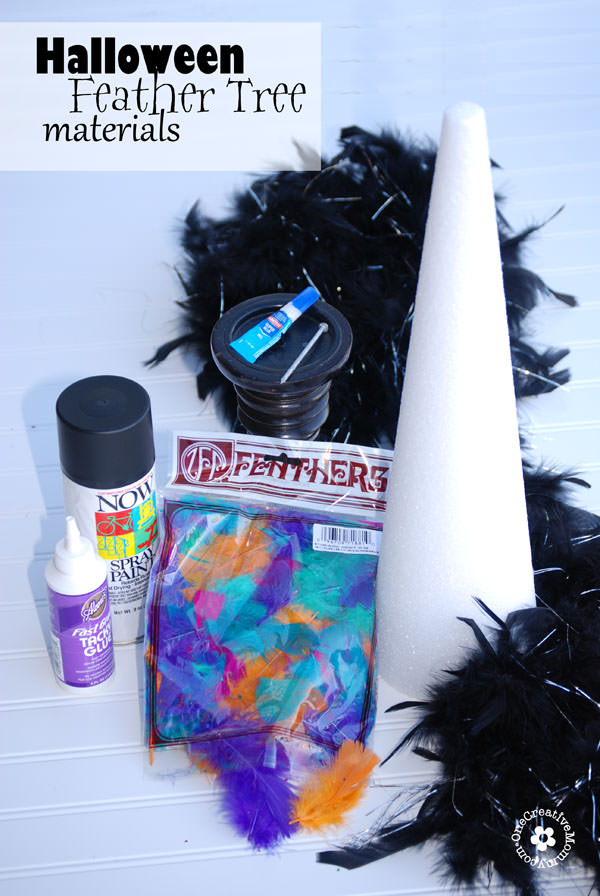
Materials:
- 6-foot black feather boa (preferably with the silver tinsel woven through it)
- small bag of brightly colored feathers (optional, and you'll have tons left for another project)
- candlestick or pedestal (Try Good Will or the Dollar Store, and remember that the color doesn't matter. You can always paint it.)
- large styrofoam cone
- craft glue
- large nail or screw with flat head
- super glue
Directions:
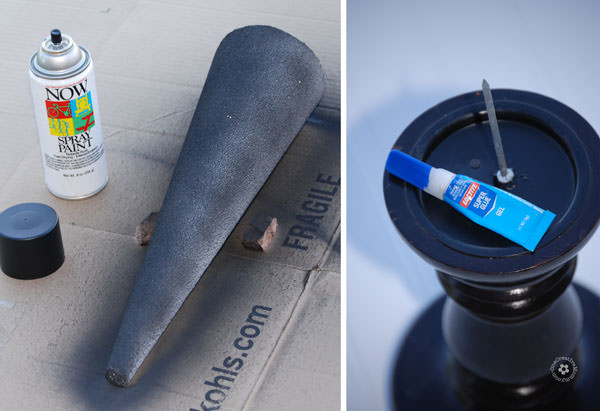
- Spray paint your styrofoam cone black. (If there are spaces between the feathers, the black will show through instead of the original color of the cone.)
- Using your long nail, poke a hole in the center of the bottom of your cone. (You'll attach it to the pedestal using this hole later.)
- Attach the head of the nail to your candlestick with super glue. The nail will hold the cone in place.
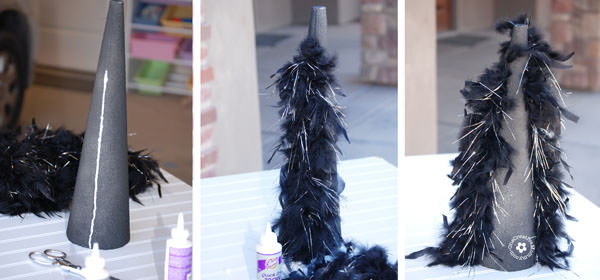
- Cut a section of the feather boa about ¾ the height of your cone. Put a bead of craft glue along the cone and attach the piece of boa. Be sure that the feathers naturally hang down and that they hang just below the bottom of the cone.
- Cut a section of the feather boa the full height of your cone. Rotate the cone, add another bead of glue, and attach the piece of boa.
- Repeat 2 more times with a short and long section of boa.
- Cut the remaining section of boa into four pieces, and fill in the larger gaps at the bottom of the cone -- one piece in between each original length of boa.
- Shape the feathers over any bare spots and secure with glue.
- To fill in the top, pull a few feathers from well-covered or too-bushy areas. Use the loose feathers to cover any bare spots at the top of the cone.
- Allow the glue to dry, and place the cone on the pedestal by threading the nail into the hole you made earlier.
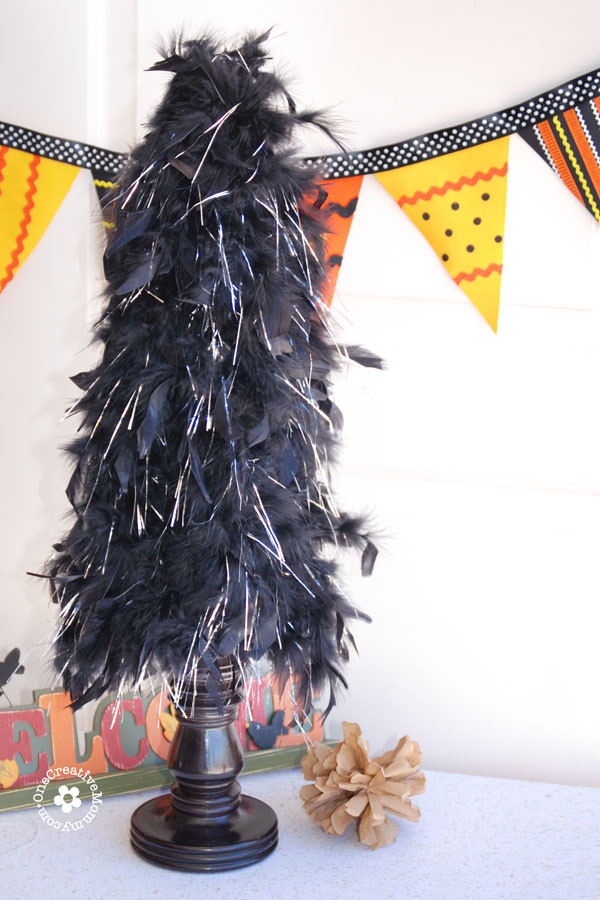
Stop here if you prefer your tree one solid color. Continue to the next step for a more colorful version.
- To add the colored feathers, simply stab the quills into the styrofoam wherever you like them. I didn't use any glue when I added the color.
- If the tree seems too poofy, start at the top and gently squeeze the feathers down. You can also remove feathers from the more poofy areas. I thinned mine out a bit toward the top.
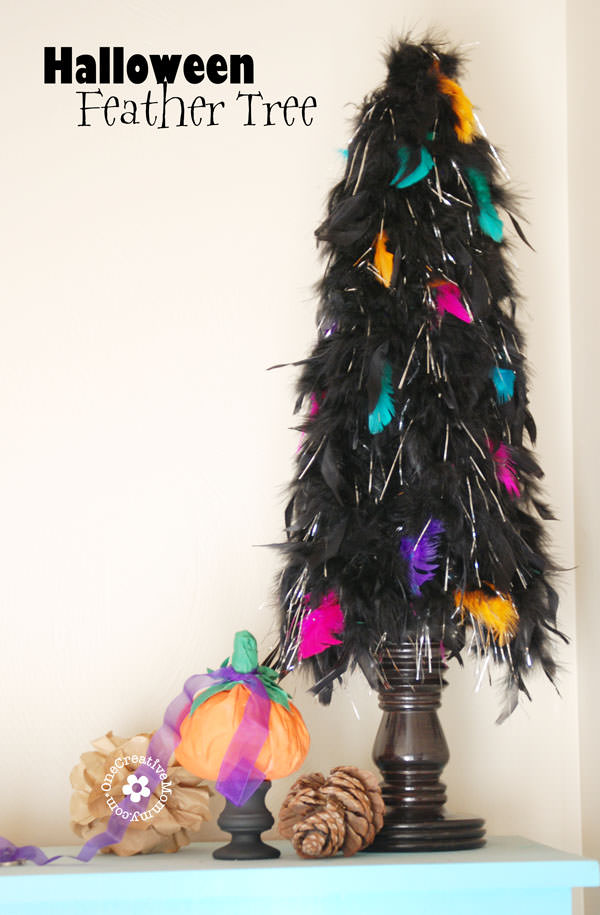
And there you have it: One unique Halloween decoration! Now, what will you do with your feather tree? Mine is sitting on top of our kids' storage lockers in the kitchen. Since they are bright blue, the colorful tree fits perfectly.
Thanks for stopping by today! While you're here, be sure to check out some of my other ideas. Images below are linked.


Meg K
Fun! & creative!! Love decorating for Halloween :)
Heidi Fowler
Thanks so much, Meg. I love it, too! It's my favorite holiday for decorations.
Brett
I love this! So smart to use a nail to anchor it to the base (that's totally one of those why didn't I think of that before now things!). Thanks for sharing - heading out to find feathers now! lol. xx, b @ being-bianca.com
Heidi Fowler
Thanks, Brett. It took me a little bit of thinking to come up with that solution! Worked like a charm. Good luck with yours!
Clare
That is amazing! And I think yours actually looks better than the original!
Heidi Fowler
Thanks, Clare! I'm really happy with the way it turned out. There's no way I was going to shell out $50!
Kelly @ Here Comes the Sun
This is such a creative project! I love it.
Heidi Fowler
Thanks, so much, Kelly. It was really fun. (Although, I'm still finding stray feathers in the house!)
Marilyn
What a great feather tree...I love the pops of color that your additional feathers added. I like yours better than the one at Pier One! :)
Heidi Fowler
Thanks so much, Marilyn! Wish I could make and sell mine for $50 like they do!
Jen
This is adorable! And I like yours better than the Pier 1 tree too--- the pop of color does it for me!
Heidi Fowler
Thanks so much, Jen. It was a fun project, and now I have lots of colorful feathers left over for something else.
Meghan
This came out great!
Katie Adams
Thanks for linking to Create Link Inspire at The Crafty Blog Stalker. You have been featured and pinned! Thank you for sharing.
–Katie, TheCraftyBlogStalker.com
Heidi Fowler
Thanks so much, Katie! Sorry I missed this comment earlier.
christina
I like yours better! Saying hello from Plucky's Link Up!
Heidi Fowler
Thanks so much, Christina! I appreciate you stopping by to say hi!
Ann
This is a neat project! I love it! I passed up a couple of black feather boas at the Dollar Store and now I have to go back and grab them.
Heidi Fowler
I didn't even think to check the Dollar Store for feather boas. I bet I could have made this even less expensive! Thanks for the idea.
Jess
So adorable. I love how this turned out!
Thanks for joining the Link Up this week!
Heidi Fowler
Thanks so much, Jess. I always love your party!