Are you aware of my addiction to making felt food? It's so much more fun than the plastic stuff they sell at the store! I created these felt pumpkins for Felt Week on Nap Time Creations last year, and I thought it was time to share them here as well. I loved tucking these in with my Fall decor this year. Did you see them with my Rustic Witch Hat?
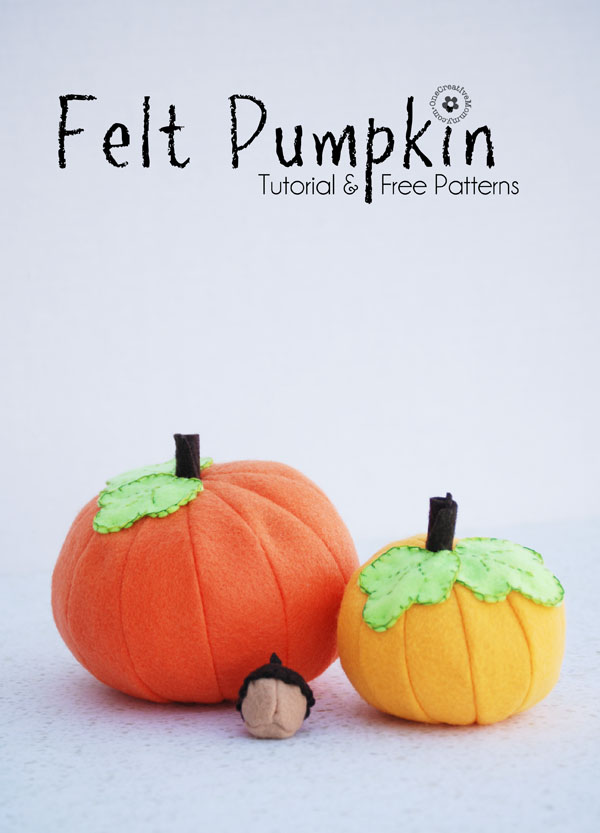
When I first got married, I used to make fleece balls as baby gifts. I modified that pattern to create these pumpkins.
Felt Food Pumpkin Tutorial
RELATED: Felt Food Popsicles, Felt Food Ice Cream Cones
Materials:
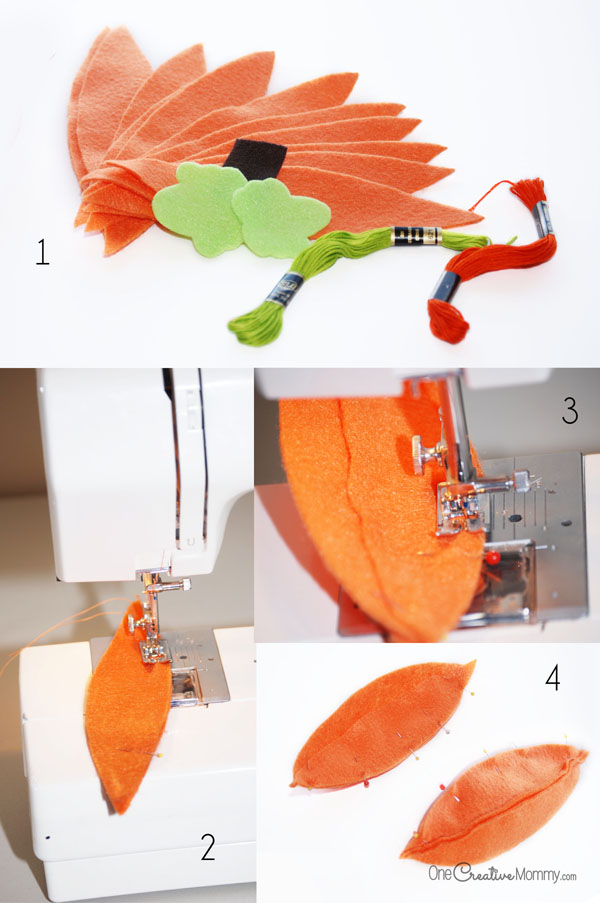
- Orange or yellow felt and matching thread
- Green felt (light or dark-- or both)
- Dark brown felt
- Your preferred stuffing material (I used felt scraps and left over odds and ends of fiber fill from blankets)
- Craft Glue
- Light and dark green embroidery floss
- Printable Pattern (Click to download)
Instructions:
- Print and cut out the patterns. Follow the directions on the pattern for tracing and cutting out the pieces. Save your scraps to use for stuffing.
- Pin two pumpkin pieces along one edge and sew along that egde. (I use just inside the presser foot as my seam allowance.)
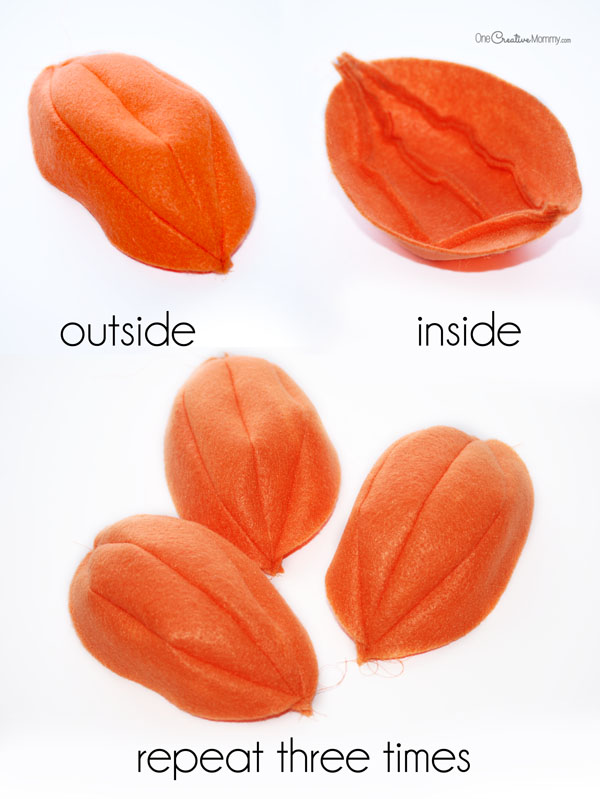
- Open your 2-section pumpkin and add another section--pinning along the edge where the new section meets the one of the original two. If felt had a right side, I'd say to pin the right sides together. It doesn't, so you'll have to be careful to make sure your seams always stay on the same side when you unfold. Sew along your newly pinned edge.
- Repeat until you have sewn a four-section piece.
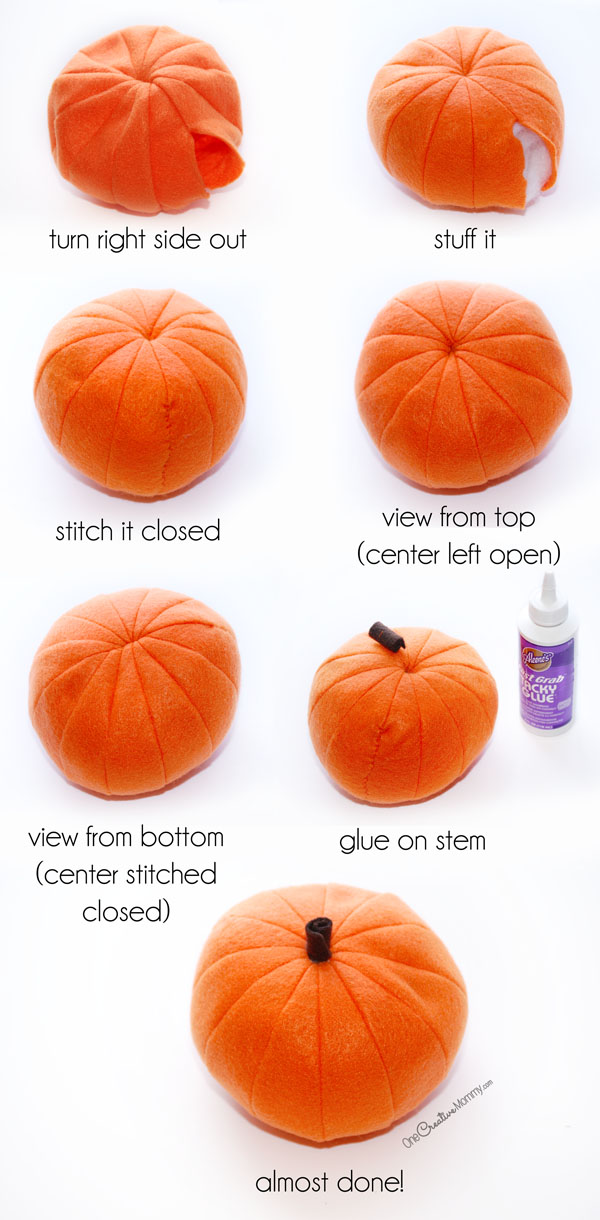
- Check with the image above to make sure you have done it correctly, and then repeat the same steps until you have created three 4-segment sections of pumpkin.
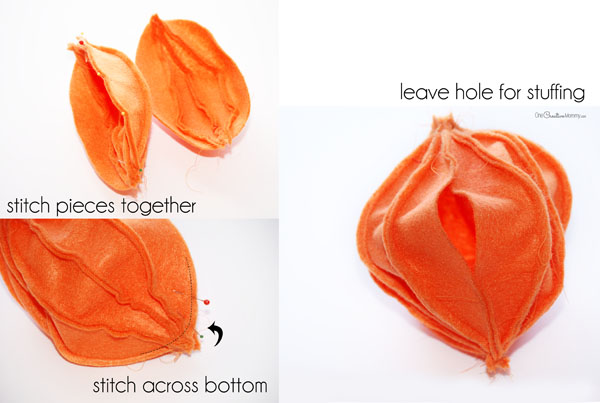
- Stitch the three sections together. Paying careful attention to the seams, pin two sections together along one seam. Stitch across the seam. Do the same with the third section.
- Now you should have one open side of the pumpkin left. You will not stitch this entire seam closed. Choose a side of the pumpkin to be the "bottom," and carefully smooth and spread out the pieces so that you can sew along the bottom edge and across part of the open side. Pin and stitch.
- Do the same with the top of the pumpkin -- EXCEPT -- do not stitch across the top. Stitch down part of the open side, but leave a little open spot at the top. You will glue the stem into that hole.
- Now you should have a complete pumpkin with a two or three inch hole in the seam for stuffing.
Now's the fun part!
- Turn the pumpkin right side out.
- Stuff it with felt scraps, fiber fill, or fabric batting.
- Hand stitch closed the open seam.
- Roll your stem piece into a tube and attach it to the top of the pumpkin. (Put some craft glue in the hole and on the bottom of the stem, and then stuff it into the hole.)
You're almost done! Now it's time for the leaves.
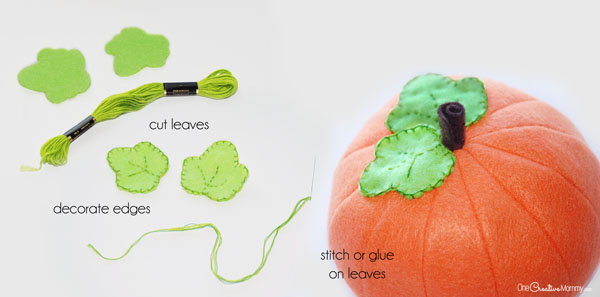
- Blanket or whip stitch around the edges of the leaves using two or three strands of light green embroidery floss and one strand of dark green. (If you don't have embroidery floss, you can cheat by laying long strands of regular thread together. I'm all for using up what you have on hand!)
- Add some leaf vein designs inside the leaves.
- Glue or stitch the leaves to the pumpkin, and you're done!
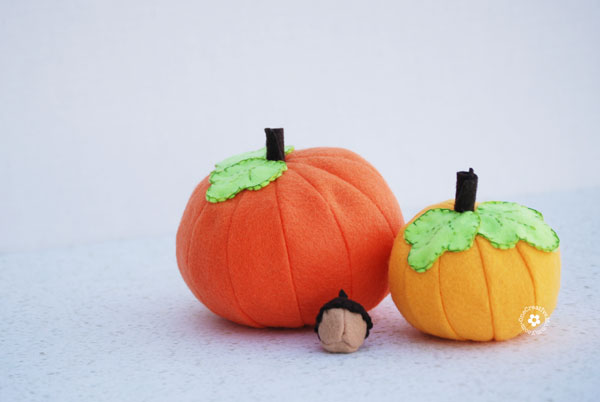
As for the little acorn in the picture (which turned out to be my kiddo's favorite part), I'm sorry I don't have a pattern for that. I just stitched a few scraps together, and it miraculously worked! (Once in a while things I create do actually turn out the first time. But only once in a while!)
There you have it! I hope you have as much fun creating these pumpkins as I did. I've temporarily stolen these pumpkins from the play kitchen and added them to my holiday decor!
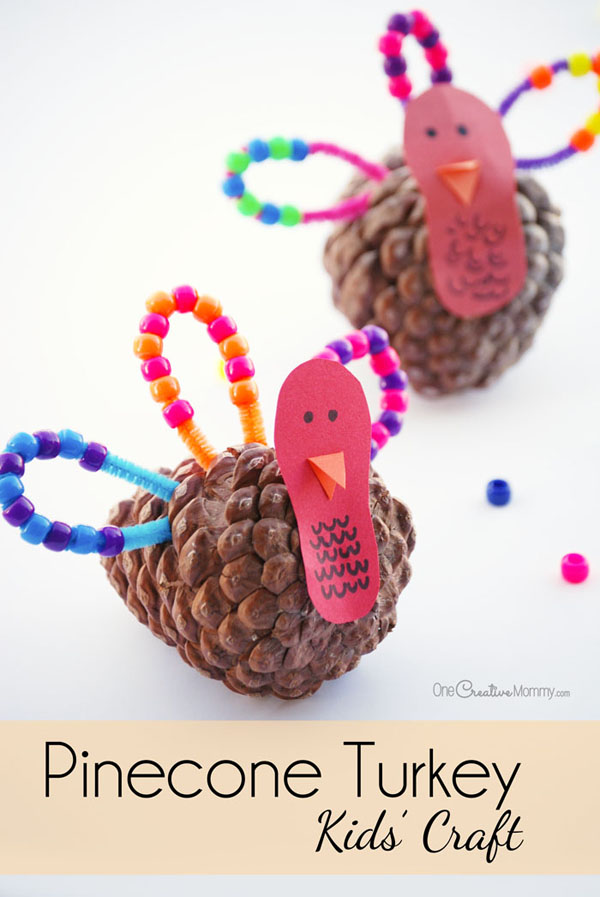
Thanks for visiting today. You can check out my felt food creations and Thanksgiving projects by clicking on the images below.





Jessica @ Cutesy Crafts
I love these SO much!
Heidi
Thanks, Jessica. They were a lot of fun to make.
Joyce
These are beautifully made! They would be perfect gifts for the smallest children (under 1 year) who can't have candy for Halloween. And, I am thinking they'd be a nice part of the centerpiece for Thanksgiving at the kids' table - all you'd need is a target board and they'd keep themselves busy tossing pumpkins while the "big people" finished getting dinner out!
Heidi
That would be so fun, Joyce! I can see a pumpkin bowling game with these as well.
Sydney @ Tastefully Frugal
These are so cute and your tutorial is amazing! I'm pinning it so I can try later :)
Ana Martin
Beautiful - just beautiful - I'm speechless...
embroidery digitizing tipsntricks