

With back-to-school just around the corner, I'm refurbishing one of my very first posts. I'm putting on my Frugal Mommy hat and showing you how to save some cash on school supplies. Are you ready to make a DIY Paper Book Cover? (They are so much better than those crazy $4 book socks!)
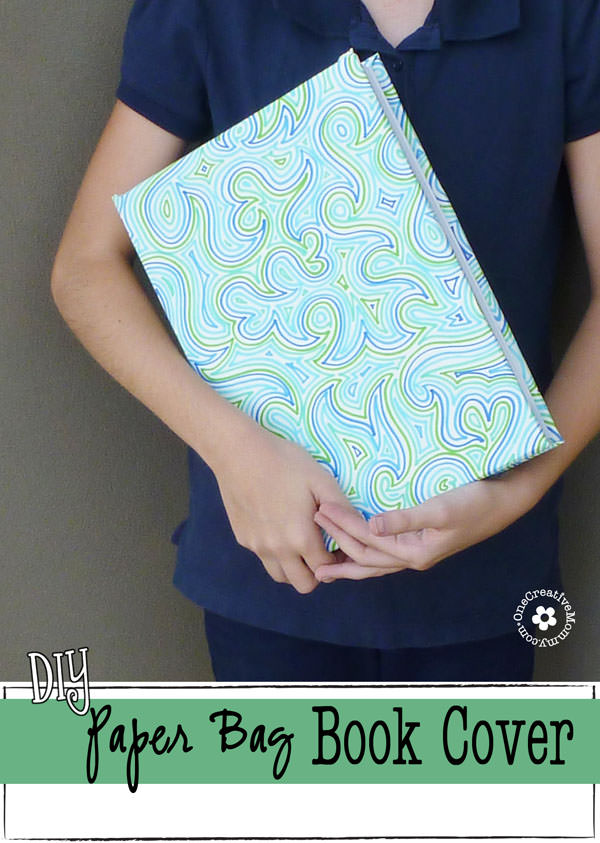
My kids are required to put book covers on their school books, but I just can't bring myself to buy a $4 book sock! And--have you actually tried to handle a book covered with a book sock? It makes the book slippery and difficult to hold. Back when I was a teenager, we made our own covers. All we needed was a paper grocery sack and a little bit of tape. Anyone else remember making those?
So, if you're ready to get a little creative and have a little fun, I'll show you how to upcycle butcher paper, a paper bag, wrapping paper, or any paper into a unique book cover with my easy tutorial.
Paper Book Cover Tutorial

RELATED: Composition Book Makeover, Duck Tape Art Portfolio
Materials:
- A textbook (I bet you figured that out on your own!)
- 1 large paper grocery sack or butcher paper (I'll show you both ideas. My butcher paper came from a roll of drawing paper the kids use for coloring). You could easily do this with any paper. Tape together coloring book pages or drawings made by the kids until you have a large enough piece to cover the book.
- Scissors and packing tape
- Markers, paint, crayons, or colored pencils for decorating (permanent markers work well). Stickers would be fun, too!
- Packing tape (optional)
This first method uses butcher paper. You'll find the paper bag book cover after this one.
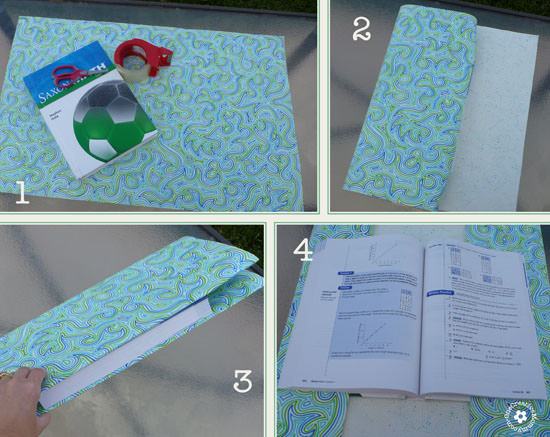
- Using any materials you would like, decorate your butcher paper. (You could even use wallpaper or wrapping paper so that you don't have to create your own design.) I created this one by drawing the design I've been doodling since I was in junior high! It looks kind of like wrapping paper, don't you think? Nope. It's just white butcher paper and markers.
- Wrap the paper around the outside of the book, folding the edges inside the book.
- (Third image is a close-up of step 2.)
- Make sure your overlap is fairly even on both sides.
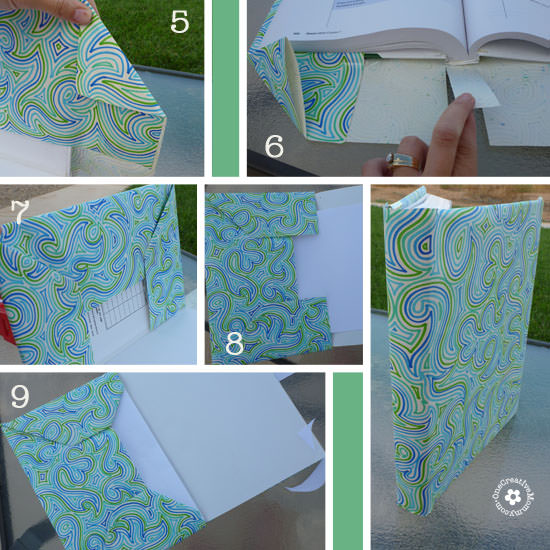
- Fold the corners in like you are wrapping a gift.
- Slit the bottom and top so that you can remove the overlap on the book spine.
- Fold in the sides and tape them down.
- Optional* Slide an extra piece of paper under the book cover.
- Fold the edges of the book cover in to make the edges look more finished.
- Not pictured (because the tape reflects funny off of the camera lens). Cover the entire piece of butcher paper with packing tape to create a protective, durable finish. *This step is optional. You can leave off the tape. The cover just won't last as long.
Because the colors show up better, I prefer the butcher paper book cover. Paper bag covers are completely free, however, and a little more durable. If you're not worried about color, I'd go for the paper bag.
RELATED: How to Make Friends: Back-to-School Tips for an Awesome First Day! Back-to-School Friendship Game for Kids
Paper Bag Book Cover Tutorial
This cover is created almost the same way as the other design.
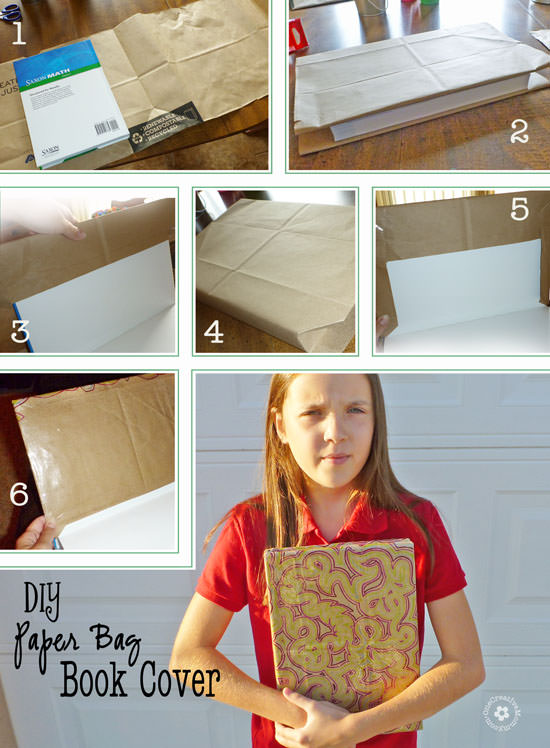
- Start by slitting open a large paper bag and removing the bottom of the bag.
- Flip the bag to the plain side and draw your design. (Or skip the design and just doodle all over it during class. That's what I used to do! I'm sure all you teachers out there love that suggestion, right? Sorry!)
- Continue on with the same directions as above.
My original book cover was made from a recycled paper bag. It worked great, but Bear and I decided to make a new one because the vibrant colors she wanted didn't show up well on the brown bag.
- When I did this the first time, I forgot to decorate the bag first. I saved that step for last. (It works much easier to do the design first.)
- You may notice that the inside of this book cover looks a little different. I put the extra paper over the folded edges instead of under (Step 6 in the picture).
So, what do you think? Will you give it a try? I'm a little biased, but I think the make-your-own book covers are so much more fun than the ones at the store! Have fun!
*This idea was originally posted in September of 212, but has been updated with new photos and ideas.
I'm so glad you stopped in today. Stick around and check out some of my other ideas. Have a great day! (Images below are linked.)


Jessi @ Practically Functional
I did the paper bag version for all my books back in high school! Loved it cuz you can draw all over them. :-) Thanks for sharing at The Fun In Functional!
Heidi
I used to draw all over mine, too, Jessi! That was half the fun! Thanks for popping by!
Ewa
the cover looks beautiful!
Barbara
Perfect timing for back to school! Thanks for sharing this at Keep Calm and Link Up this week! Can't wait to see what you link up next Friday!
Barbara at Chase the Star
chasethestar dot net
Katherines Corner
Thank you for sharing at the Thursday Favorite Things hop. Your participation helps make it a success.I'm sorry I am slow to visit I am fighting a nasty head cold and my time on the computer has been limited.Wishing you a beautiful day .xo
Debbie Thompson
I really like the one covered with wrapping paper. You could also do that for ugly books that might not make it to the coffee table otherwise. Great idea!
Debbie
Heidi Fowler
Thanks! That's actually not wrapping paper. It's a drawing. Cool to know that it looks like real wrapping paper!
kukafera
I thought it was wrapping paper too!! What a beautiful design!!
Heidi
Thanks! I've been drawing that same doodle since I was a kid!
Jamie @ Love Bakes Good Cakes
I used to cover mine with the brown paper so I could draw all over it! Pretty paper would be so nice too! Thank you so much for sharing this at All my Bloggy Friends last week. I can't wait to see what you share tomorrow! :)
Bobi Jensen
Looks good!
I'm hosting my first linky party - would love for you to join in:
http://westernwarmth.blogspot.com/2012/09/weekend-warmth.html
Thanks,
Bobi
K @ Claiming Our Space
I remember making these for my books way back in high school. Ah, the memories. :-D Thanks so much for sharing on Tout It Tuesday. Hope to see you tomorrow.
Nichi - The Mandatory Mooch
Great tutorial. Thanks for linking up to Tasty Thursdays on The Mandatory Mooch. I hope you link up again this week. The party will be live tomorrow night. http://www.mandatorymooch.blogspot.com
And don't forget to "like" my Facebook page if you haven't already. http://www.facebook.com/TheMandatoryMooch
Thanks, Nichi
Carrie
What a great tutorial!! I remember always making mine from paper bags as a child or the school would get free ones from local businesses. Thank you for sharing at Sharing Saturday!!
partycraftsecrets
So cool - great choice in covers too! Linda x
Kathie
We used to make these when I was a kid! Haven't seen them in so long. They work great and those ones at the store are not worth the price. Thanks for sharing at Gettin' Krafty this week!
Bella
Lovely! My daughter had to make her own at school this year. I love that it gave students a chance to be creative, and save money :)
Barb @ A Life in Balance
Love this! I still remember covering our books with paper grocery bags and then doodling all over them.
Heidi
I used to do the exact same thing, Barb! I remember even wanting to save a few at the end of the year. Memories!
Jess
Great tip here!
Thanks for joining the Link Up this week!
Heidi
Thanks for hosting, Jess. I always love your parties!
Carie Spence
I remember doing this and vowed to have my kids do the same. Can't stand the book socks either. Love your pattern btw! Thank you for linking up to the Bloggers Brags Pinterest Party. I have pinned your post to the Bloggers Brags Pinterest board.
Heidi Fowler
Thanks so much, Carie! My kids insisted on book socks last year, but we are back to paper this year. The socks are so slippery! Thanks for the pin.
Heidi
Thanks so much, Carie! My kids insisted on book socks last year, but we are back to paper this year. The socks are so slippery! Thanks for the pin.
Katerina
You did such a great job with these book covers! Again, thanks for coming and linking up at The Weekend Social. All posts get pinned in our pinterest board! Please be sure to come back next week starting Thursdays at 9PM EST on culinaryflavors.gr ! I hope to see you there!
Heidi Fowler
Thanks so much for stopping by and commenting, Katerina. I always love your party!
Debi and Charly @ Adorned From Above
Thank you so much for sharing with Adorned From Above's Link Party
Debi @ Adorned From Above
Heidi Fowler
You're welcome, Debi and Charly! Thanks for popping by to leave a comment!
Glenna @ My Paper Craze
This is a great idea! I love how you decorated your covers. I do remember having to cover our books with paper bags as a kid. Thanks for sharing with Creative Spark Link Party.
Glenna @ My Paper Craze
Heidi Fowler
Thanks, Glenna. We're getting ready to do a new batch this weekend!
Maxie
But not every plyer wants to spend houes in wow gold farming,
if you really have enough time, here I would like to tell youu these useful tips to you, and tthen you can easily make WOW gold in the games.
There are new exciting updates for this game and you can enjoy new stages and challenges.
Should your granary ever be destroyed, youu will lose all the food that was contained in them, which will negatively impact your popularity in turn.