Do any other moms out there totally hate their kids' bunk beds? It's almost impossible to change the sheets, it's super hard to actually tuck a kid into the top bunk, and you can never sit on the edge of the bed and tell stories or sing songs. I was about to put this bunk bed on Craig's list, but I decided to humor my daughter and turn the area below the bed into a bunk bed fort. My daughter is in 7th Heaven, and I think maybe I don't hate the bunk bed anymore. (Who am I kidding? Someone please invent an easy way to change sheets on a bunk bed!)
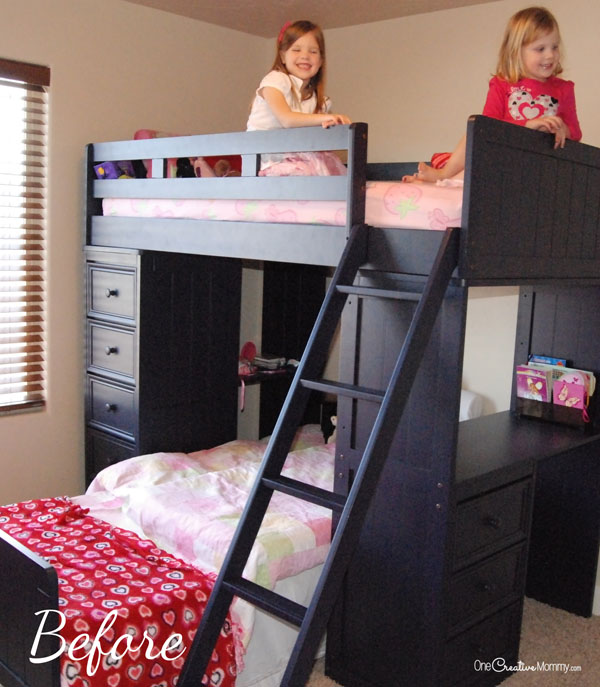
When the girls finally outgrew their toddler beds, I was super excited to find THE PERFECT BUNK BED. Navy blue wasn't my first pick of color, but it was a floor model, so I got a steal of a deal. I loved it because the bedroom didn't have room for two full-sized beds and a dresser. This bed was perfect. It fit two beds, a dresser and a desk into one compact space.
Look at the happy faces of my girls the day we installed the beds. (We hadn't bought a mattress for the bottom bunk yet, so we used the toddler mattress for a few weeks.)
RELATED: DIY Pocket/Front-Facing Book Shelves for Kids, How Getting Rid of Toys Made Us a Happier Family
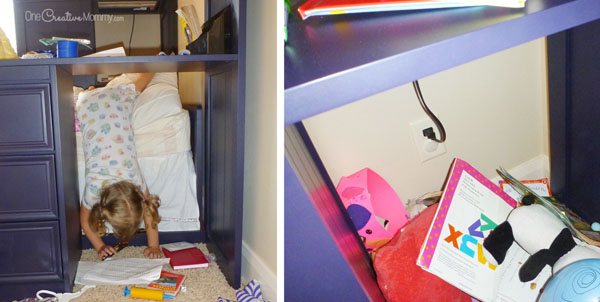
Fast forward a few weeks, and suddenly we had bunk bed trouble! Tiny Lu is quite a crazy sleeper. She was constantly slipping off the top of the bed and ending up stuck under the desk or in the hole under the shelf on the other side of her bed. Those shelves on the side of the bed that seemed like such a great place to put a few books and a glass of water suddenly became a giant dumping ground for lost toys, books and garbage. Yikes! It drove me crazy.
Don't get me started on changing the sheets. At one time, the top bunk had a waterproof zip-closed mattress pad. (Like a bag that surrounds the entire mattress.) Guess what happens when that gets wet (which only happened once). Just try getting something that is zipped around a mattress off the top bunk! I had to take the mattress completely off the bed. Let's just say that I was sweating by the time I finished, and I had to find a helper to put the mattress back. Crazy.
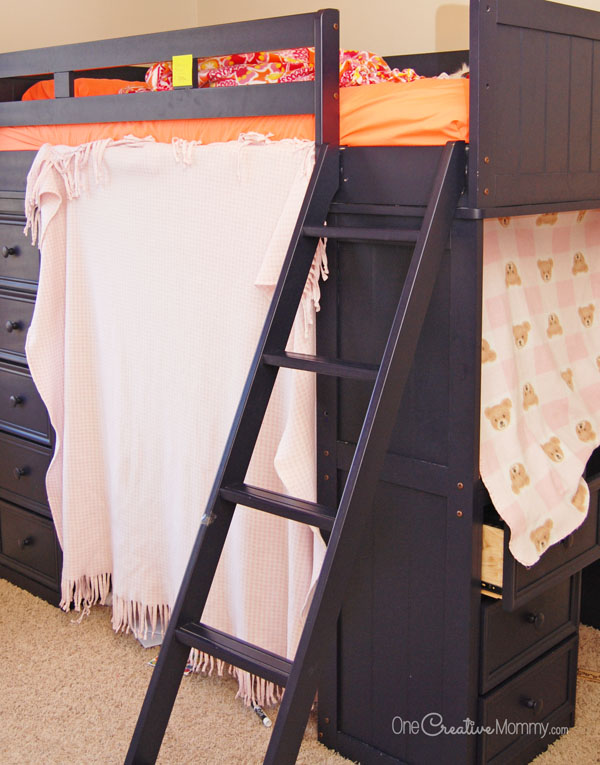
So, enough complaining. I'm sure you're beginning to see why I quickly fell out of love with this bed. Fast forward to a few months ago. I was fed up with the girls sharing a room, and I dragged the bottom bunk into the playroom. (Best thing I ever did, but that's a post for another day.) I was ready to sell the bunk bed until Boo (the occupant of the top bunk) started tucking blankets in all around the bed to create a secret room.
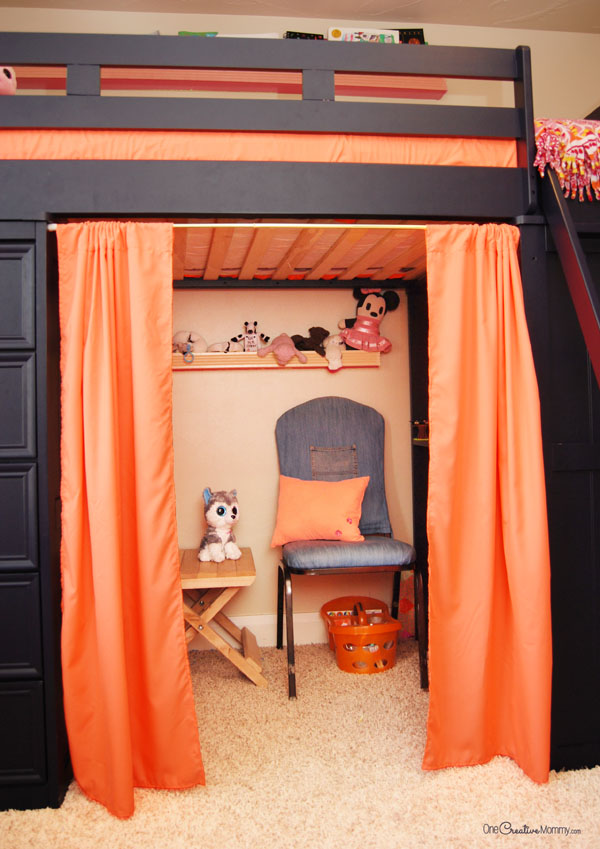
I decided to make her idea a little more permanent, and I'm so glad I did! Boo's bedroom is now a super fun place to play, and she's keeping it clean! (Extra bonus: After seeing how easy it was to make these curtains, 10-year-old Boo has started a new hobby -- sewing!
Want to try this with your bunk beds? All you need is one twin sheet and some cheap spring curtain rods. Since Boo never sleeps with a top sheet, so we cut up the flat sheet from her set to make these curtains. We even had enough extra fabric left for Boo to make herself several pillows. (So far, she's made five, and she and her friends have started a sewing club!)
Bunk Bed Fort Curtains
Figure out how best to use your sheet so that you have enough fabric
A definition: When I say, "pocket," I mean the top of the bed sheet that folds over about three inches and makes the top of the sheet look pretty.
So, let's get to the tutorial! Since the dimensions of everyone's space will vary, I won't give you any measurements. I will give you a general idea of how to get this done for your little one.
To make sure that you make the best use of your fabric, measure your sheet and draw it out on a piece of paper (or do it in Adobe Photoshop, like I did). Now measure the holes you want to cover. Draw rectangles that match the dimensions of the holes you want to cover (scaled small to match the drawing of your sheet). Cut out the rectangles, and place them on your sheet to decide how to cut up the fabric. (I am totally kicking myself that I didn't save my diagram!)
*Hint: Try to make the top of the sheet the top of as many panels as possible. The folded over top of the sheet is a ready-made pocket for you to slide in a curtain rod. If you place your panels right, you can also take advantage of the already-hemmed sides and bottom of the sheet.
Don't start cutting yet! Now that you have a general idea of how your panels will fit on your sheet, you need to add some extra length and width for seams and for the top pocket on the panels that don't already have one. You don't have to be completely exact. If you make the panels extra wide, then they will gather a little bit (which I like). The diagram is to make sure that you have enough fabric before you start cutting. No use cutting up a perfectly good sheet and then finding out that you don't have enough!
If your panel is not cut from the top of the sheet, and you need to add your own pocket to the top, add 3 to 4 inches to the length. If the pocket is already there, you only need to add extra length to hem the bottom (about an inch).
Sew the panels
For panels that already have a pocket at the top (those cut from the top of the sheet):
- You need to open up the pocket so that you can thread a curtain rod through. Unpick the stitching that goes along the side of the pocket (not the whole side of the sheet--just the part that goes over the pocket), and unpick five or six inches of the stitching that goes across the bottom of the pocket. If you did it right, you should now be able to slide something through the pocket.
- Now, hem the sides of the panel by folding over the edge twice and pinning it in place. Iron the seam, and then stitch across the bottom of the fold you just created. Once you have hemmed both sides, re-stitch across the pocket.
- Now, hem the bottom the same way you did the sides.
For panels that do not already have a pocket at the top:
- Hem the sides of the panels first, then create the pocket.
- To create the pocket, fold the top of the panel over about three inches. Then, fold the bottom edge of that fold under. Pin it in place and iron the seam. Stitch across the bottom of the pocket.
- Finally, hem the bottom of the panel.
Add embellishments!
To add a little bit of extra color to a very orange room, we added a strip of pink ribbon across the bottom of one of the panels and stitched on a few pink flowers.
Hang and enjoy!
I purchased really cheap tension rods at Walmart to hang the curtains. I like them because they have little stoppers on the sides, so you don't have to put any nails into the bed. Depending on the paint used on the bed and the humidity in your area, you may need to add some some padding to the stoppers to protect your furniture. The rubber may remove the paint in humid areas. You can buy stick-on pads at any home improvement store. (They're the same as the pads you add to the bottom of your kitchen chairs to keep them from damaging the floor.)
I hope your kids have a lot of fun with this. Boo thought I was the best mom ever for at least a day or two. :-)
Sorry I don't have more process pictures. This is one of those projects that I kind of figured out as I went, and the goal was a happy little girl, not great pictures for a blog post.
You might be interested in these projects for the house, too. (Click on the images below to visit the posts.)




Virginia Fynes
I'm sure you kiddos love that space! So much fun!!!
Walter
The loft is by Jay Furniture out of Ontario California. Great company.
Heidi
Thanks, Virginia. They do love it. It's the new favorite hang out.
NV crafter
When our daughter was in elementary school (she's now a grad student in physics!), we had a bunk bed set similar to the one you had but no bottom bunk (one of the supports was a dresser and the other a cabinet similar to an entertainment center with a desk underneath the top bunk). We used a fitted twin sheet and a decorative sleeping bag (those kid overnight ones, not a camping one). . . much easier to wash a sleeping bag than to try to tuck in the flat sheet, blanket, and bedspread! At the time our daughter thought she was going to be a marine biologist (then majored in Japanese and ended up in physics, go figure), we found a very cute shower curtain with dolphins and dolphin sleeping bag so we used a tension rod for the shower curtain "fort" and the sheets/sleeping bag above.
Heidi
The sleeping bag idea is brilliant! I hate changing those sheets. It's almost impossible.
victor brown
Where can I get the bunk bed shown up top or plans to build it.
Heidi
We got these beds years ago at a furniture store in Las Vegas, but I have seen them online. Try a google search for loft bunk beds and you should find plenty to choose from.