
DIY Storage Lockers Part 2
Thank you so much for your huge response to my DIY Storage Lockers post. It made me so happy to read all of your comments! So many of you mentioned that you plan to make the lockers that I thought I'd better hurry and share some painting tips to go with it (while I still remember what not to do!).
I'm sure my regular readers remember that I like to make all of the mistakes so that you don't have to. With that in mind, here are the things I learned about painting bare wood.
Tips for Painting Bare Wood
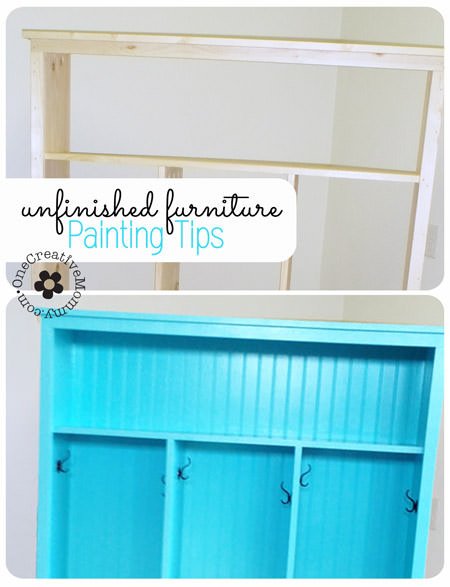
- Do buy or borrow an electric sander. You'll love it, and it will make the project go so much faster! Okay--if you really want the exercise, go ahead and sand by hand. It's debatable which is more important--working out your arms or saving time. I'll let you make the choice! (You might also want to invest in a paper mask to save your lungs from the dust.)
- When selecting the amount of paint to buy, do consider the entire surface area in your plans. I looked at the size of my project and was positive that 1 quart would be enough. I always buy too much paint. I buy a gallon to paint a small piece of furniture and end up with tons left over. This time, I was not going to over buy. After all, I've painted dressers before, and I always have tons of paint left over. Bad choice! When painting a piece of furniture with drawers, you only have to paint the outside surfaces. When painting this project, you have to paint both sides of every shelf and the back piece that shows through the shelves.
- When selecting the amount of paint to buy, do consider that bare wood soaks up paint (especially the primer), and you will need more than you expect. I had not a single drop of paint or primer left when I was finished with this project. I literally scraped the edges of the can clean. It wasn't enough. There are many hidden spots that I was not able to give a (needed) second coat.
- Don't forget to sand after each coat of paint--especially after the primer. This was my first surprise when I was painting. Before I started painting, my dad gave the entire project a really good sanding. It was perfectly smooth. After the first coat of primer dried, the project was rough again! Adding the primer will raise the grain. You will need to sand again. I researched tips from expert furniture painters, and they recommended a light sanding after every coat of paint (using a finer grain of sandpaper with each successive coat of paint). I cut corners on the sanding, and my final project definitely shows the wood grain. If you want a smooth finish, don't forget to sand!
- Do save some extra paint in a mason jar and keep it under the sink. When you find a spot you missed, or when the furniture gets dinged, you can easily pull out your jar and give it a quick touch up. (*Refer to steps 1 and 2! I obviously was not able to follow this little tip!)
- Do have fun!
In case you missed my lockers project, click on the image below. It's linked to the project.

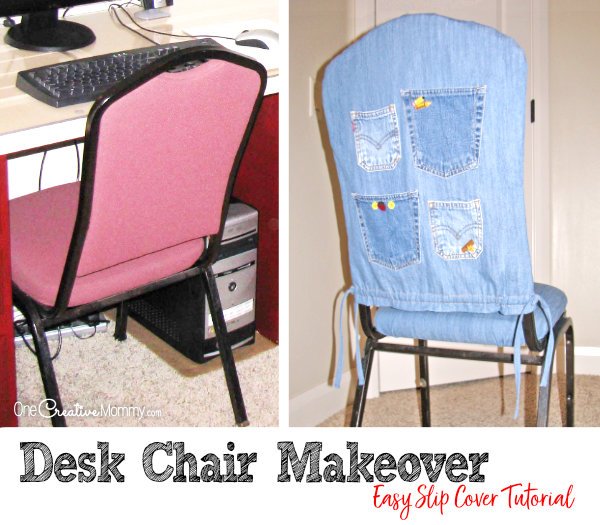
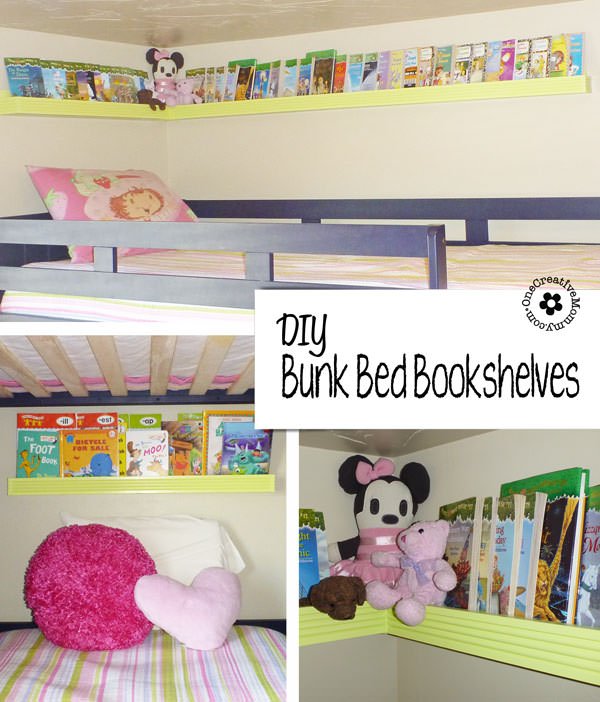
You might also like these projects: (Images are linked.)
Thanks for stopping by! If you like what you see, please like, pin, tweet, +1, or share in some way!


Melissa @Serendipity and Spice
Love love love the color! I can't wait to make something like this for our new house!
Heidi@OneCreativeMommy
Good luck, Melissa! You'll love it.
Linda
Pinning. Over from Diana Rambles Pin Party. Best wishes, Linda
Heidi@OneCreativeMommy
Thanks, Linda. Have a great night!
PJ @ Planned in Pencil
I love the bright color you chose! Thanks for sharing at the Pinworthy Project Party.
Diana Rambles
Fabulous Heidi! Thanks for sharing at my Pin Me Party!
Gloria // Simply Gloria
I love this idea! Especially the color you chose. This is the perfect thing I need for all of our winter jackets ...and backpacks. I'm featuring you tomorrow morning at the Show Stopper Saturday! Be sure to stop by later and grab your Feature button! Thank you for sharing amazing project and tips with all of us!
Heidi@OneCreativeMommy
Thanks so much, Gloria! I love the color, too. It makes me smile every time I walk by! I always love your parties. Thanks so much for featuring my project. Popped by!
Joyce
I painted a table top it is unfinished wood, I sanded, sealed, then painted. I waited a few days to put stripes on the top, when I pulled the blue tape up it took everything right down to bare wood. What did I do wrong?
Interier
Hm.. thanks for excellent post. I worj with furniture on small slovenian market and must say that I am getting also more inquearies from people how to diy then for actual wardrobes to purchase. I guess it has something to do with recession, since everybody wants now to make their own furniture. Regards, Matija
PETRIFIED WOOD SPHERE
wow very inspiring.. thank :)