
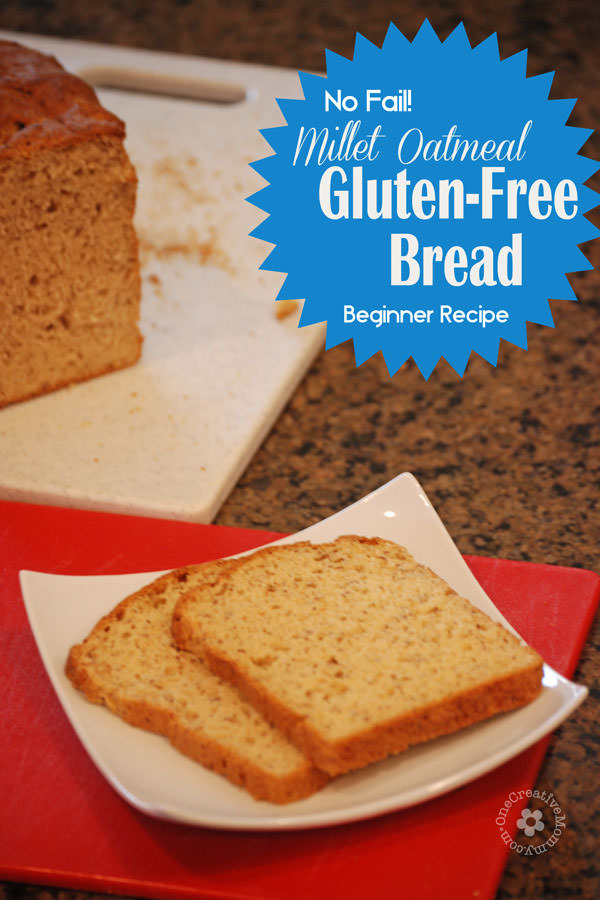
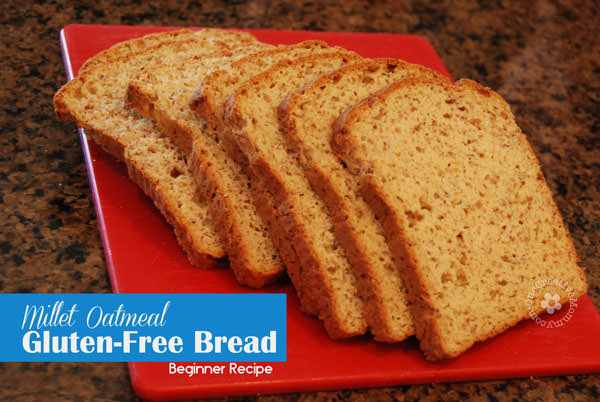
If you are new to gluten-free cooking, the first thing you need is a good gluten free bread recipe. I had several recipe fails when I first started cooking, and I got quickly frustrated. This recipe for Millet Oatmeal Gluten Free Bread saved me! It turns out every time, so I call it my no-fail gluten-free bread! (I've tried several successful recipes since this one, but this is still my kiddo's favorite and tastes most like regular bread.)
The trickiest thing about gluten-free baking is learning the correct texture of the dough, tricks to make it raise, and cooking time. I'll teach you my methods and tricks to get the best bread possible.
Be sure you read all the way to the end of the post to find out my secrets for getting a good bread shape, saving money on gluten-free flours, and making quick gluten-free bread.
RELATED: Gluten Free Pumpkin Chocolate Chip Cookies, Pumpkin Oatmeal Pancakes (Gluten free)
No-Fail Millet Oatmeal Gluten Free Bread Recipe
This recipe comes from GutenFreeMommy.com, but the method is my own. Her blog has disappeared, so I sure am glad I saved this recipe!
Dry Ingredients:
- 1 cup brown rice flour (I grind my own)
- ½ cup tapioca flour
- ½ cup gluten-free oat flour (I grind my own)
- ⅓ cup cornstarch
- ¾ cup millet flour
- ⅓ cup sweet rice flour (I grind my own from Calrose Rice)
- ¼ cup flax seed meal (Optional--Adds fiber, but not flavor)
- 1 Tablespoon xanthan gum
- 1 ½ teaspoons salt
- 3 Tablespoons brown sugar
Wet Ingredients:
- 3 eggs
- 1 tsp apple cider vinegar
- 1 packet active dry yeast+ 1 tsp granulated sugar for proofing yeast (1 pkg = 2 ¼ tsp)
- 1 Tablespoon molasses
- 4 Tablespoons butter or butter substitute, melted
- ¼ cup plus 1-1 ½ cup very warm water
Directions:
This method was perfected by my mom--the best experimental gluten-free cook I know!
- Turn the oven on to 200°. When it reaches that temperature, TURN IT OFF. (Many gluten-free flours store best in the fridge or freezer. If your dry ingredients are already at room temperature, you can skip steps 1 and 6.)
- Grease or spray bread pan.
Bread is best when ingredients are at room temperature. So, either take all of the ingredients out of the fridge well in advance, or warm up the cold ingredients by doing the following:
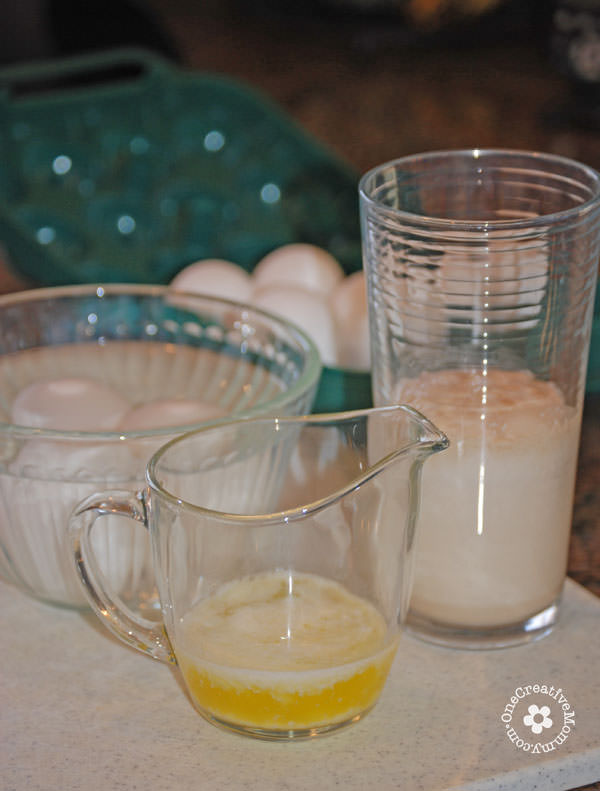
- Carefully place three eggs (still in the shell) in a bowl of very warm water while you assemble the other ingredients
- Proof yeast by combining the yeast, 1 tsp. white sugar, and ¼ cup water. (I use a tall glass.) Let the yeast sit for about 10 minutes while you do the next steps. (If the yeast is not foamy after 10 minutes, start over with new yeast. Don't be afraid to use very warm water--up to 120°.)
- Melt 4 T butter in the microwave, and place it back in the fridge to cool.
- Place the dry ingredients in the mixing bowl of a stand mixer and whisk to mix. (When measuring dry ingredients, scoop flour into the measuring cup with a spoon. Level off the top with a knife. Do not pack down the flour.) Place mixing bowl in the warm oven for a few minutes while you do the next steps.
Prepare wet ingredients
- In a small bowl, whisk the eggs and then add the vinegar, molasses, and butter. Whisk again. (Tip-before measuring the molasses, dip your measuring spoon into the melted butter. The molasses will easily pour off the spoon without you needing to scrape it off.)
- Carefully remove the dry ingredients from the oven. Just a reminder--the mixing bowl will be hot! Use hot pads or oven mitts! (Learned that one the hard way!)
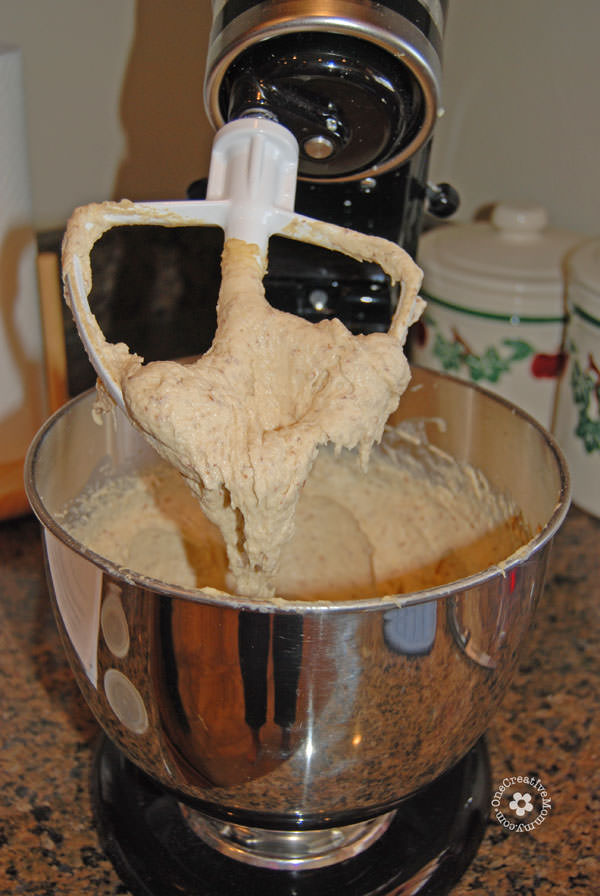
- Add egg mixture, proofed yeast, and 1 cup of warm water to the dry ingredients. Beat with the flat paddle of mixer. Dough should be very thick, but it may be necessary to add up to an additional ¼ cup of water. Beat on high for 5-15 minutes. (I usually do 8 minutes.) The dough will not be stretchy like regular bread dough. It is more like really thick cake batter.
- Pour dough into prepared 10-inch bread pan. Use a wet spatula to smooth the dough and push it into all the corners of the pan. This dough will not settle as it rises and bakes, nor will it "shake down" if you jiggle the pan from side to side. You need to get it completely smoothed and spread out with the spatula. You may need to re-wet the spatula a few times to keep the dough from sticking.
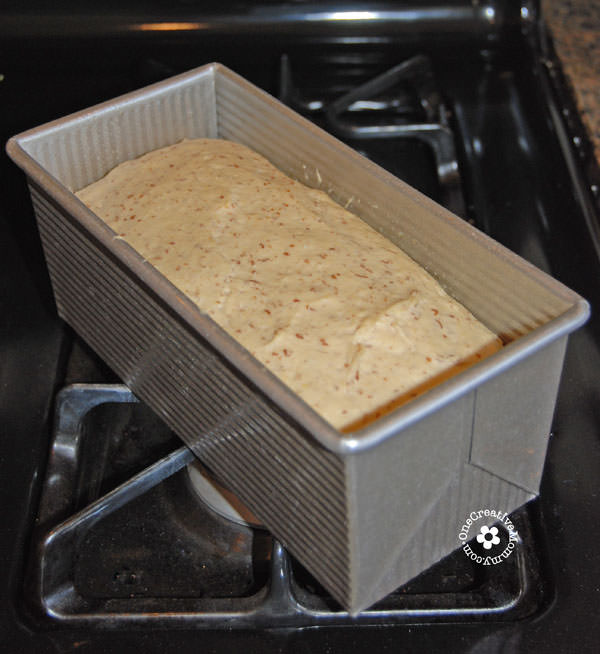
- Place dough in the still-warm oven to rise. The original recipe says this step should take 50-75 minutes. Since I've been using the method I'm sharing with you, my bread has often risen in only 20 minutes. Be sure to check it! Experiment as to how high you want the bread to rise before cooking. I use a special bread pan (I'll link it at the bottom of the post), and I only let my dough rise until it is about an inch from the top of the pan. Remove the bread from the oven, and preheat the oven to 350°. (By the time my oven is ready, my bread has usually risen to the top or above the top of the pan.)
- Replace the bread in the oven on the center rack to bake.
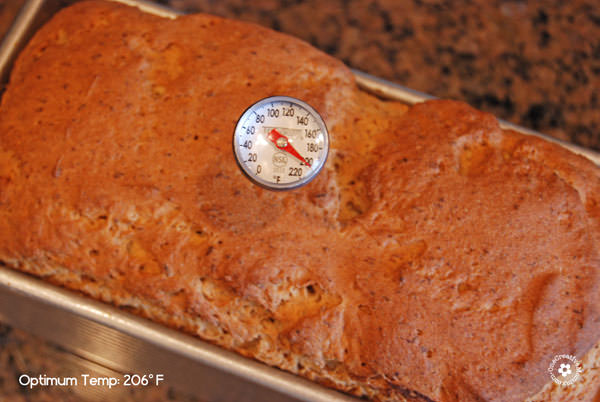
- Bake for 40 minutes or until the internal temperature reaches 206°. (If your bread is not at the correct temperature after 40 minutes, return it to the oven and check it every 5 minutes. Once you get this recipe down, your bread should consistently finish baking after the same amount of time. Unless I alter the recipe, mine always takes 40 minutes. My mom's takes longer. It will depend on your oven and how much water you added in step 9.
Remove bread from the pan and allow it to cool completely on a cooling rack.
Store sliced bread in the fridge or freezer. (I slice mine, and save a few slices in the fridge. The rest, I separate with pieces of waxed paper between the slices, and put them in a freezer bag in the freezer. Then I defrost the slices in the microwave or toaster to serve.)
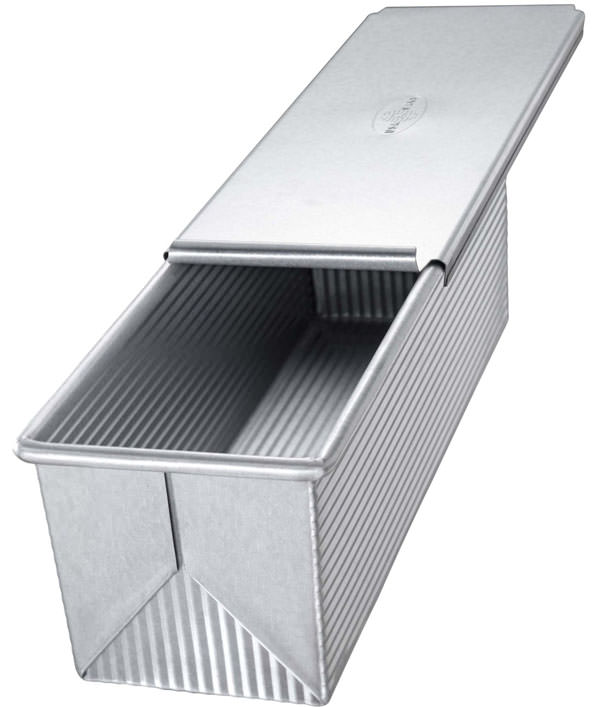
Image courtesy of Amazon.com
The Secret to My Special Bread Shape
If you've baked gluten-free bread before, you are probably wondering how I get my slices to look like real sandwich bread instead of the short squatty pieces you get from a regular bread pan. The secret is my bread pan. I absolutely love it! Gluten-free bread does not raise as high as regular bread. Consequentially, when you use a standard bread pan, your slices are wide and short. To solve that problem, I use the Pulman Loaf Pan.
This type of pan is usually used with the lid (also called a Pan de Mie pan) to create square bread. For gluten-free bread, remove the lid. Because the pan is narrower than a regular bread pan, the bread expands upward, creating a more normal-shaped piece of bread.
How I Keep the Cost of Gluten-Free Bread Low
RELATED: How to Make Your Own Almond Meal
I have one more secret to my gluten-free bread. I keep the cost down by grinding many of my own flours. I use my blendtec blender (linked above), which is a gluten-free cook's best friend! Gluten-free flours are pricey. I grind my own bean flour, brown rice flour, sweet rice flour, and white rice flour. I also grind my own almond meal. That greatly reduces the price for my baking, and I highly recommend it! Plus, I know that my flours are fresh--maintaining a high nutrition content.
The Secret to Quick Gluten Free Bread
My final bread-baking secret. When you think about mixing all the different flours for this bread, it probably sounds like it will take forever -- and it will, the first time. My secret is that I never assemble this bread totally from scratch. I spend a half hour once a month or so and make bread mixes. I combine all the dry ingredients into one ziplock bag per batch (or sometimes I make double batches). I store the bread mixes in the freezer.
When it's time to make bread, I pull out a mix, dump it into my mixing bowl, and put it in the warm oven to warm up. (Step 6 becomes my step 1.) From there, all I have to do is assemble the wet ingredients, and I'm ready to go! Easy peasy.
Thanks for stopping by today. Good luck on your gluten-free journey! You might be interested in some of my other gluten free recipes. Images below are linked.


Kim @ 2justByou
Pinned it! So glad to be a new IG follower. Thanks for joining the linky. =0)
Have a great weekend,
Kim
Heidi Fowler
Thanks so much, Kim. I hope you have a great weekend!
Jessica
I sure wish making gluten free bread wasn't such a pain in the butt! This looks like a great recipe…I'll have to give it a try:)
Heidi Fowler
Check out my tip for making this recipe quickly, Jessica. I make about five bread mixes (just the dry ingredients) at a time, and store them in the freezer. When it's time to make bread, it's super fast!
Ali the Skinny GF Chef
I love your Mom's method tips! I would have never thought to put my flour in the oven. I'm going to do that from now on. Thanks so much!
Heidi Fowler
Isn't it a great tip? I think she found it in the comments on a gluten free blog. If you try it, be ready for your bread to raise a lot quicker than you expect!
Ali the Skinny GF Chef
I did try it and my bread rose so high that it flowed over the sides of the pan! lol.. Still very impressed and will now fill my pans with less dough!
Heidi Fowler
Oh, my goodness, Ali! You could also try shortening the raise time. My original recipe said 50 minutes. I now let it raise 20 minutes, tops. (Sometimes it's ready even quicker.) When the bread is about an inch to an inch-and-a-half below the rim, I heat up the oven and bake it. The fun of gluten-free baking. It's always an experiment! I wonder what will work better . . . less dough or less raise time. That would be cool if your could get another small loaf out of your recipe!
Jeanine
This loaf looks amazing, Heidi! Love that it's full of healthy flours, not just starches. :)
Heidi Fowler
Thanks, Jeanine. That's another reason I like this one. I have a good recipe that is mostly white rice and starch, but this one feels more like a nice, healthy multigrain bread. (Kind of like white vs wheat bread!)
Kristen
You had so many great tips in this post! I grind my own flours, too, but the warming of the flours and the narrow bread pan are great things to know!!
Heidi Fowler
Thanks, Kristin. I love my bread pan. My old bread used to look so strange. My daughter like that her bread looks normal.
Sandi
What a beautiful loaf of bread. You make it look so easy in your post.
Heidi Fowler
Thanks, Sandi. Gluten-free baking can be tricky at first, but once you find a bread recipe you like, using a bread mix really does make it easy!
ang
I love those recipes you can always depend on! Thanks for sharing this, Heidi!
My readers love GF recipes and I'm planning to share this on FB/G+ next week :)
ang
Heidi Fowler
Thanks so much, Ang! It's a great recipe. I hope your readers like it, too.
Cindy (Vegetarian Mamma)
This looks great, I need a no fail bread!
Heidi Fowler
Thanks, Cindy. I've goofed up the process a few times on this bread, but it has still tasted great.
GiGi Eats
Wow this bread looks phenomenal!! It looks like something that could and SHOULD be sold in grocery stores :)
Heidi Fowler
Wouldn't it be nice if the GF bread in grocery stores didn't taste like cardboard? Thanks GiGi!
Elise @frugalfarmwife.com
This bread looks awesome! I love the flavor millet flour gives bread products. I also grind my own flour using a Blendtec grinder. :)
Heidi Fowler
Thanks, Elise. Isn't the blendtec great? It saves me so much money!
Cynthia@WhatAGirlEats
I can't wait to try this bread, it looks delicious!
Heidi Fowler
I hope you like it, Cynthia! Thanks for stopping by and leaving a comment.
Raia
Great recipe, Heidi! It is hard to find good, easy, gluten-free breads. I'm definitely going to keep this in mind! Thanks so much for sharing it at Savoring Saturdays, I'm going to feature it on this weekend's link-up. Hope you come share with us again!
Heidi Fowler
Thanks so much, Raia! I'll be sure to pop back over. You made my day.
Raia
:)
Cindy (Vegetarian Mamma)
Thanks for linking up at our Gluten Free Fridays party! I have tweeted and pinned your entry to our Gluten Free Fridays board on Pinterest! :) I can't wait to see what you share this week!
Cindy from vegetarianmamma.com
Heidi Fowler
Thanks so much, Cindy. I always love to visit your party.
Lauranne Harvey
Hi, I really want to try this recipe, however I noticed there is one item , the flax seed meal, there is no amount, it states (1/4 flax seed meal) but not what, a cup, a tablespoon, a teaspoon...
Heidi
Hi, Lauranne. Thank you so much for letting me know about that mistake. The correct measurement for the flax seed meal is 1/4 cup. I hope you enjoy the bread.