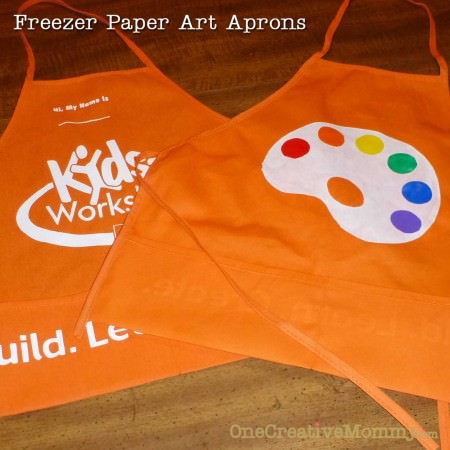
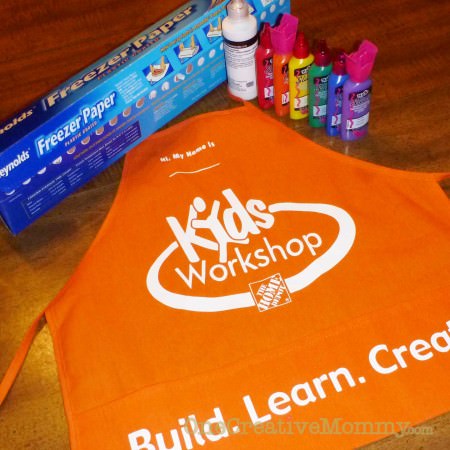
Get ready to turn free home improvement store aprons into awesome art aprons! Here's what you need:
- An apron (pick one up at your local Home Depot when they host their Saturday Kids Workshop)
- Freezer paper (I found mine at Walmart)
- Tulip Fabric Paint in assorted colors (You can use other brands. I like Tulip.)
- Small and large foam brushes
- Art pallet pattern--Free download from this link!
Let's get started!
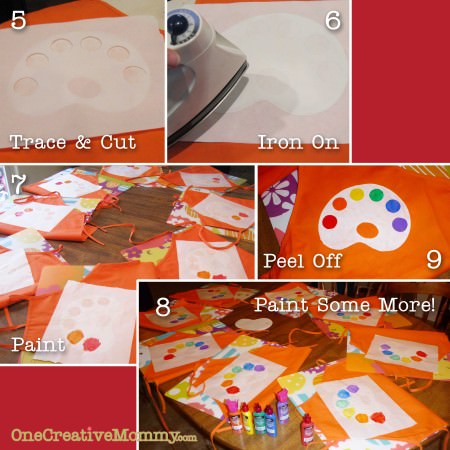
1. Trace pallet pattern onto freezer paper. Cut it out--saving the outside edge (frame) and oval for ironing. (I took patterns to cut with me on a road trip. I accidentally threw away the frames and kept the center piece! I had to redo all of them! Did I mention that I can be a bit scatterbrained?)
2. Center the frame where you'd like it on the back of the apron, and iron it on (with iron at hottest setting). (If you are like me, remembering where you keep the iron may be the most difficult part of this project!) Add the oval and iron the frame again, making sure all of the edges are firmly attached to the fabric.
3. Using a large foam brush and white fabric paint, sponge on the paint from the outside edges in. (This will help keep the paint from seeping under the frame.) *I decided to let my kids help with this step, so the edges weren't perfectly crisp, but the kids had fun! Allow the paint to dry and continue to add coats of paint until you get adequate coverage. I used 3 coats.
4. (This is the fun part!) Peel off the freezer paper to reveal your design.
Mom Tip
*When I made the second batch of aprons, I discovered a tip to let the kids help--but still get crisp edges. I did the first layer of paint on all the aprons, then I let the kids paint the second and third coats. They turned out much better, and the kids still got to paint. (After the first coat, I also re-ironed down the freezer paper--just to make sure the edges were laying flat.)
5. Print the holes pattern onto cardstock and cut out the holes. Trace the holes onto a piece of freezer paper large enough to cover the painted pallet. Lay the new pattern on top of the painted pallet.
6. Place another piece of freezer paper on top (to keep the iron from sticking to the paint), and iron on the holes pattern. It's very important the paper surrounding the holes is firmly attached to the fabric. Peel off the extra layer of freezer paper.
7. Using a small foam brush and fabric paint, paint over each hole. (If you are making several aprons, paint one color at a time.)
8. Allow your first coat of paint to dry, and paint two or more additional coats (depending on how dark you want the colors).
9. Allow the paint to dry, and peel off the freezer paper to reveal your completed design. (Did I mention that that's my favorite part?)
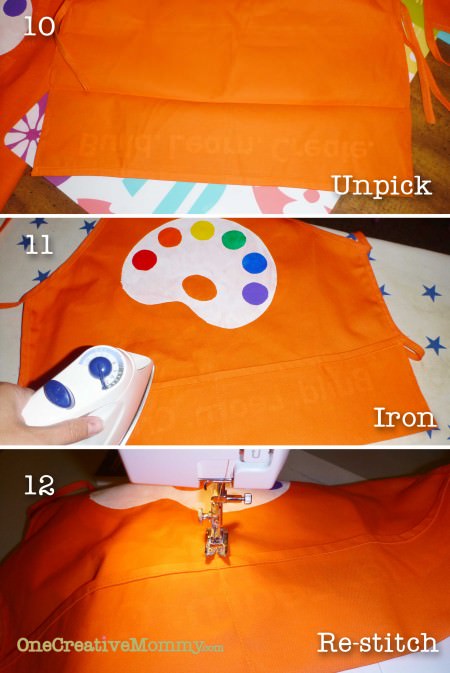
10. Using a seam ripper, unpick the vertical stitching in the center and the side seams along the edges of the pocket of the apron. (Don't unpick the seam across the top of the pocket.)
11. Turn the pocket inside out (so that it now is on the same side as your design), and iron it flat.
12. Restitch the pocket side and center seams.
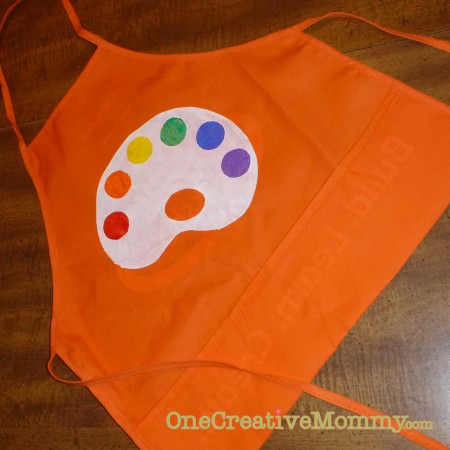
Your art aprons are ready!!! Now let your kids get messy!
I did try to avoid turning the apron inside-out by making the pattern large enough to cover the logo on the front of the apron. In order to cover the thick silk-screen design, it would've taken several coats and almost a whole bottle of paint! That's why I opted for the smaller design on the back. The smaller design also looked better.
This is the first of many projects for Boo's art party this weekend. Stay tuned for more projects.
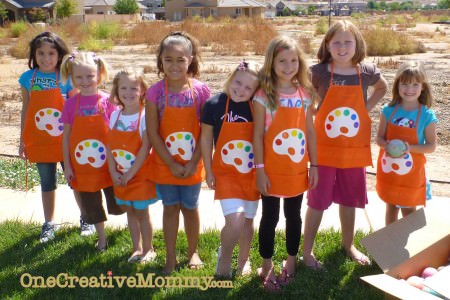
*Post-Party Update: The aprons were a hit! (Yes, I know the empty weed-filled field behind my house is lovely. Maybe someday someone will build a house there. I can only dream!)
Want to see my other art party posts so far? (Images are linked.)

If you enjoy this idea, please "like," "Pin," or "+1" so that others can join the fun! Thanks!






Kathie
What a fun tutorial! My girls would love these to go with their art easel! Thanks for linking up to Gettin' Krafty With It!
Steph @ Crafting in the Rain
Super cute--and that reminds me I should take my kids to those workshops some time now that they're old enough :)
Christine
The aprons turned out GREAT!!! I did some painting on bags yesterday!! Isn't it fun to work with the kiddies?
Thanks so much for sharing this at The DIY Dreamer.. From Dream To Reality!
Elise
Love this! THis is such a cute idea to make. I'm sure this will be worn over and over again.
http://www.iheartpears.blogspot.com
Nichi - The Mandatory Mooch
This is so creative. It would be great for my little artists. I'd love to have you link this up to Tasty Thursdays on The Mandatory Mooch. http://mandatorymooch.blogspot.com/2012/08/tasty-thursdays-2.html
Thanks, Nichi
Donna Wilkes
Came over from Happy Hour. Super cute apron. Forget the kids - I want one!
Brittany @ Crafty Mischief
These are too cute! I have a little artist who would love one! Thanks for the tutorial!
Ambreen
So creative, these aprons look great!
Charlene@APinchofJoy
Great idea and nicely done tutorial! Thanks so much for sharing on Busy Monday!
Sharon @ Elizabeth & Co.
Super cute! And what a great tutorial!
Susie @Bowdabra
Congrats, Heidi! Your awesome project is being feature on our Bowdabra Blog today! Your project was a top crafty pick by our Bowdabra Designers! We are giving you a shout out on Faebook, Twitter and Pinterest today!
http://bowdabrablog.com/2012/08/10/feature-friday-bowdabra-top-crafty-showcase-picks-9/#
Stop back over on Saturday-Thursday and link up more of your awesome ideas!
Susie at Bowdabra
Joyce
You have such a talent for streamlining projects and making them very easy to make. These aprons and the paint can pinata are great designs!