
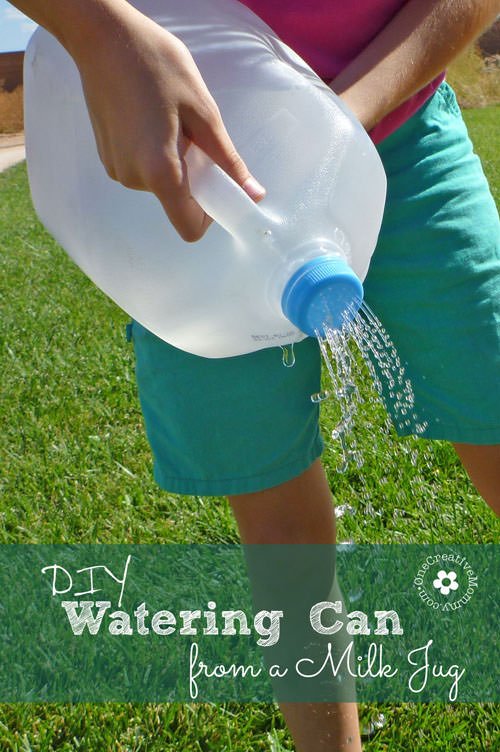
My garden has a drip line for watering, but sometimes I really need a watering can. (Like when I have planted new seeds that have to be kept wet until they sprout.) I don't have one for a very simple reason: I hate spending money! When I saw this project on It's Overflowing, I knew I had found my free solution! (I saw the project on one blog, but the idea came from another, so I decided to credit them both.)
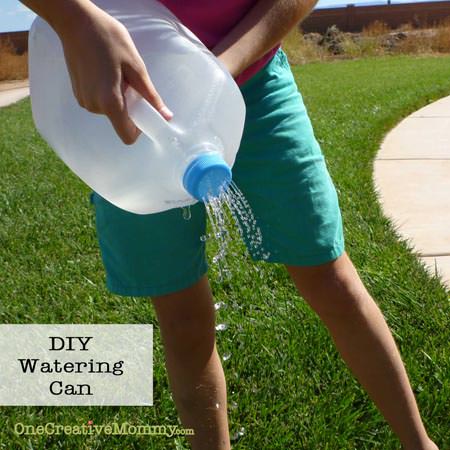
Here's a quick tutorial to create a watering can from a milk jug: All you need is a milk jug, a large needle, and a cigarette lighter. Use the lighter to heat the needle (be sure you have something to protect your fingers from the hot needle), and then poke it though the lid (from the inside out). Heat the needle again for each new hole.
This project is super easy, and I recycled! Woo-hoo!
*I actually did it wrong the first time--just so that I could tell you what not to do. When I originally saw this idea, I did not read the directions. I just grabbed a nail, hammered some holes in the lid, and went out to water the garden. The holes were way too big, so the watering can was a little too powerful. Stick to a needle!
Want more gardening ideas? Check out these:

Gardening for Dummies (Tips from a Gardening Dummy!)
Check out all of my ideas for the garden here!


Aimee - It's Overflowing
Thanks for the feature in your post! So sweet! Your pic and tutorial are PERFECT! XO, Aimee
Ambreen
What a cool idea, thanks Heidi for sharing this wonderful tutorial!
Katie Drane
What a brilliant idea! I can't believe I never thought to do this. Thanks so much for posting on Terrific Tuesdays link party!
Katie
http://www.funhomethings.com
Foster
What a great idea. My watering can just broke. Perfect timing!
Christina at I Gotta Create!
Woohoo is RIGHT! Bravo to you for this easy and great recycle!! ( which happens to be one of my passions). Thanks so much for linking up at I Gotta Create! <3 Christina
Eileen
Love it. I'm visiting from Thursday Favorite Things. Stop by and read about my magic shed if you get a chance. :) I'm on Pinterest under ThePinkHome, if you want to check out my boards. :)
Jessi @ Practically Functional
Great idea! We only buy milk in cartons, but maybe I'll get a gallon at some point so I can try it too! Thanks for sharing at The Fun In Functional!
Nicole@Show Off Friday
That is totally brilliant and so simple!
Kathie
I had seen this on Pinterest but couldn't figure out how I would get the holes right. Thanks for sharing how you did it with a needle!
Beja {Howdy-Honey}
I love a FREE repurpose project. Great idea! Thanks for sharing!
Dawn
Awesome, awesome, awesome idea!! Thanks for sharing this one.
Sharon @ Elizabeth & Co.
What a clever idea! And thrifty too!
Jamie @ Love Bakes Good Cakes
What a neat idea. My younger kiddos would love to help with the watering :) Thank you for sharing at All My Bloggy Friends last week. I can't wait to see what you share this tomorrow!
K @ Claiming Our Space
This is a great reuse project. Thanks for sharing on Tout It Tuesday. Hope to see you tomorrow!
Debi @ Adorned From Above
This is such a great idea. How easy is this? Thank you so much for linking with my Wednesday Adorned From Above Blog Hop last week. I have listed your posting as one of my featured links for this week.
http://www.adornedfromabove.com
Grab the featured blogger button or just add a link back to the my blog.
Thank you again for participating, and the link party is opened for this week.
Sincerely,
Debi Bolocofsky
http://www.adornedfromabove.com
Christina
I love this! I did this myself this past summer and it worked wonders for me! :)
christinasemporium.blogspot.com
Nichi - The Mandatory Mooch
Very clever!! Thanks for linking up to Tasty Thursdays on The Mandatory Mooch. I hope you will link up again this week. The party will be live tonight. http://www.mandatorymooch.blogspot.com
Thanks, Nichi
Jill
What a nice simple way to make a watering can!
Thanks for linking to a Round Tuit!
Hope you have a fabulous week!
Jill @ Creating my way to Success
http://www.jembellish.blogspot.com/
Kathryn Griffin
Smarty pants! Great idea! Thank you for sharing this at my Make it Pretty Monday party at The Dedicated House. Hope to see your prettiness again on Monday. Toodles, Kathryn @TheDedicatedHouse
Jennifer Ressmann
this is great! I love a good recycling project!
Randomly Fascinated
Great idea!
Thanks for linking up to Friday Fascinations! You have been featured, come over and get a button! http://domesticrandomness.blogspot.com/2012/09/friday-fascinations-4-and-5-feature.html
Tami Pederson
I Love It! I hate spending money too. Especially on watering cans that don't work. I'm definitely going to try this & I'm pinning it too :)
Juan
I did this before and adjusted it to my needs. To cover a wider area I poked several holes (to the cap) with the needle at different angles (do not twist the needle), it is a trial and error, and it worked. For a wider area I poked the holes (the same way) but doing it at the jug neck. Do not follow the jug curvature, do a straight line as far as you consider appropriate to your needs. Use the poked cap and jug at the same time, or replace the cap. If you need to use either one in specific places just turn the jug to have the holes on the neck on top, this way you use the cap to water the plants. Or build two for specific job. The higher you hold the jug, the wider the spry area. Try two litters soda jug for indoors since it provides smaller spray and weight. Plus hold this one upside down, water will stop flowing and a drip may start. Use it to feed plants slowly until needed again. It is trial and error, again. I love this idea, I am glad you are spreading it .
Calculadora Gestacional
So cool! and it's an idea that promotes recycling and sustainability.
Kate
Love this idea of a DIY watering can. I hope you don't mond me sharing it on my blog. Great website too. you have a lot of great ideas.
Nicole
Such a great idea! I want to have a garden so bad and I know my daughter would love it and be asking all the time "momma whats that?". Now she can help me water :) I'm glad I found you on the One Project at a Time Link Party.
Melhor Franquia
I'm really liking you articles, they're all so interesting and smart, how could i never thought about using a milk jug like this.