I shared this fun classic toy tutorial on Juggling Act Mama last summer, and today I'm bringing it to One Creative Mommy. Grab some tin cans and rope, and let's get building some Tin Can Stilts! I love that this toy costs only a few dollars, but the whole neighborhood will be lining up to give them a try. It only took one trip around our street before kids were marching behind my daughter like she was the Pied Piper!
Tin Can Stilts Tutorial
RELATED: Duck Tape Scooter Makeover, 40+ Projects to Make with Your Kids
These stilts are simple to make, and they use materials that you probably have around the house already. Check your cupboards, because it's time to recycle!
Materials:
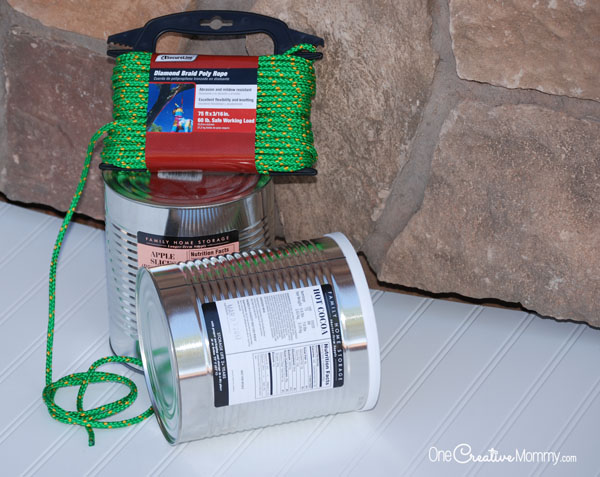
- 2 clean and empty tin cans (I used cans from my food storage. Yes, my family drinks a lot of hot cocoa! Coffee cans and family-sized soup cans work well for this project, too. The larger the can, the bigger the kid that will be able to use the stilts.)
- Rope (I purchased 75 feet of rope at Walmart for around $6 because I needed it for some other projects. You can use old jump ropes if you have them. The length you need depends on the height of the tallest person who will use the stilts. I used two lengths of rope that were about 60 inches each. More on this later.)
- Two C clamps (My hubby has the coolest C Clamps. You can open and close them with one hand! I love them! I'll share the link to buy them at the end of the post.)
- A piece of scrap wood
- A power drill with a metal drill bit slightly larger than the diameter of your rope
- A hammer and a sharp nail
- A metal file
Directions:
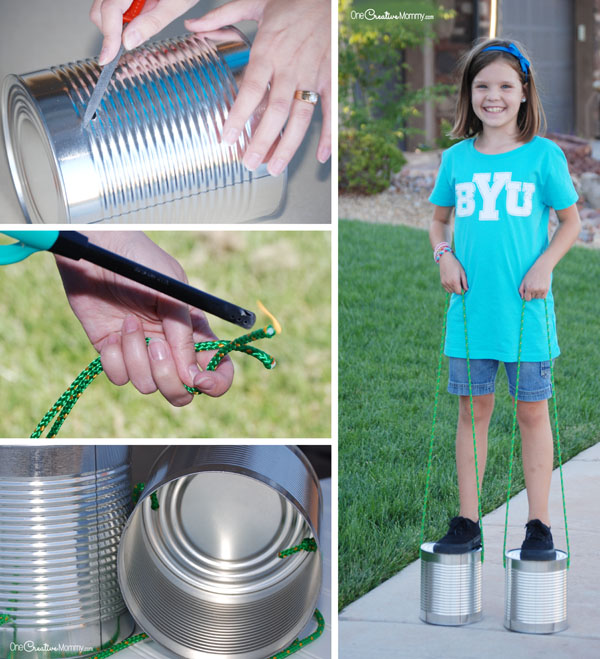
- Wash the inside of your cans and remove the labels. Be extra careful with the edge where the lid was removed!
- Turn your cans so that the closed end is facing up. You will be drilling holes about an inch and a half below the closed end of the can.
- Set up your can like you see below. Use one C clamp to pin the scrap wood to the table and one C clamp to pin the can to the scrap wood. The scrap wood does not go all the way into the end of the can. When you drill into the can, you should not also be drilling into the wood. (If you do, it’s okay. It just makes it a little bit harder.) I know you are all jealous of the card table I am using as my work station!
- Before you begin drilling, use a nail and a hammer or mallet to make a small indentation where you plan to drill your hole. It will help keep the drill bit from slipping when you begin to drill. Your holes should be about 1 ½ inches from the closed end of the can and should be equidistant from each other. You need one hole on each side of the can.
- Drill two holes in each can.
- Use a metal file to smooth the rough edges around the drill holes. These cans will be handled by kids, so don’t leave any sharp edges. File the rough edges on the inside and the outside of the can. Check the edge where the lid of the can was removed, and file any rough edges there as well. If you can’t get it as smooth as you would like, try covering that inside edge with duck tape for extra protection.
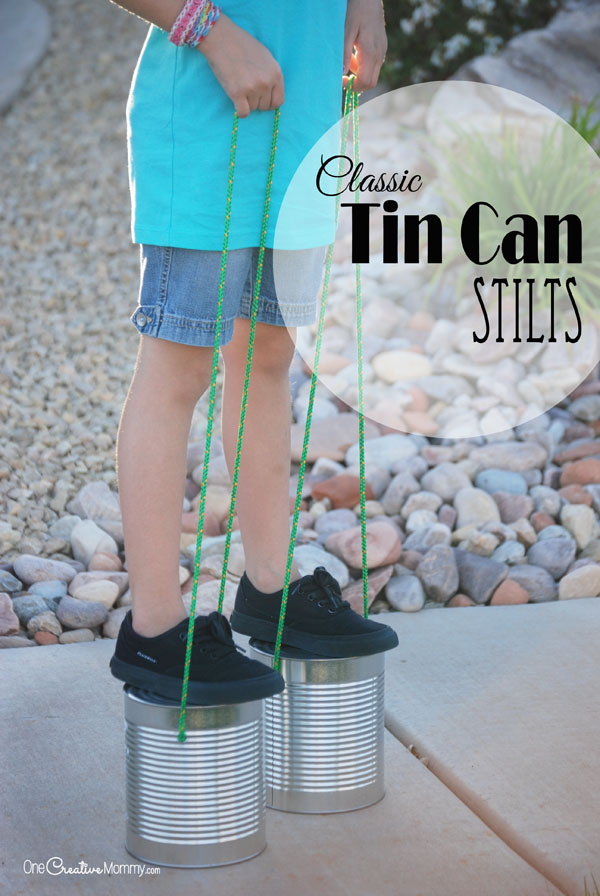
- To decide the length of rope you will need, ask your tallest child to stand on a can with his arms at his sides. The rope should be long enough to go from the hole, to his hand (and across the palm), and then back into the other hole. Add extra length for two knots. Cut two lengths of rope (one for each can).
- If your rope is made of nylon, use a lighter to burn the ends of the rope so that they don’t fray. (Ask any boy scout about that one. It’s the Tenderfoot 4A requirement. If you have a scout, here’s a good time for him to use his skills!)
- Thread one end of the rope into the can from the outside. Tie a knot inside the can. Thread the other end of the rope through the hole in the opposite side of the can and tie another knot. (I used granny knots, and they are holding up just fine.)
- Repeat with your second can.
That’s it! It's a really quick and easy project. Feel free to decorate your cans. I opted to skip that step (see my note about simplifying at the end of the post). Sometimes I go a bit overboard with my projects when the kids are just as happy with simple. The simpler the project, the more time the kids have to actually play with it!
So, does this toy bring back memories? Did you play on tin can stilts when you were a kid? I hope you have a great time sharing the tradition with your own kids. (Go ahead. Try them yourself! Getting silly with your kids makes everything more fun!)
Before you go, I just have to add a little note about simplifying. I did not go all out and overboard with this project (and I'm actually quite proud of myself!). Could I have painted the cans to make them look all cute and colorful? Yes. Did I have the time or supplies to do that? No. Will my kids love the tin can stilts just as much when they are just plain old boring cans? Absolutely!
I'm learning (the hard and slow way) that my kids don't need everything to be fancy. Often the fancy is just for me. This time, I opted to forego the fancy and keep it simple, and I'm so glad I did.
So, all you moms out there who like to do crafty things for your kids . . . I'm giving you permission to back off a little! Every little thing does not have to be perfect. Your kids are happy with or without the extra work, so go ahead and do your next project the easy way. What will you do with all that extra time? Have a little fun with your family, of course!
And these do look like fun, don't they? I stood in line right with the kids and took my turn clomping around our street!
You might be interested in some of the tools I used for this project. My favorite are the C clamps that my hubby bought for our garage makeover. You can open and close them with one hand! Seriously, they're right up there with my Kreg Jig on my list of coolest tools! Love them!
Looking for more Crafts for Kids? Check out some of these. Images below are linked. Click on the image to visit the post
Thanks for stopping by today. Come back soon!






Melanie (The Party Suite at Bellenza)
Such a fun idea for kids! Great for relieving summertime boredom!
Heidi
Thanks, Melanie. They're a lot of fun! It's fun to hear the clomp, clomping on the sidewalk.
Karen
I LOVED these when I was little. Definitely making some for my kiddoes. Thanks for the memories :)
Heidi
You're welcome, Karen. They sure are a lot cheaper than the toys my kids want me to buy for them!
Selina (My Kid Needs That)
Great share Heidi and an absolute all time classic!
Sometimes the most simple and cost effective toys bring the most enjoyment!
Going to put the iPad away for a weekend and try this out with my little ones!
Heidi
Have fun, Selina! It really is a fun toy.