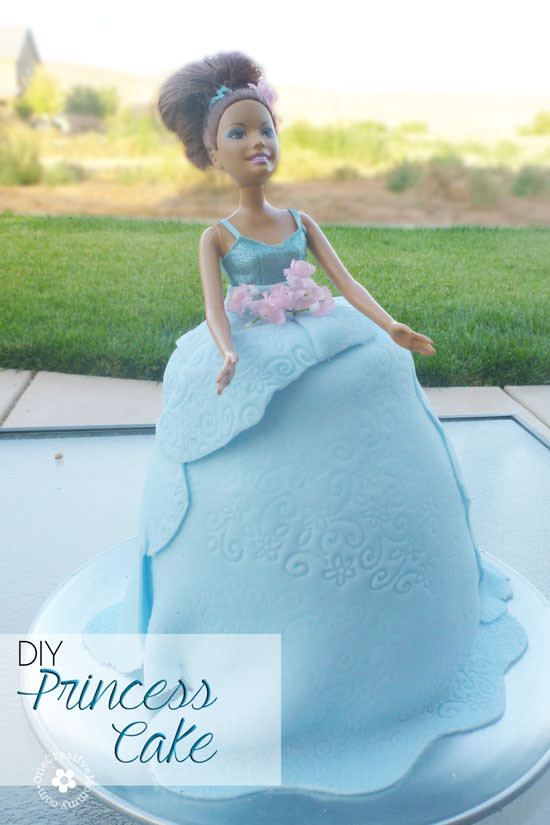
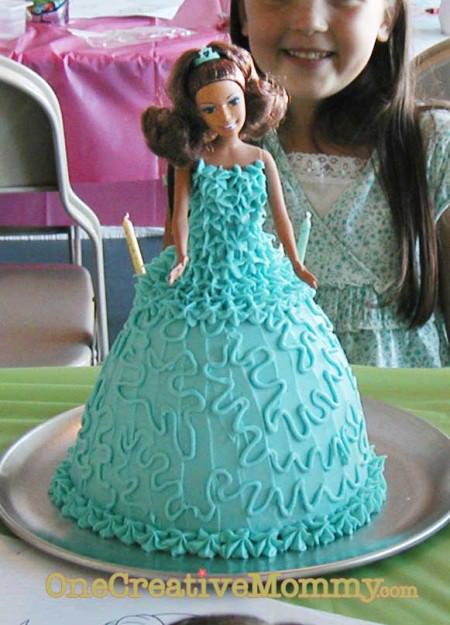
Four years ago, I attempted my first princess cake (see it here). I didn't have a special mold, so I filled a glass measuring cup with 1 ½ cake mixes and put it in the oven to bake. It took forever to bake the cake, and it turned out dense and kinda inedible. This year, I again didn't have a mold, but I did have an idea how to fix the problem--and I tried fondant. Here's this year's fondant princess cake cake and a tutorial.
*A reader recently commented that this cake would be perfect for the current "Frozen" party trend. I couldn't agree more! Choose a blond barbie, and you've got a perfect Frozen Party Elsa Cake!
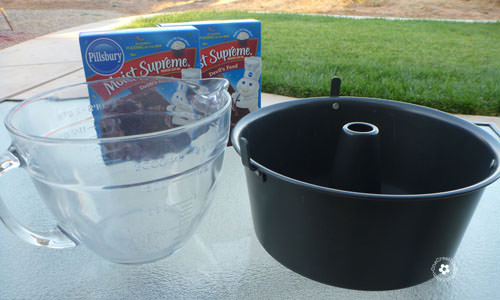
To bake the skirt, you need two cake mixes, a large glass measuring cup or bowl, the inside piece of an angel food cake pan, and one round cake pan.
*Please remember that this was an experiment. I had no idea if it would work, but was very pleased with the result.
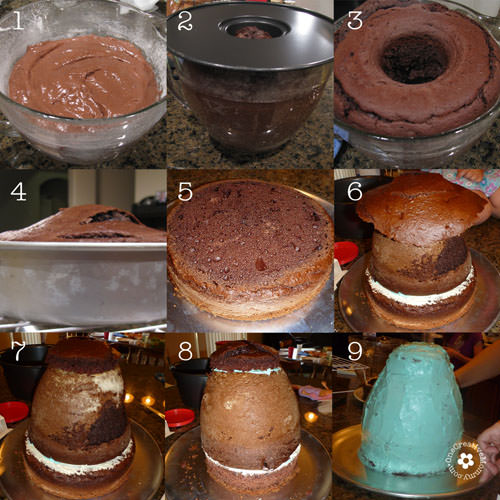
To prepare the skirt:
- Prepare the batter for two cake mixes according to directions on the box. (I used Pillsbury Moist Supreme Devils Food Cake, and it turned out very moist and yummy. I used Duncan Hines for the Oreo cupcakes, and the Pillsbury tasted much better.) (1) Lightly grease and flour glass bowl and fill to about ⅔ full. Cook the remainder of the batter in a greased and floured round cake pan.
- Lightly grease and flour the inside piece of the angel food cake pan and press it into the batter in the glass bowl. (2) (The post from the angel food cake pan will cook the center of the cake and provide you with a convenient hole for the barbie doll. I was worried the cake wouldn't cook with a top on it, but I decided that since you can cook a cake in a dutch oven, there was a pretty good chance this would work, too.) The batter will come up through the hole in the post, and that's okay.
- Bake the round and bowl cakes according to the instructions on your mix and then keep adding time until anything long enough to stab the center of the cake comes out clean. (I used a wooden skewer for the bowl cake.) For the bowl, I cooked according to the time for a bundt cake and had to add at least fifteen to twenty minutes to the time. (3&4)
- Cool cakes according to package directions. (Usually for about 15 minutes in the pan and then completely cool on a rack.) You can eat the extra cake in the center of the post.
- Level both cakes. (5) You need to save the top from the round cake, but you can nibble on the piece you cut off the bowl cake all you want! I don't have a cake leveler, so I had to get creative: Have someone hold the cake still for you. Stretch a long thread out tightly and (using a left to right sawing motion) slowly slice off the top of each cake. (It's kind of like using a wire to slice cheese.) It is surprisingly easy. Both my cuts worked on the first try. (Sorry I was unable to take a photo of this step.)
- Using butter cream icing, frost the top of the round cake and carefully stack the bowl cake on top. Frost the top of the bowl cake and place the cut off piece from the round cake on top of that. (6) (I forgot to tint the frosting before I did this step, but it wasn't a big deal.)
- Trim the top piece using a sharp knife. (7)
- Optional--(8) Trim the round cake to the same diameter as the bowl cake. I did this, but looking back, I think it would have been better balanced if there was a ridge at the bottom of the skirt. Next time I might not trim the bottom cake. It's up to you.
- Tint your butter cream frosting to match your fondant, and frost the entire cake. (9)
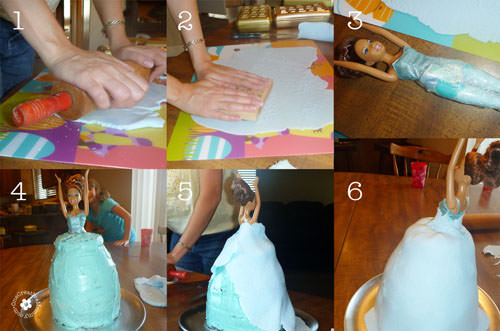
Now you are ready for the fondant skirt. Since I have never used fondant and know almost nothing about it, I bought pre-tinted rolled fondant and followed the directions on the package. I had less than an hour to decorate/experiment, so I definitely wasn't worried about perfection!
- I used a plastic place mat and a regular rolling pin. (You would normally use a special mat and a rolling pin with rounded edges, but since the skirt doesn't need to be perfectly smooth, my tools worked just fine. I rolled out half the fondant at a time and made the skirt in two large pieces.
- After carefully cleaning and drying a rarely-used stamp, I pressed it into the dough to make a light pattern on the skirt.
- I wrapped Barbie's legs and torso in saran wrap to keep her dress clean, and cut a hole in the top of the cake (I only had to cut about two inches before I came to the hole from the pan).
- When I slipped Barbie into the skirt, my hole was a little too small. That's why to very top of the cake looks pushed out a little bit. It didn't matter.
- I carefully wrapped the fondant around the front of the skirt (not worrying about much except covering the front of the skirt).
- I carefully wrapped the second piece of fondant around the skirt from the back.
- (For final details see image below.) Using a sharp knife, I trimmed the sides of the top piece of fondant to scallop down the sides of the dress. I trimmed the bottom in a wave and didn't worry at all about the one spot on the left front where the skirt wasn't as long as the rest.
- The top of the skirt was a little messy, so I cut a few random pieces to drape over it and used a long rectangle like a ribbon around her waist. I tucked in silk flowers to hide my mistakes.
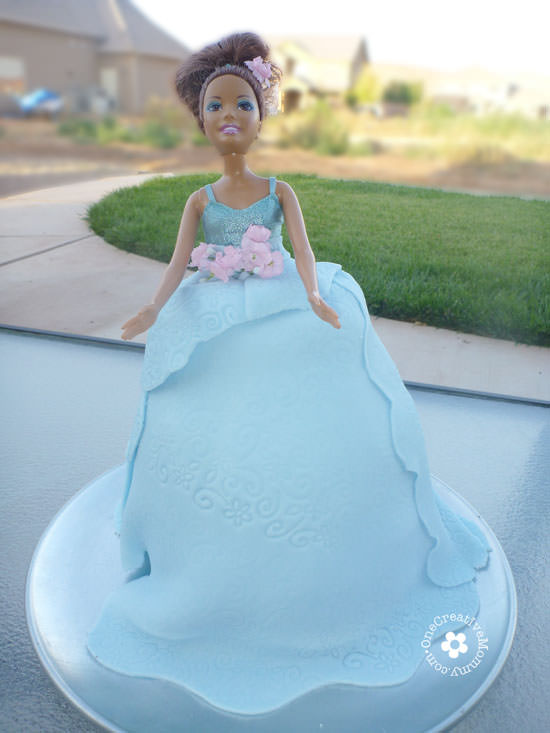
So, what's the verdict? Was the fondant easier than piping frosting on my first princess skirt? Definitely! And the best part--the cake actually tasted yummy instead of like cardboard! (The secret is the post in the center of the baking cake.)
I'd love to know if this works for you. Send me pictures, and I might just feature them!
If you would prefer to try the frosted princess skirt, I'll do my best to give directions here.
Later this week, I'll be adding more ideas from Lu's Princess Birthday party and a new Division Don't Eat Pete project. Be sure to check back!
(Thanks Kelly for sharing your angel food cake pan and Bree for the stacking idea!)
Thanks for stopping by! While you're here, be sure to check out some of my other posts. (Images below are linked.)




Buffi Neal
How cute !
New follower from the Blog Hop
-Buffi
My Wonderfully Dysfunctional Blog
Misty
Thanks so much for linking up to TA-DA TUESDAY! What a great project! If you haven’t already, I’d be delighted if you’d follow back : ) blessings!
~Misty
413 Sparrow Lane
Trish - Mom On Timeout
Turned out beautifully! I'm still too chicken to try fondant so kudos to you :) Thanks so much for sharing at Mom On Timeout!
Miranda McCallister
With Frozen craze going on this would be perfect for an Elsa cake.