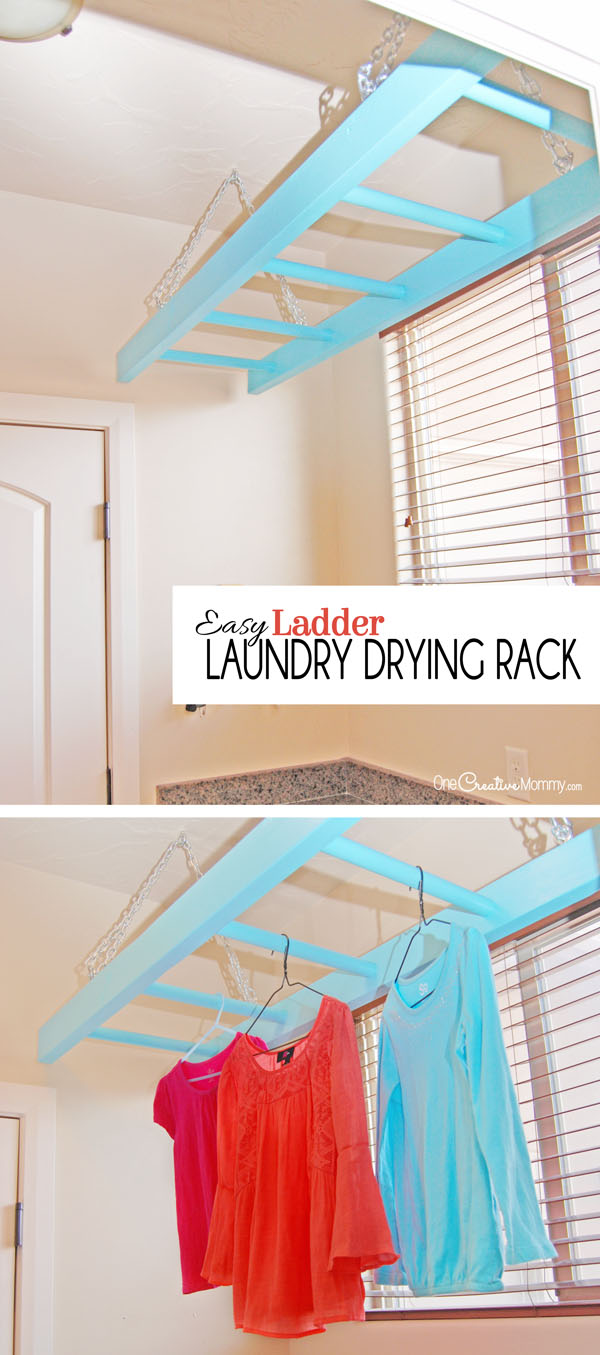
Today is a pretty exciting day at my house. Today the days of wet laundry strewn around the house every Saturday come to an end! Today is the day that I finally get my laundry drying rack. Yippee! (I've wanted to do this for years.)
RELATED: Desk Chair Makeover, DIY Family Computer Station, DIY Bunk Bed Bookshelves
Many people could probably hang a few hooks, and that would be enough for their drying needs. Most people could hang a shower bar, and that would work, too. A few hooks would not cover it for me. I hate it when clothes shrink, so I air dry shirts for almost the entire family. That means lots of wet clothes, every week. As for the shower bar? It would work, but I want something a little more fun.
I've been wanting to make this since I first saw it on Little Lucy Lu several years ago. She made hers from an antique ladder--the kind with round rungs. Well, guess what? You have to be really lucky to come across a ladder with round rungs. I'm not that lucky, so I had to figure out how to make my own. Guess what? It's super easy!
The length of the materials you will need depends on the length of the space you're trying to fill. I created a 5' ladder, so I'll give you measurements that match a 5' ladder. Adjust the measurements to match your space.
Materials:
- 1 - 2" x 4" x 10' length of wood (Cut in half so that you have two 5' lengths.)
- 2 - 4' x 1 ¼" wooden dowels (Each cut into 3 - 16" pieces) For a 5' ladder, you will have one extra piece when you are done.
- 1 - 1 ¼" Shank Forstner drill bit (This bit will drill out the holes for the dowels.)
- 6 - 2 ⅞" screw eyes
- 4 - ⅛" quick links or carabiners
- 2 - lengths of chain - The length will vary depending on how low or high you choose to hang your ladder. Make sure to choose a link size that fits inside your screw eyes and quick links.
- Wood glue
Ready to get started? Here we go! You're not going to believe how easy it is to make this hanging ladder laundry drying rack!
Directions:
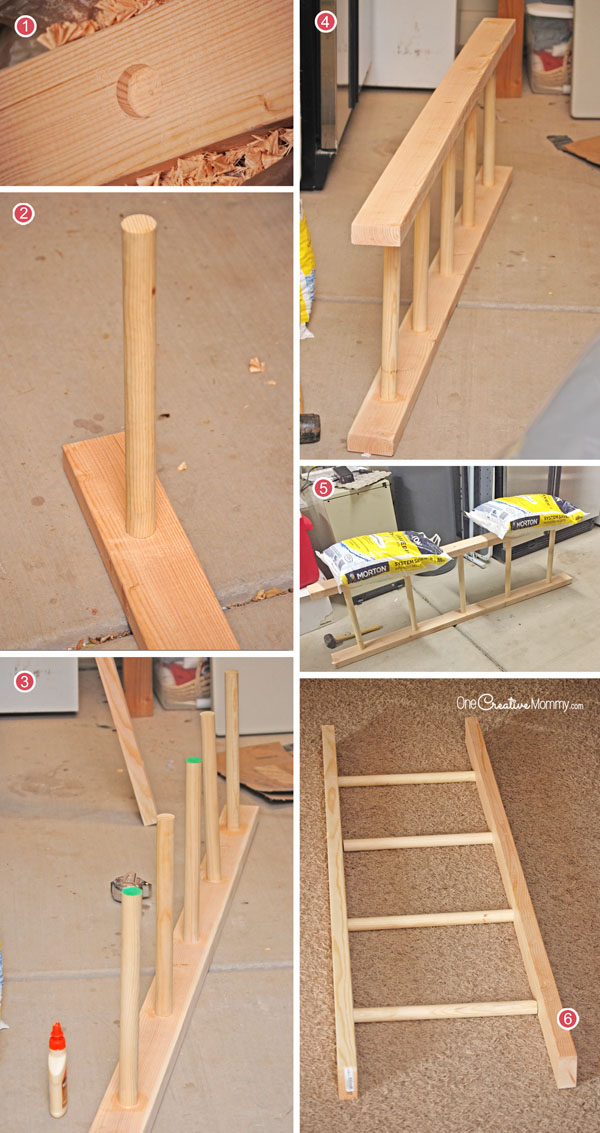
- Lay out your ladder, and arrange the dowels/ladder rungs in the spacing you like. (Ladder rungs are usually about 1 foot apart. That is how I made mine. You also want to pay attention to how close your rungs will be to the end of the ladder.) Carefully mark the placement of your dowels with a pencil. Mark the placement of the center of each dowel. The placement of the holes should match on both lengths of wood. (This is probably the most time-consuming part of the project.)
- Using a 1 ¼" shank forstner drill bit, drill out the holes for each ladder rung. (Thanks to the guy at Lowe's who helped me figure out which drill bit to buy.)
The drilling isn't as hard as it looks, but it does take a steady hand to keep the drill straight. My hubby did the drilling, and I just tried it out for fun on some scrap wood. I had a hard time keeping the drill straight. If you are a novice like me, plan to practice on some scrap wood first.
- Follow the directions on your wood glue for gluing the dowels into the holes on one side of the ladder.
- Lay the second side of the ladder (the one you have not glued yet) on the ground. Place glue in the holes and glue on the ends of the dowels sticking out of the first side of the ladder. Invert side one and push the dowels into the holes in side two.
- Lay the ladder down and measure from corner to corner to make sure it is square. Adjust as necessary. (You can use a level, too.)
- Once you're sure you've got everything in the right place, stand the ladder on one side and place something heavy on top while it dries. (I used salt bags from our water softener.)
Once you're drying time is done, you're done! Can you believe how easy that was? Since I totally made this up from scratch, I was pretty shocked.
Go sand and paint your project, then come back to find out how to hang it. See you back in a little while! I painted mine Rapids by Valspar (the same color I painted these DIY Storage Lockers), but now I'm wondering if I should switch to a nice lemon yellow. Hmm. Maybe I'll change it up in a year or so.
Done painting already? Here we go!
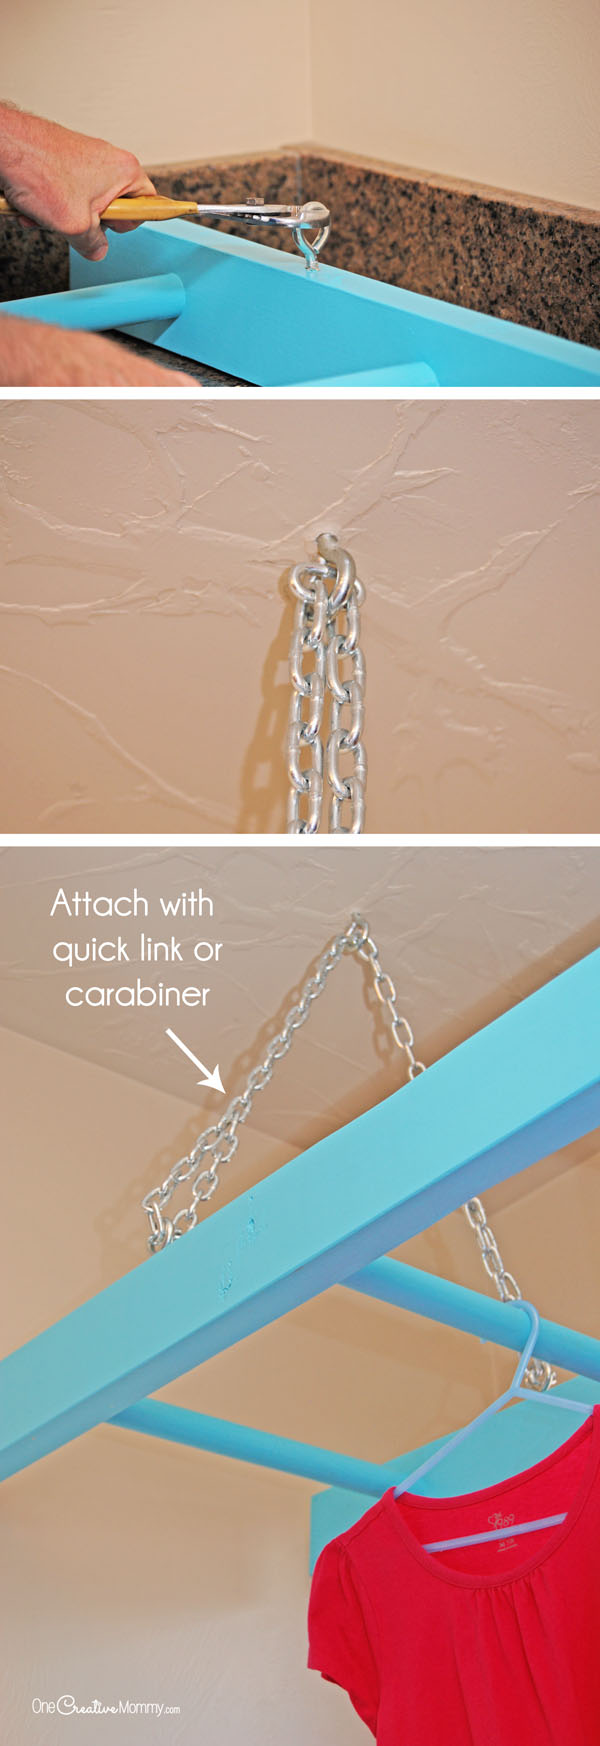
- Attach two screw eyes to each side of the ladder -- one on each end. Mine are 12" from the ends, but put yours wherever you think they look the best. (It helps to drill a starter hole first and use a crescent wrench to help screw in the screw eye.) Finish with the eye parallel with the side of the ladder. (The screw eye in the picture is not finished yet. That's perpendicular. Keep twisting.)
* Very important!! When you screw the screw eyes into the ceiling, be sure you screw into a stud!! We used a stud finder and then tested with a small nail to be sure we had really found a stud before we drilled.
- Carefully measure and attach a screw eye centered above each side of the ladder (directly above and centered between the screw eyes on the ends of the ladder). The screw eye should run parallel to the sides of the ladder.
- Attach a quick link to each end of both lengths of chain.
- Thread the chains through the screw eyes in the ceiling, leaving the ends dangling.
- While someone holds up the ladder, thread one end of each chain through a screw eye on the ladder, and secure the chain at the desired height with the quick link.
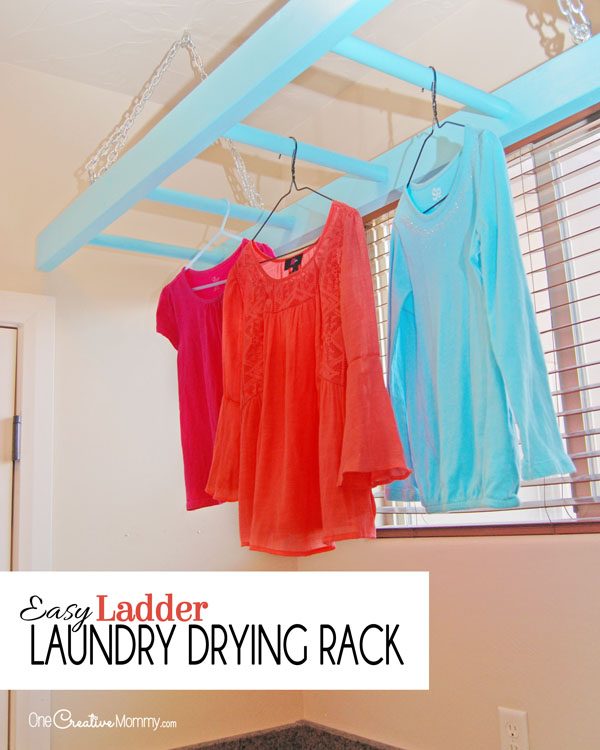
Ta da! Done! Now hang those wet clothes and enjoy a mess-free laundry day! I'm so excited to try mine out this week. (And if you are wondering how difficult it is to take pictures in a tiny laundry room -- it's almost impossible!)
You could save a little money and use hooks instead of screw eyes and quick links. (The quick links are almost $2 each.) I went with the more expensive option because the ladder is above my head, I'll be hanging lots of heavy stuff on it, and I don't want the chain to accidentally get knocked off the hooks and have a heavy ladder fall on my head! Safety first!
What do you think? Will you make one? How do you avoid hanging wet laundry all over the house?
Thanks for stopping by today. Check out more home projects by clicking on the images below.










Crystal
This is pretty awesome. I wish I had seen it sooner, we had an old ladder that we threw away. We didn't think we could do anything with it.
Heidi
Thanks, Crystal! I always seem to throw things away and then want them later. It's Murphy's law, I guess.