

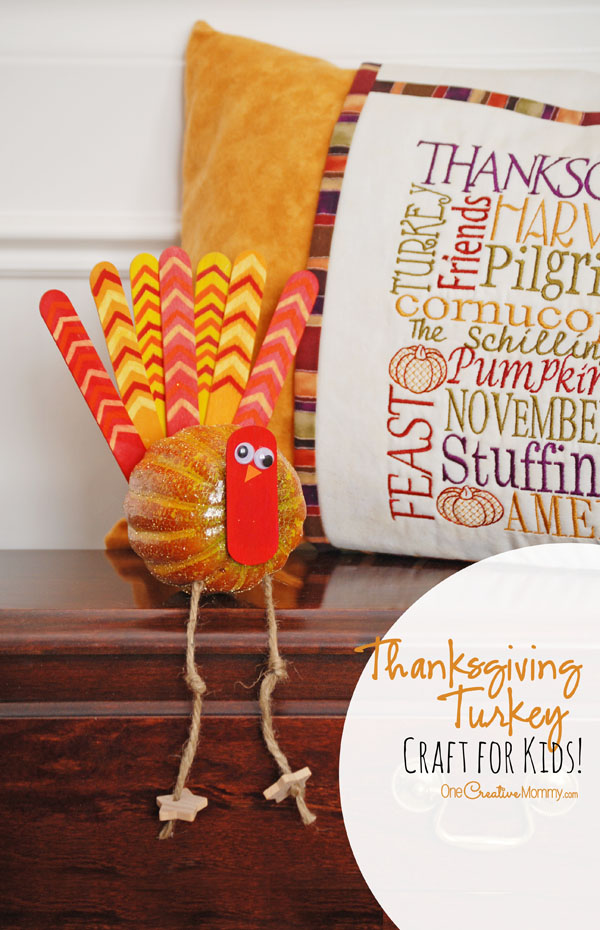
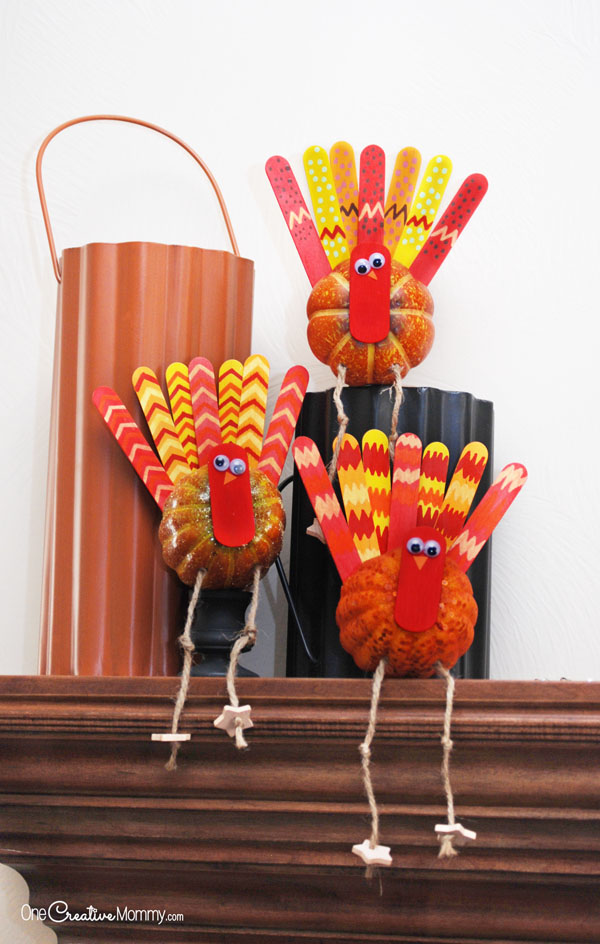
My girls and I just finished making these adorable Thanksgiving crafts. What do you think of our pumpkin turkeys? Now that my girls are a little older, this was the first time I let them use a glue gun (supervised, of course). I was the classic nervous mom, but they rocked it!
Thanksgiving Crafts: Pumpkin Turkeys
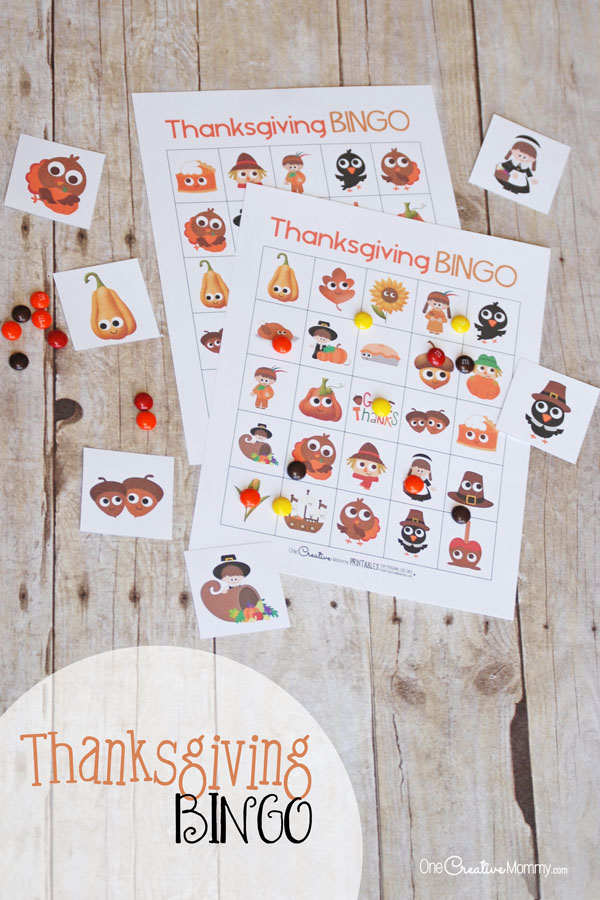
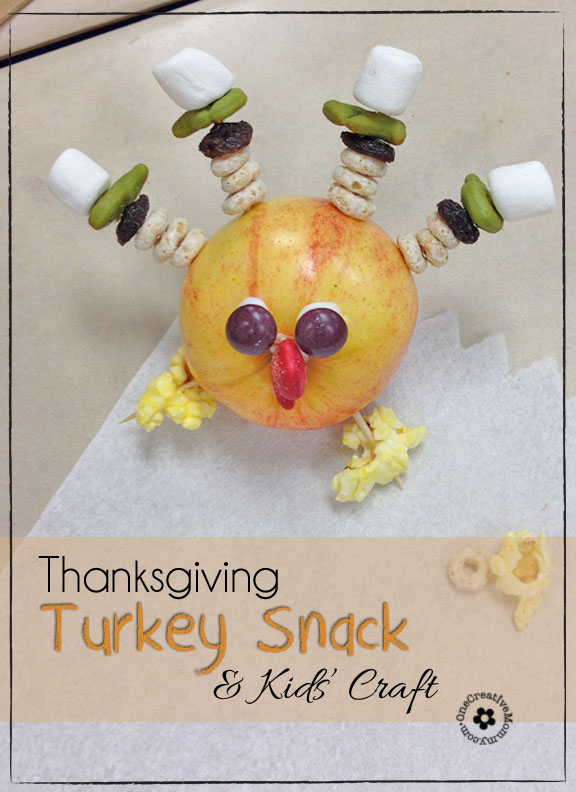
RELATED: Pinecone Turkey Craft, Turkey Snack and Kids Craft, Thanksgiving Bingo
Since my daughters are 9, 11, and almost 15, it's time for our crafts to get a little more grown up. We decided to come up with a Thanksgiving craft that could also be used as Fall decor. (I am an artist at heart. Much of my decor is handmade, and I like it that way.) My 15 year old was more interested in building a Star Wars "Rey" staff than crafting, but the other two girls and I had a great time. (Bear's Rey costume is going to be epic!)
Ready to make your own pumpkin turkeys? Let's get started!

Materials:
- Glue gun and glue (I chose Elmer's Cordless CraftBond Enhanced Safety Dual Temp Glue Gun because I think it's the safest gun to use around kids.)
- Small foam or plastic craft pumpkins (one for each turkey)
- Small wooden stars (three for each turkey) *You could use wooden beads instead of stars for the feet, but I liked the stars best.
- Jute twine (not pictured)
- Colored craft sticks (I chose the extra wide size)
- Dog tag craft sticks (those are the small sticks pictured above)
- Red craft paint
- Paint markers (I like Elmer's painters.)
- Glue stick
- Wiggly eyes
- Small scraps of orange paper or card stock
- Drill
Special thanks to Elmer's glue for sponsoring this Thanksgiving crafts post. I received products and compensation for using their products to create a fun project for you. All opinions are my own. I only endorse products that I believe my readers will love!
Instructions:
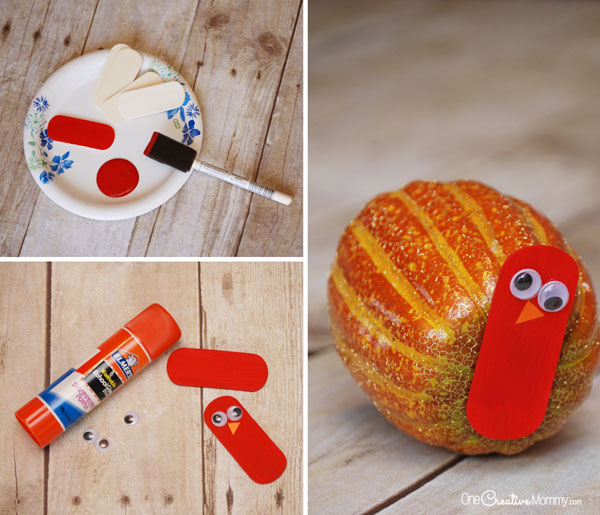
- Head and Neck: Paint the dog tag craft stick red. Cut a small triangle out of orange paper or card stock, and remove the stem from your craft pumpkin. Once your dog tag has dried, glue on wiggly eyes with hot glue and attach the triangle beak with a glue stick. Tip the pumpkin on it's side. Attach the turkey's head/neck over what used to be the top of the pumpkin with hot glue.
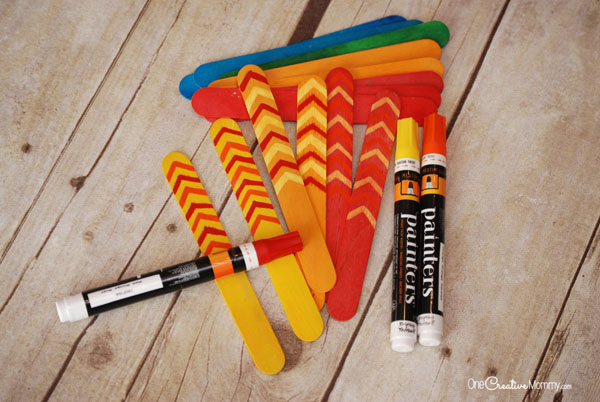
- Feathers: Using paint markers or a brush and paint, add designs to the colored craft sticks you choose to use for the turkey's tail feathers. By trial and error, we learned that the feathers look best if you put the same pattern on each feather. Use as many colors as you want -- just keep the pattern the same. Different patterns make the feathers look too crazy.
Set the feathers aside to glue on a little later.
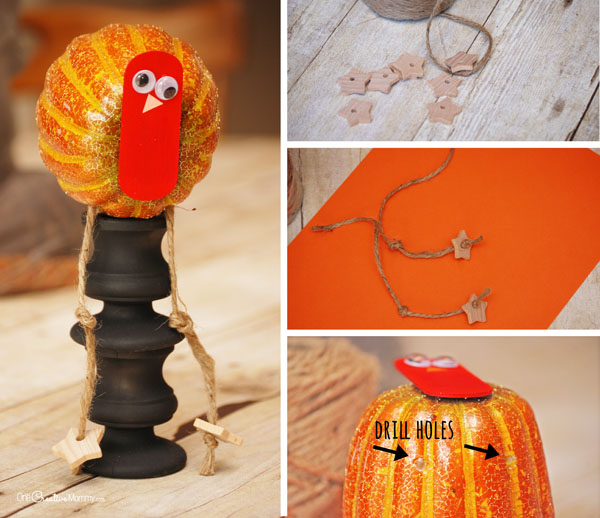
- Legs and Feet: Drill a small hole through each star, slightly off center. Cut two lengths of jute twine about 6-8" long. Thread a length of twine through each hole and tie a knot under the star. Tie another knot halfway up the twine to create the turkey's knee. Hold your "legs" up to the turkey to test their length. Trim as necessary
I drilled the first hole perfectly then ruined four stars before realizing that I left the drill on the reverse setting. My oops moment of the day! I found a use for the broken stars later. Guess I need some practice with a drill!
Using your drill or a nail, create two holes in the pumpkin below the neck of the turkey (about 1.5 inches apart). Push the end of the twine into the hole to make sure it will fit. Remove the twine and squirt hot glue into one hole. Thread the end of the twine back inside the hole so that the hot glue holds it in place. Repeat with the second hole.
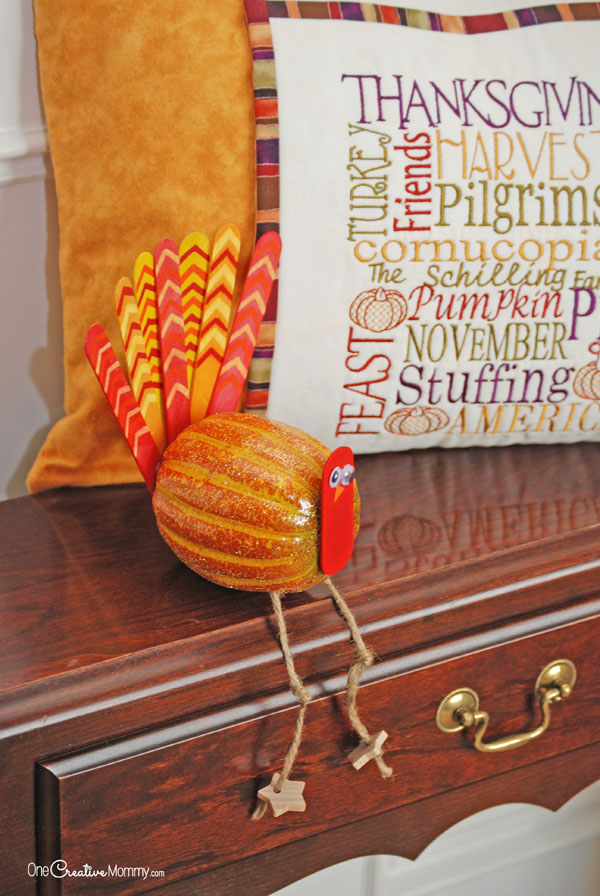
- Add Feathers: All feathers will be attached with hot glue, but it works best if you follow a pattern. Begin with the center feather, and then add the two outside feathers (red in my example). Next add the two feathers closest to the outside feathers (orange). Finally, add the feathers closest to the center (yellow).
- Balance the Turkey: Because the feathers are so heavy, your turkey will tip over unless you add one final star. (This is where I used my broken stars.) Hold your turkey on a flat surface and slide a star slightly under the feathered bottom until the turkey will sit up on it's own. Once you've found the balance, add hot glue to the star and make it permanent.
Display and enjoy!
Shop this post

All done! I hope you and your kids enjoy this craft. It is definitely for older kids, but younger children could do it with lots of help.
Where will you put your turkey? We even tried setting him on a Fall wreath!

I think I like him best sitting on a ledge or mantle.

Thanks for stopping by today! Be sure to check out more Thanksgiving crafts and activities for kids by clicking on the images below.


Jenn
This is adorable! I am going to try these with my kiddos and my niece next weekend. I also love the pillow where was that from?
Heidi
Thanks, Jenn. The pillow was handmade by a friend. I love it, too.
Jacqui Odell
I love the pine cone turkey! I think it would be fun to do with my girl scouts.
Heidi
Thanks, Jacqui. You should definitely try it with your girl scouts! They'll love it!
Enza Kectcham
These are so cute!! Lots of fun ideas to do with kids. I really love the pine-cone turkeys.
Heidi
Thanks, Enza. Thanksgiving crafts with the kids are a lot of fun!
Jasmine
The pumpkin turkey SO flipping cute!! I would never have thought to use that for a turkeys body! I want to make these with my boys!
Heidi
Thanks, Jasmine! If you try it with your boys, I hope you all have fun. I got the idea for the pumpkin body from a turkey I saw in Pier 1. (The two turkeys look nothing alike, but it was still my inspiration!)
valmg @ Mom Knows It All
These are all super cute. I remember doing things with pine cones myself as a child, as well as my oldest son in school.
Heidi
Thanks, Val. We always grab a few extra pine cones during our annual leaf hunt. They make great crafts.
Joyce
Very cute! I think if each of my 9 grandkids made one, I'd keep them here and hide them each year. They'd have to find their own turkey before they get pumpkin pie! (grandma would help! :))
Heidi
That sounds fun, Joyce! You always have the most creative ideas. I can't wait to see what you post this year for Thanksgiving fun.
Marcie W.
Goodness, these are adorable! I would love for each of my own three turkeys to make one so we could display them on our mantle. The little legs hanging down would be too cute!
Heidi
Thanks, Marcie. I think the dangling legs is my favorite part of the turkey. (I have three turkeys at my house, too!)
Audrey McClelland
OMG, those are the cutest! My youngest loves to make crafts with me, so I know we're going to have a blast with these.
Heidi
Thanks, Audrey. I hope the two of you have a great time together.
Leah
Those are so cute! My daughter is super crafty and would love to make one of these!
Heidi
Thanks, Leah. It sounds like your daughter would fit in well at my house!
Beeb Ashcroft
Oh, how cute is that! What a creative idea to use a plastic pumpkin. I have a hot glue gun so this would be a good craft to try. I remember making pinecone turkeys when I was a kid!
Heidi
Thanks, Beeb. My original plan was to make this another version of a pine cone turkey, but the pumpkin was much cuter.
Cathi Crismon
Oh my goodness! Those little turkeys are just way too adorable! I'm in love with their skinny little legs. I have to pin this for my grandkids! Gobble Gobble!
Heidi
Thanks, Cathi. They were a lot of fun. The skinny legs are my favorite part, too.
run 3
This is adorable! I think it would be fun to do with my girl scouts.
Kelly Cooper-Slayton
Where did you get your plastic pumkins? Also, how big are they in inches?
Heidi
Hi, Kelly. My pumpkins came from Walmart. They came in a bag of five or so. There are a couple different sizes, but the tall pumpkin pictured in the step-by-step images is about 4 1/2 inches by 2 or 3 inches.
Any size small enough for popsicle stick feathers will work. Have fun!