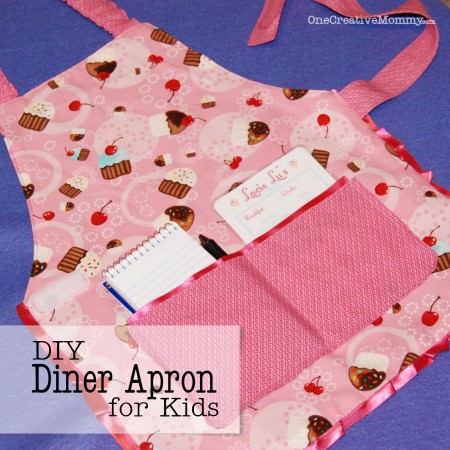
I have a friend who makes amazing things for her kids' birthdays. (I'd send you to her blog, but it's private.) I love to copy her. The only problem is that I tend to see her idea and want to add to it. Sometimes it works--sometimes it doesn't. I think this one worked. It's a kids waitress apron.
So, what did I do for Lu's 4th birthday? I made her things to go with her own pretend diner. (An apron--complete with a personalized menu, notepad and pen, and felt food.) Do you want to know what Lu's favorite part of the gift was? . . . The adorable apron? The fun menu? Nope. The $.20 spiral notebook and pen. Go figure.
The birthday idea began with this cute (and free) apron pattern from SewLiberated. My friend added a pocket, but I couldn't stop there. I had to add a ribbon trim, too. Have I ever made a ribbon trim before? No. Did that stop me? Of course not. I just asked the ladies in the fabric store how to do it! (It didn't actually work very well on this apron, but I learned how to do it correctly so that by the time I was ready for Boo's birthday, I knew how to do it right.) Sadly, I did not take pictures of the process of making this apron, but I have tried to recreate a few things for you.
Download the pattern and follow the written directions with the following changes:
- Optional--buy two coordinating fabrics instead of one. (You can make it out of only one color.) I made the waist strap, neck strap, pocket, and inside of the apron from a coordinating fabric.
- When you make the pattern piece for the body of the apron, round the bottom outside corner of your pattern (the shorter side of the pattern that is under the arm-hole curve).
- Stop after pinning the waist and neck straps to the main body piece.
If you would like to add pockets, now is the time. I sewed pockets on the front and back apron piece so that Lu could wear the apron either way. She always wears it with the cupcake side on the front. If I did it again, I would skip the inside pocket.
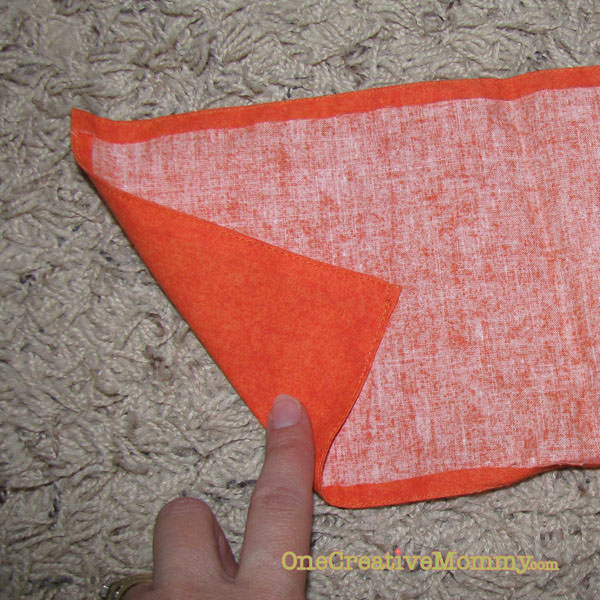
Cut a 10"x5" rectangle from your coordinating fabric. (Optional-- round the bottom corners.) Using an iron, press ¼" of fabric under, creating a border on the back side around the entire piece. (This picture is of the back of a pocket I made for a different apron, but it was done the same way.)
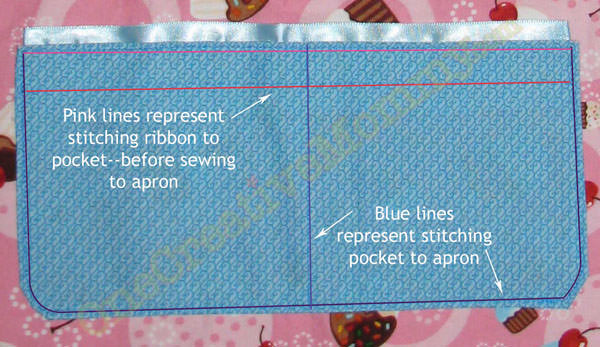
Before stitching the pocket onto the front or back apron piece, sew a ribbon behind the top edge, leaving about ¼" ribbon showing. I stitched at the top of the pocket and at the bottom of the ribbon (pink guidelines in the image above). Now stitch the pocket to the apron using the blue guidelines in the image above.
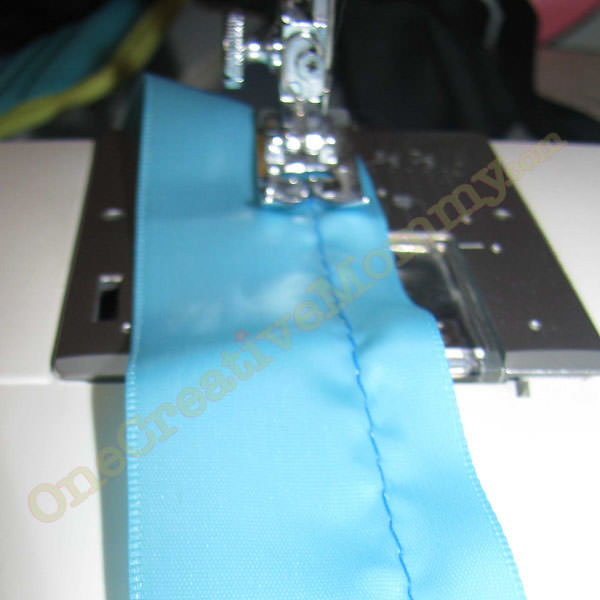
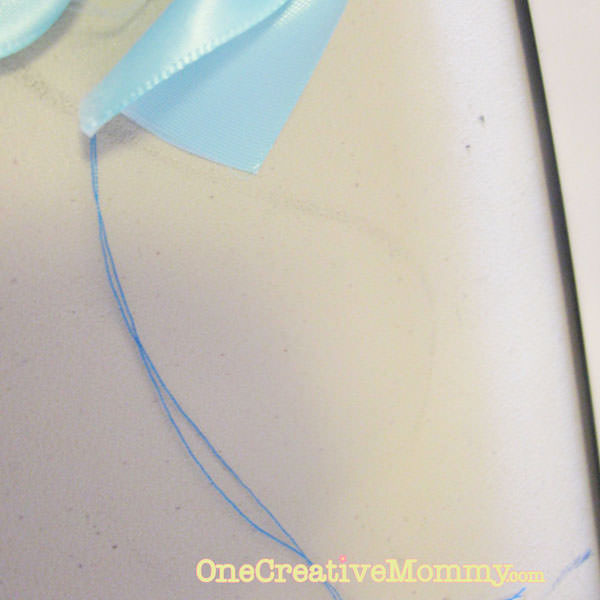
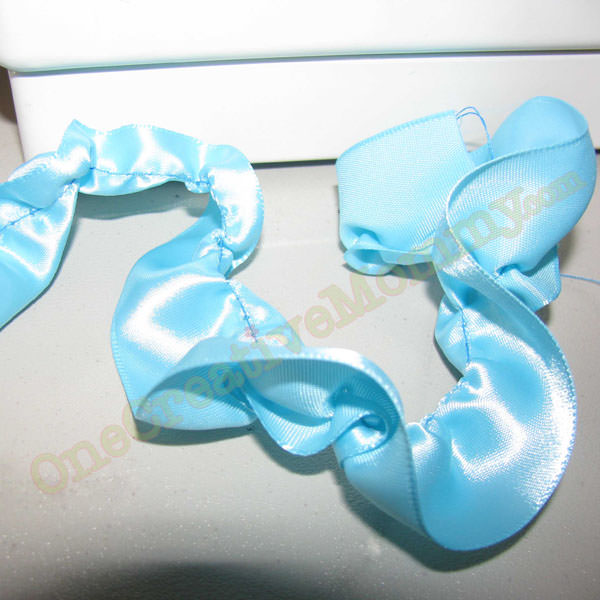
Now you're ready to gather your ribbon. Start with a length of ribbon about 90" long. (That should be more than enough, depending on how tight you make your gathers.) Sew a running stitch along the length of the ribbon. (Make the length of the stitch 3 or 4.) Before you cut the thread, pull the ribbon so that there is at least four inches of extra thread hanging off the end. You want the extra length so that it will be difficult to pull the thread all the way out of the ribbon.
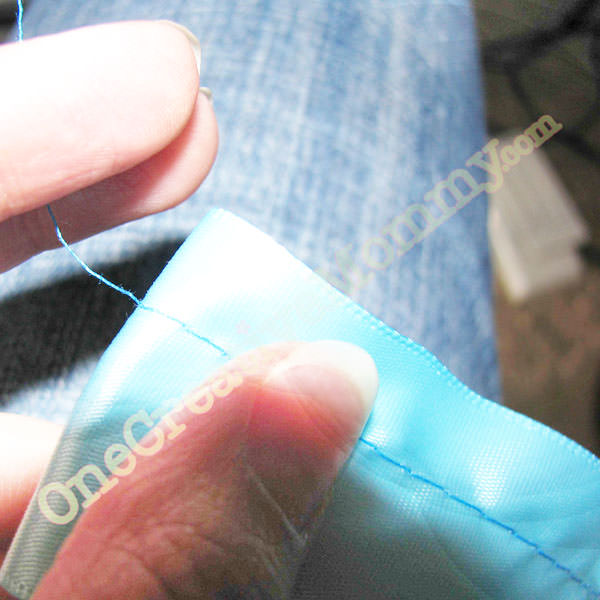
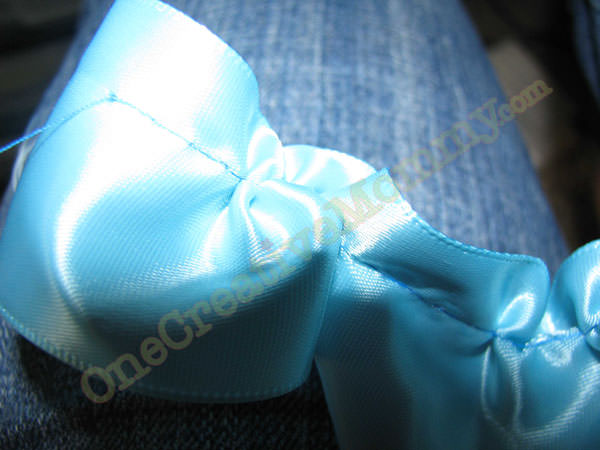
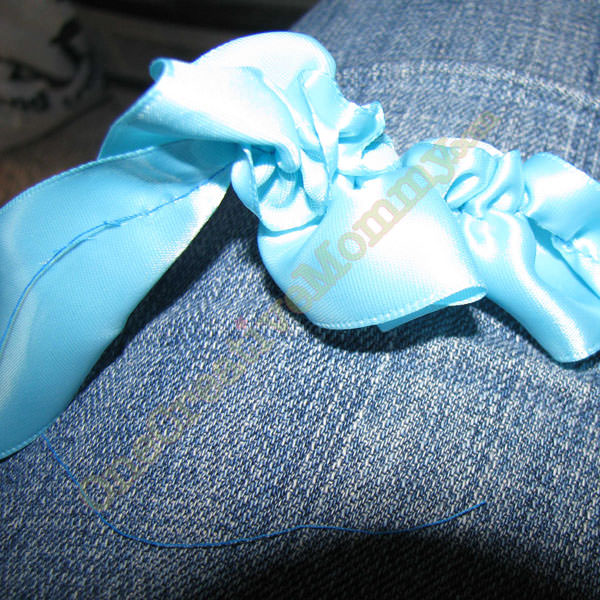
Now, beginning at the top of the ribbon (the extra length of thread is at the bottom), grab one thread (I use the one on the front) and carefully pull it through the ribbon. The ribbon should begin to bunch up. Stop every once in a while to slide the ribbon to the right--pushing the gathered material toward the end of the ribbon--spreading the gathers out as you go. Be very careful not to gather too much at once, or your thread will snap and you will have to start over.
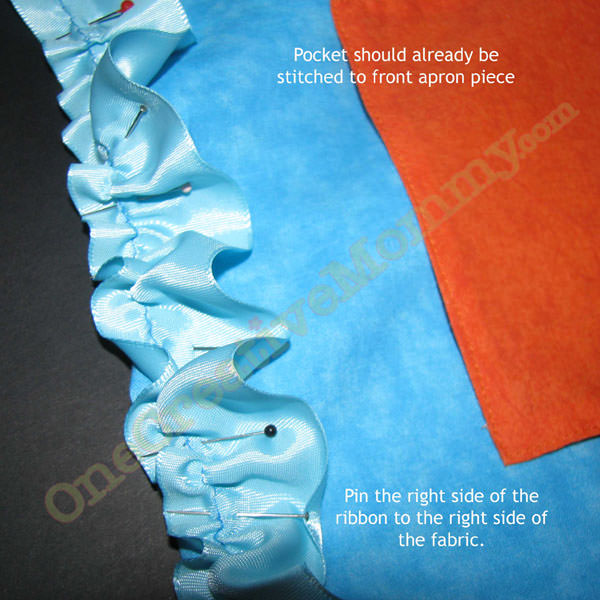
Carefully spread out your gathers until the ribbon looks the way you like. (Remember that I am recreating several of these steps. I am out of my original fabric. The blue represents the front of the apron, and orange is the pocket and back of the apron.)
Place the front apron piece face up in front of you. With the right side of the ribbon facing down, carefully pin the ribbon to the edge of the apron. Leave a little extra at the beginning and end of the ribbon to pin back and create a more finished-looking edge. (See the second image in this post to determine where to start the ribbon.)
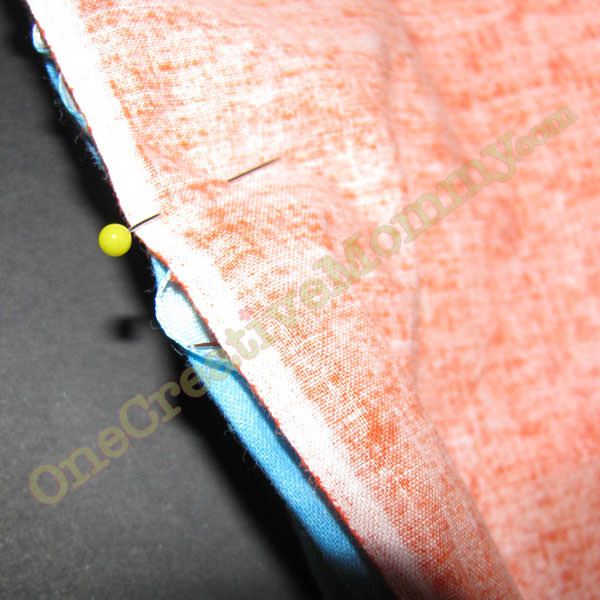
Now place the back apron piece on top of the front piece with the right sides together. Your ribbon (and the neck and waist straps) will be sandwiched in the middle. My version is very sloppy so that you can see the three layers.
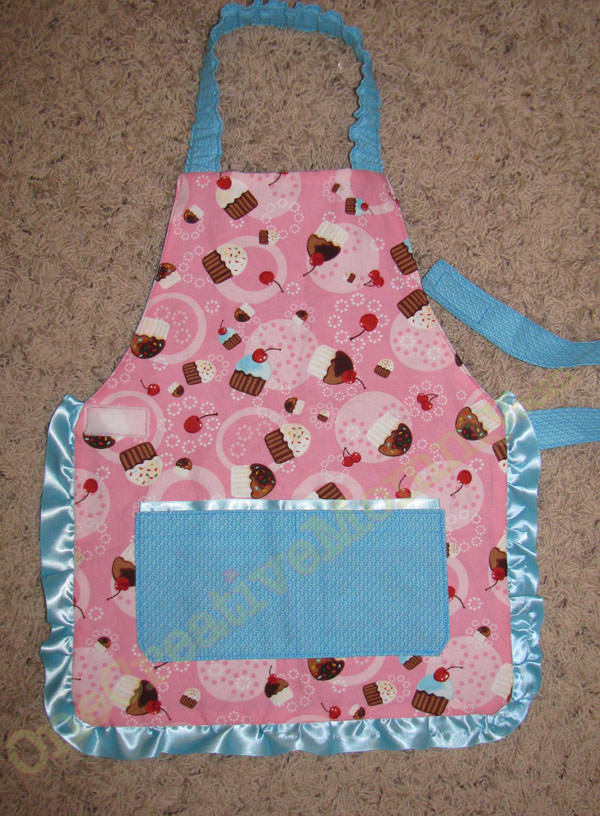
You can now return to the basic pattern you downloaded. The remainder of the steps are the same. Since the ribbon on the apron I made later for Boo's birthday turned out much better, here's a picture of what your completed apron should look like. (Wondering what I did wrong the first time? I stitched my running stitch down the center of the ribbon--instead of close to one edge, which didn't leave much of an edge to stick out for the trim. Then, I didn't gather the ribbon enough. I spread the gathers out too far, so the ribbon ended up looking slightly pleated, instead of gathered.)
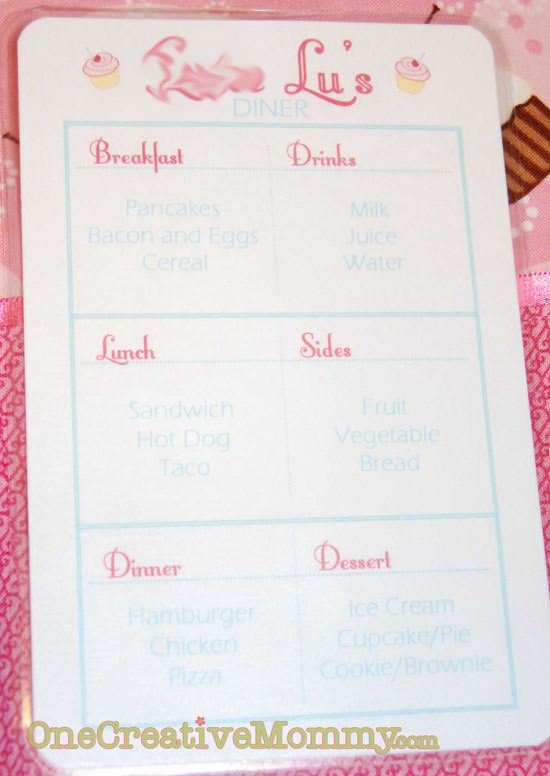
Now for the rest of the project. I googled diner menus until I found one that I liked. Then I made my own version in Adobe Photoshop. If you are thinking of making your own, the menu is 4x6. (I had quite a fun time with the menu, and I'd be happy to redesign it for someone else if you need one.) The title of the menu is smeared because I smeared out Lu's real name to post on this website. I printed three copies and laminated them so that Lu could give menus to all of her customers.
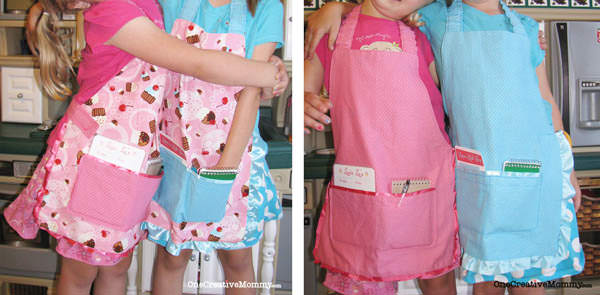
All you need to do now is pop your menus, a pen, and a small spiral notebook into the pockets. Your waitress outfit is ready to go!
Click here to see all the fantastic sites I like to link up with each week.




Jennette
So cute!
Kadie
How cute!! Thanks for the pattern. I am totally pinning this and will be featuring it at our party tomorrow. Stop by and grab a button if you would like.:) Thanks so much for sharing with us at Link It Up Thursday.
Heidi Fowler
Cool! Thanks!
Britni
Hey, Heidi! This is too cute. I can't wait until my daughter is old enough for things like this. Adorable! I was just snooping around your blog and finding lots of cute ideas! Would love if you came by my party too and linked up! It's only up for a few more hours tonight but will be back up Thursday if you miss it. Hope to see you there! http://www.hubbymademe.com/throwback-thursday-no-3/
Devin @ Nom Yum & Free
Wow! Another cute kids apron! I love them. A reindeer told me that Santa is bringing my kids a new art easel . . . so I think we may be trying out your project of creating home improvement free apron to art aprons sooner than later!! ;)
Thanks for the great ideas!
Trish - Mom On Timeout
This apron is adorable and I know my boys would love it!
Pam @Threading My Way
Love the fact that the aprons are reversible. The pocket is a great idea, too!
Christa
What a cute idea. I love it. Would be great with a new kitchen set or with some playfood to help carry out the theme. Thanks for sharing and linking up at Tips and Tricks
Nikki Gillette
Thanks so much for sharing! I am giving my niece the fabric and link to this site for her birthday. She is getting a sewing machine from her parents.
Laurie McCormickDavis
I cannot find the pdf pattern to save my life. Can anyone direct me?
Heidi
Thanks for letting me know that the link wasn't going to the right place. It looks like the original creator of the pattern moved her post. You should be able to get to it now. Happy sewing!