

Do your kids (or you!) love the packaged Rice Krispie treats with the chocolate frosting? Mine do, too, but I hate the price tag. (I also hate that they aren't gluten free. I want a treat that my whole family can eat.)
Whether you are trying to save money or just want to eat gluten free, have I got an easy trick for you! You can make Copycat Frosted Rice Krispie treats in less than a half hour. Want to know how? I thought so! (If this looks familiar, I shared this idea a few weeks ago on Occasionally Crafty. I'm revamping it a little for this post.)

Easy Chocolate Frosting
Start by preparing the rice krispie treats. (Instructions at the end of this post.) Once those are ready, move on to the super easy frosting!
You won't believe the simplicity of the frosting, and you don't need any special tools.
Directions:
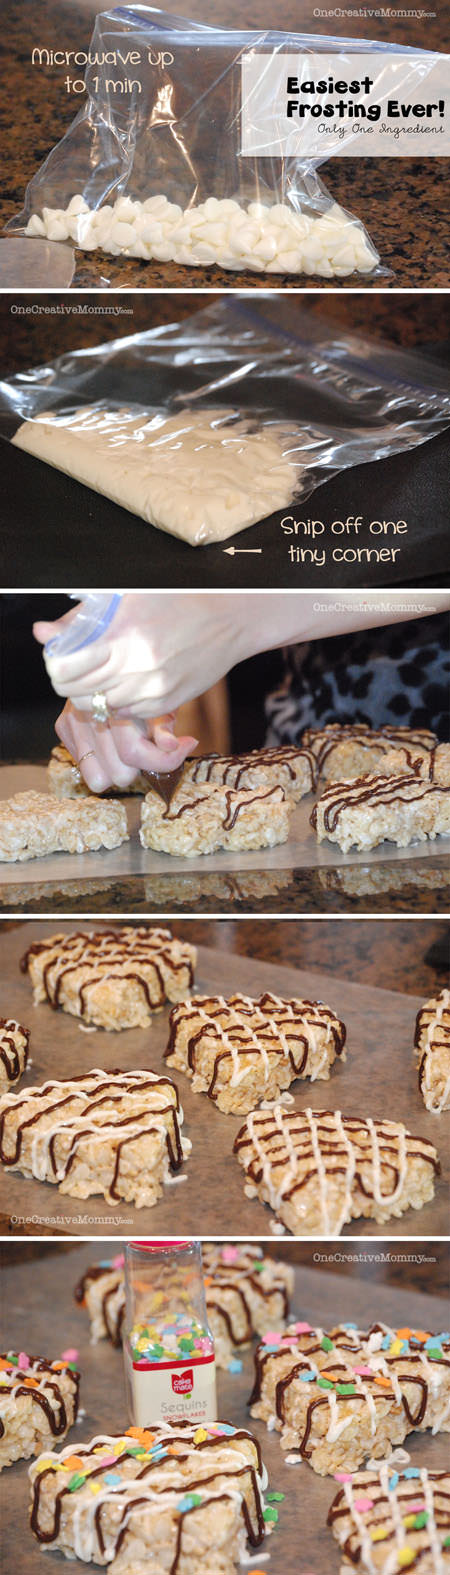
- Place one cup of any flavor chips into a plastic bag.
- Microwave unsealed bag up to one minute.
- Using scissors, snip off a tiny corner off of the bottom of the bag. (The larger the hole, the larger your stream of frosting. Start tiny.)
- Carefully hold the bag above the chocolate with two hands. (Caution! The chocolate will be hot.) While your bottom hand slides down toward the chocolate, gently pull up with your top hand. The chocolate should flow slowly out of the hole.
- Draw designs on your treats, and repeat with another flavor/color of chips.
- Optional: Add sprinkles before the chocolate hardens.
How easy was that? And don't they look way cuter than the store version?
In case you need the recipe, I've included it here (with instructions for gluten free):
Gluten-Free Rice Krispie Treats
Begin with the basic Rice Krispie Treat recipe. I bet that many of you know it by heart!
Ingredients:
- 3 T butter or margarine
- 4 cups mini or 40 large marshmallows (That's one package or 10 oz.)
- 6 cups crispy rice cereal (Kelloggs used to make a gluten free Rice Krispie cereal, but they stopped making it. Guess what? Malt-O-Meal brand is gluten free! Yippee! And it's much cheaper, so even better!)
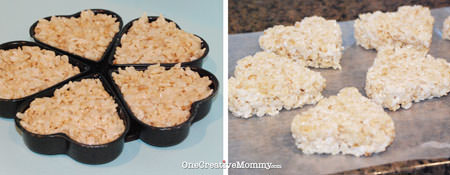
Hint--If you will be using a mold like I did, I suggest preparing only half of the recipe at a time. It gives you more time to mold the shapes before the marshmallows begin to harden. If you plan just to cut the treats into shapes, go ahead and make the full recipe.
Directions:
- Melt the butter over low heat, and add the marshmallows.
- Stir until marshmallows are completely melted.
- Remove from heat and add rice krispies.
- Stir gently until completely blended.
Use either of the next two methods to complete the treats:
- Use a buttered spatula or wet fingers to transfer the mix to molds. (Clean, wet fingers work best for me, but be sure to let the mixture cool a little bit first.)
- Empty the molds onto waxed paper.
(0r)
- Pour mixture into a 9x12 baking dish.
- Allow to cool.
- Cut into shapes.
- Place the shapes on waxed paper.
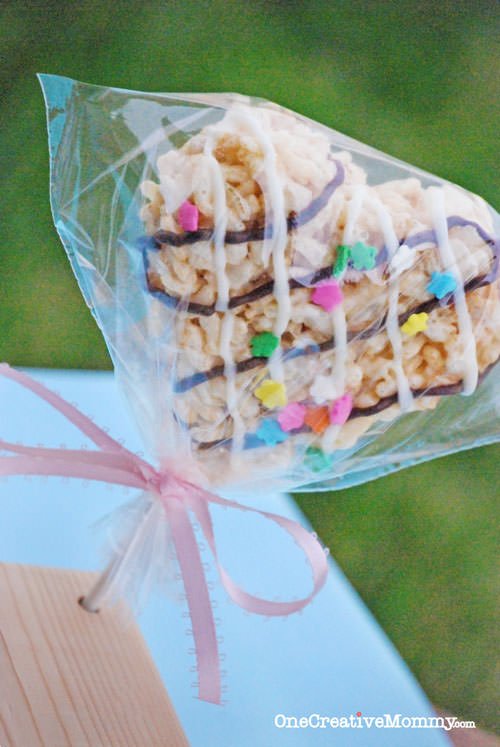
To make treat pops, place the treats in the fridge or freezer to harden, and then insert a lollipop stick into the base of each treat.
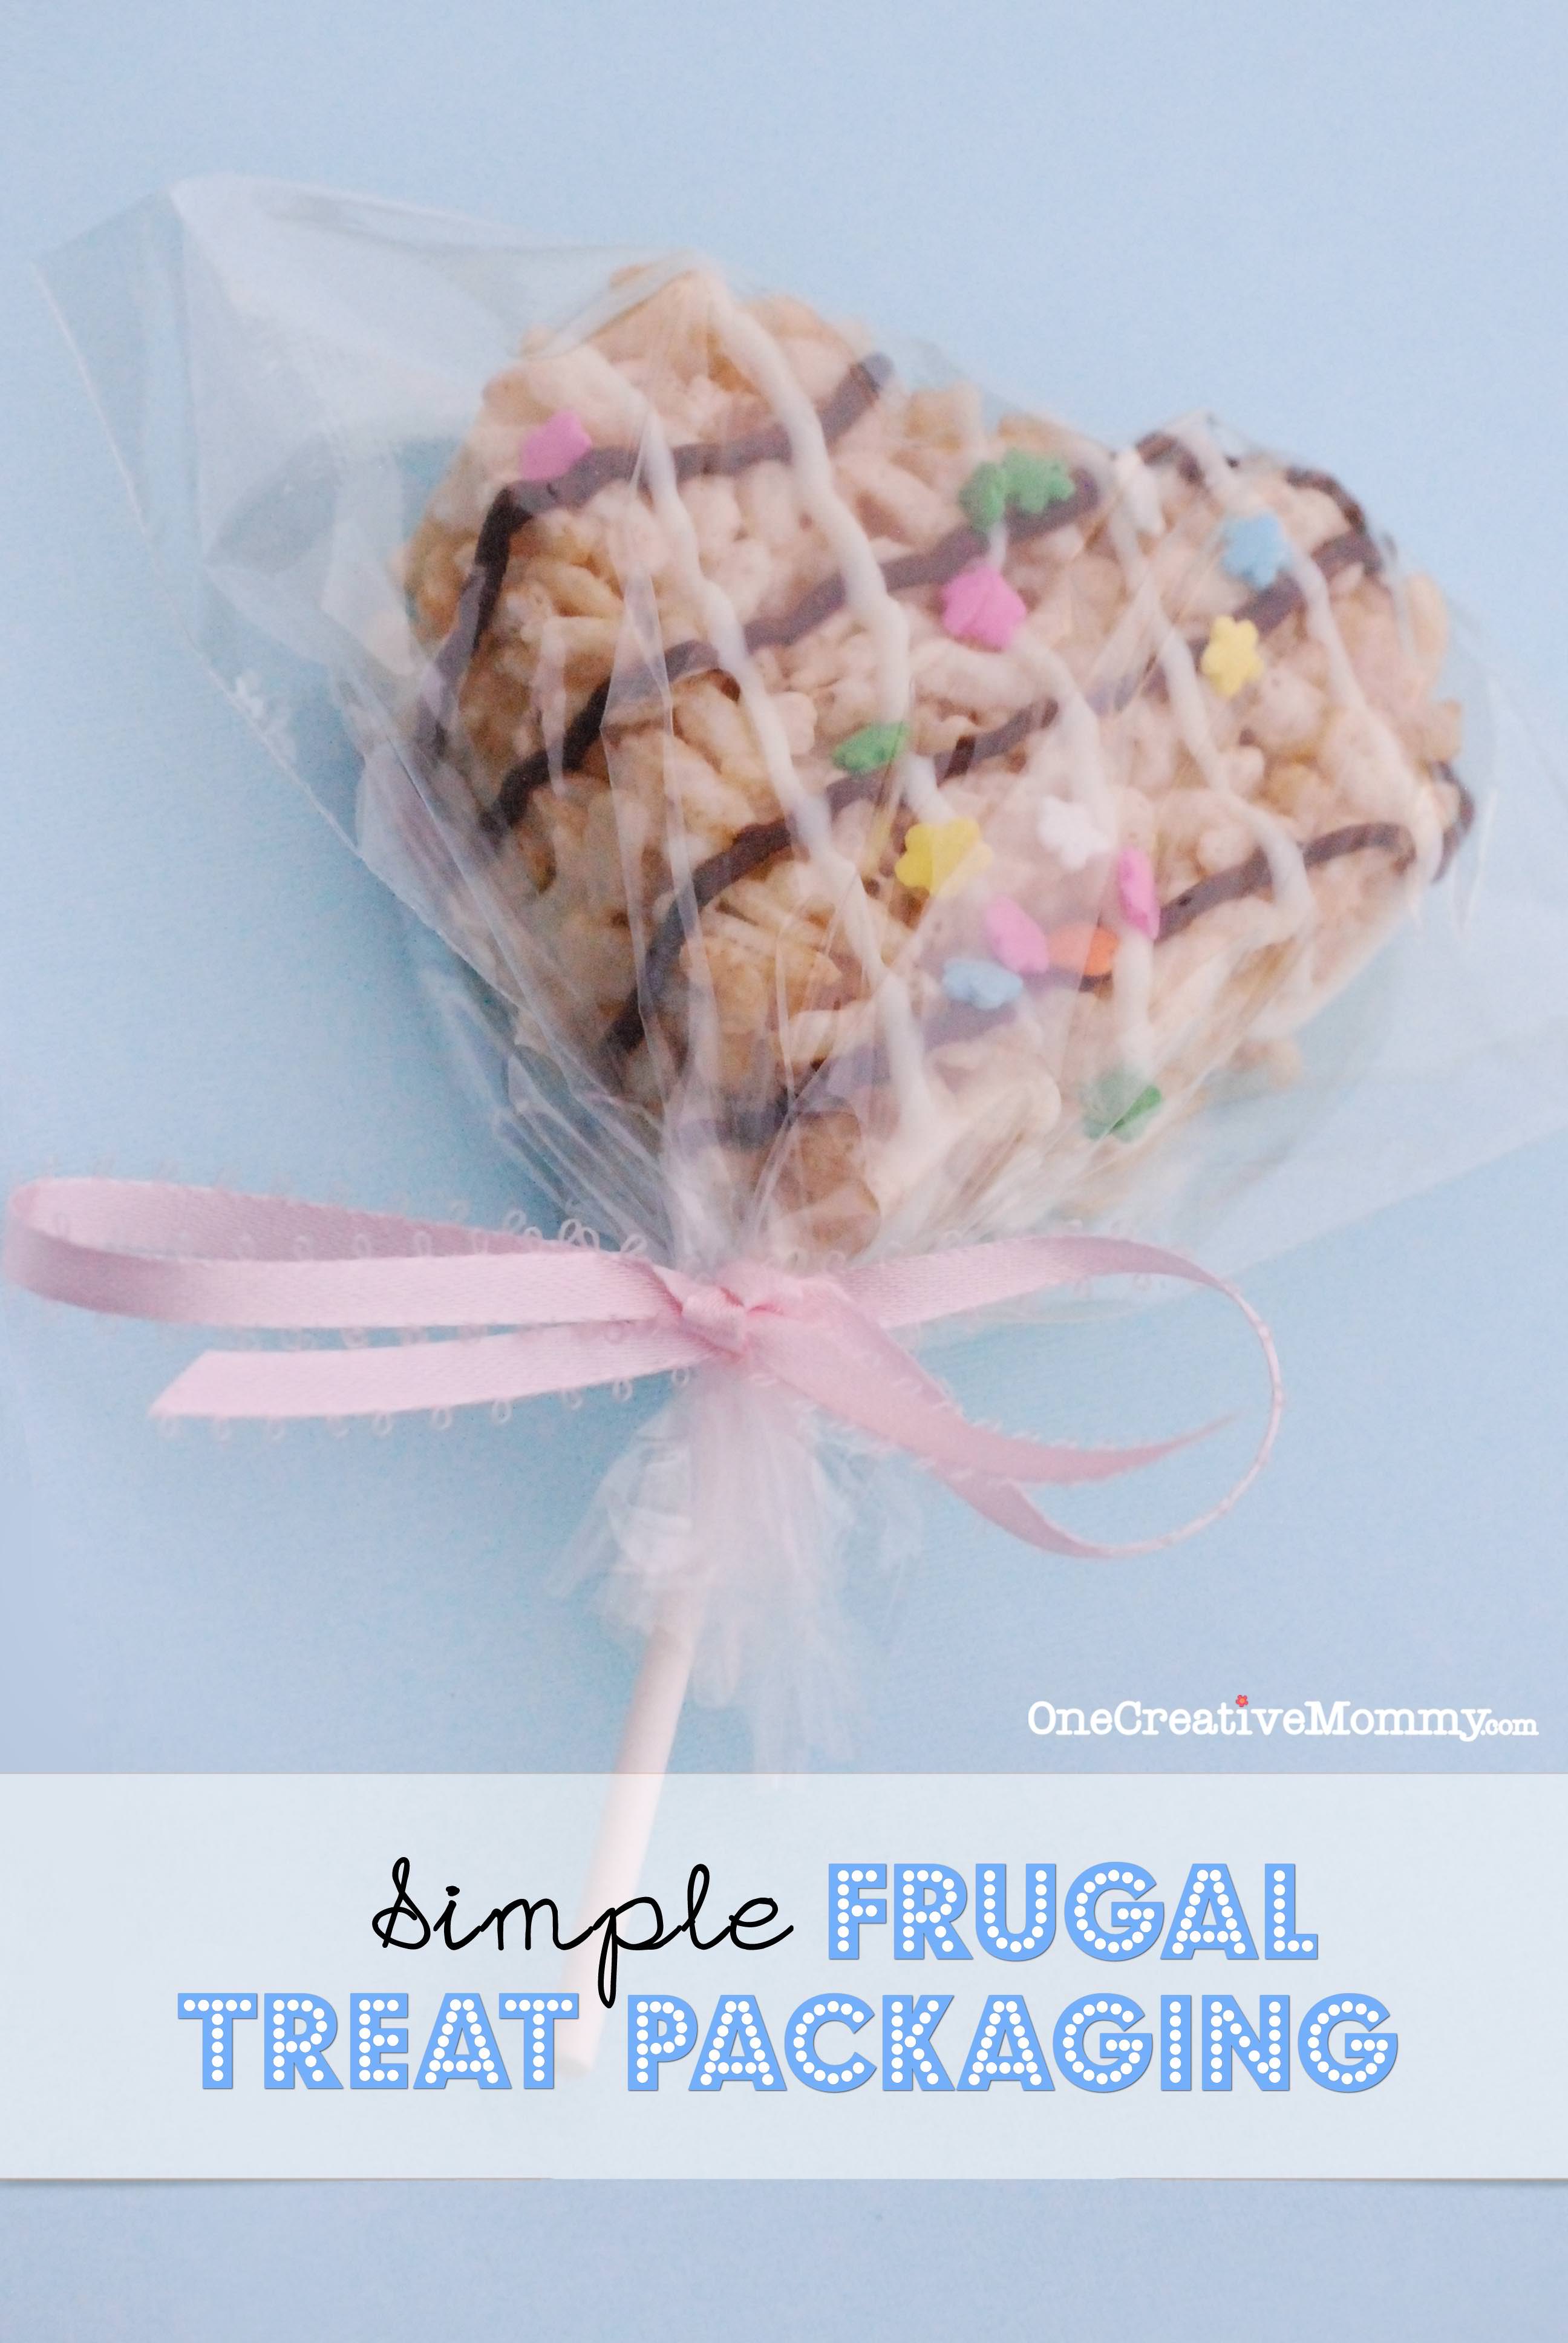
Great treats in less than a half an hour. It doesn't get much easier! Click here to learn my Frugal Treat Packaging Trick.
Thanks for stopping by! While you're here, check out some of my other Spring posts.
[metaslider id=9398]
Click here to see all the fantastic sites I like to link up with each week.


Peggy~PJH Designs
Hi Heidi! These look delicious and so cute. I love that they are gluten free as I've been looking for those kind of recipes. Thanks so much for sharing with Transformed Tuesday.
Hugs,
Peggy~PJH Designs
Danielle @ Poor and Gluten Free
So cute! Thanks so much for sharing this on Waste Not Want Not Wednesday, Heidi, I’ve pinned it.
Also,I’d love for you to link up to my new GF & OAS Bloggers page, a place to find like-minded bloggers :) http://www.poorandglutenfree.blogspot.com/p/links.html
Michelle
Thanks for the tips! I never would have thought about melting the chips in a plastic bag. Great idea!
Heidi Fowler
You're welcome, Michelle. Can you believe it's that easy?
Jenna @ A Savory Feast
Oooh these are perfect for Spring! Thanks for linking up with Hump Day Happenings. You have been pinned! See you next week.
Megan Walker
I love this recipe! Pinning immediately...
Thanks for coming to Hump Day Happenings!
Becca from ItsYummi!
These are so cute, Heidi!
Heidi Fowler
Thanks so much, Becca!
Clare @ Super Mommy Club
I thought the idea of store bought Rice Krispie treats was great - until I tried one. YUCK! I really should try and make some at home - especially as I can adapt your recipe to be dairy free. I'll add this to my Evernote list of recipes and pin it too!
Heidi Fowler
Thanks so much Clare. I hope you can find something to replace the butter to make it dairy free!
Christina @ It's a Keeper
What a cute idea! These are great for school parties!
Heidi Fowler
Thanks, Christina. Those would be fun for school parties. Careful, though. Some schools won't let your bring homemade food anymore. Isn't that sad?
Heather
These look better than the ones we get in Walt Disney World!
Heidi Fowler
Really, Heather? What a nice thing to say! Thanks!
CANDI
These are adorable. I love the packaging.
Heidi Fowler
Thanks, Candi. Would you believe that the packaging is a regular old fold-top baggie with the fold cut off?
Diana Rambles
Very cute, Heidi!
Heidi Fowler
Thanks, Diana. I think it's time to make another batch. Spring is on it's way! (Except for the snow we got yesterday!)
Marilyn
What a fun way to enjoy rice krispy treats!
Heidi Fowler
Thanks, Marilyn. It's fun how something so simple and ordinary can turn into something kind of special.
Katie
These look so great. I absolutely love your easy frosting tip, thankyou!
Heidi
Thanks, Katie. Isn't it funny how something that looks so hard can turn out to be so easy?