

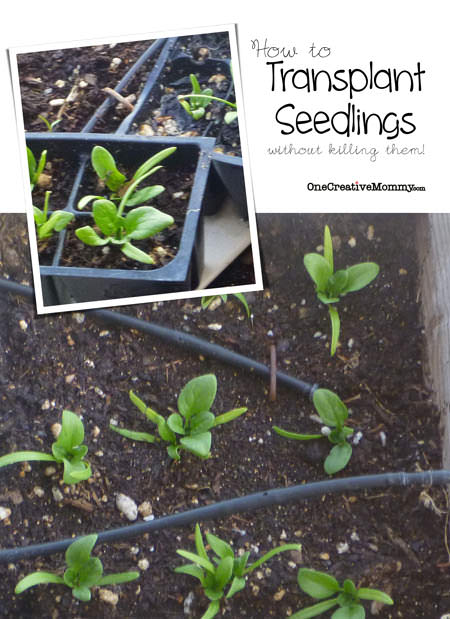
Please tell me I'm not the only one who has ever done this:
- Buy a plant.
- Transplant plant into the garden.
- Watch plant die a few days later.
- Start over.
Sound familiar? If it does, I've got some great tips to show you how to transplant seedlings into the garden. My uncle is a Master Gardener, and I learned these tips from him. (You can see a small portion of his garden in my DIY Garden Trellis post.)
The instructions are simple:
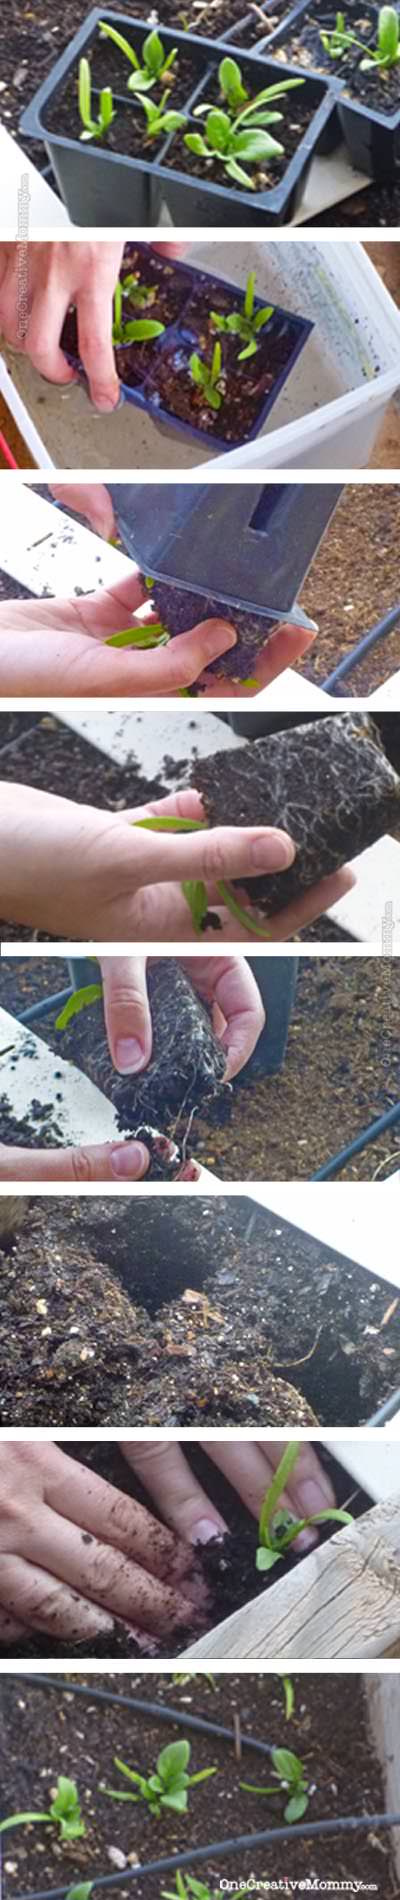
- Water your soil and prepare a hole for the new seedling. (Leave plenty of room--maybe double the size of the root bulb.)
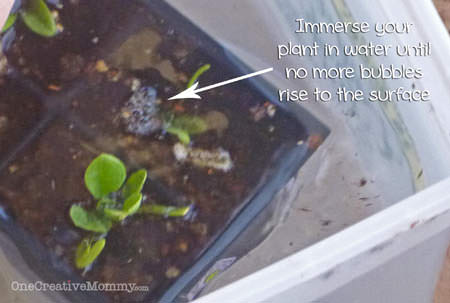
- Immerse the seedling's entire pot in water (above the dirt line), and keep it under water until no more bubbles rise to the surface. (Just my opinion, but I think this is the secret.)
- Turn the pot upside down and carefully dump the plant into your hand. DO NOT pull on the plant to get it out. Instead, gently shake or squeeze the pot from the bottom.
- Tear off a portion of the bottom of the root bulb. (If your seedlings are really small, and the roots aren't tangled into the shape of the pot, you can skip this step.)
- Gently place the seedling in the hole and fill it in with dirt. DO NOT pack the soil super tightly.
- Add another spray of water, and you're done!
- Sit back and enjoy the garden!
I hope this works for you. I am not a gardening expert, but while using this method, I haven't lost a single plant. (I cannot say the same about my transplanting skills before I learned this! Let's just say that there was a lot of senseless death!)
Interested in gardening? You might like these posts, too:
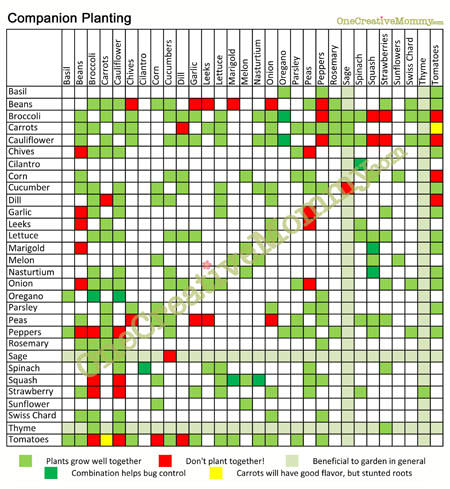
Companion Planting--What Plants Work Well Together in the Garden?
Gardening for Dummies {And I'm the Dummy!}
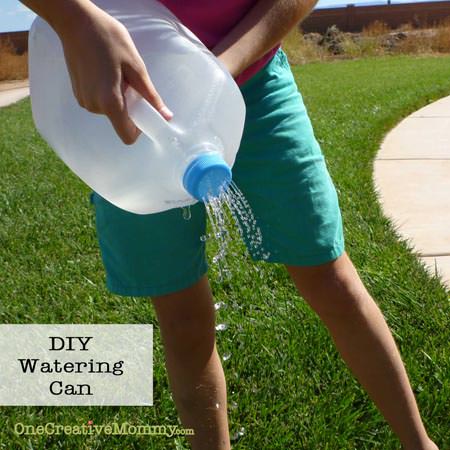
DIY Watering Can From Milk Jug Upcycle
Thanks for stopping by! I hope you'll come back when you're done working in the yard!
Click here to see the places where I have been known to link up my projects and recipes.









Cathy
I would love for you to share your favorite posts and link up at my TGIF Link Party.
http://apeekintomyparadise.blogspot.com/2013/05/tgif-link-party-2.html
The party opens Thursday night and closes on Wednesday night at midnight.
Please, invite your friends to party too! The more the merrier!
Hugs, Cathy
Kalyn Brooke | Creative Savings
Great tips. I like to start my tomato and zuchinni plants as seedlings and transplant. The major struggle with that is the squirrels like to dig them up!
Heidi@OneCreativeMommy
That must be so frustrating, Kalyn! I just finished putting netting around my strawberries because the birds were getting every single one. Too bad netting wouldn't work for squirrels! How about a chicken wire box? (I wanted to try that, but it costs $50 for a bale of chicken wire! Crazy. Good luck.
Kalyn Brooke | Creative Savings
We did buy a roll of caged wire to make a little box for it, it did help - I don't think it was near $50 though, because it was a small roll.
Heidi Fowler
Did you manage to find a deal on the wire somewhere? I'd love to find some for a little less money!
Kalyn Brooke | Creative Savings
We found gardening wire at Lowes. This is the kind we bought: http://www.lowes.com/ProductDisplay?productId=3459696
jodi stewart
Hey Heidi, great post! I'm so glad I found you at Waste Not Want Not Wednesday. I usually go from "buy plants" to "watch plants die" I've pinned this in case this latest batch survives.
Meg Sluyter
Hi Heidi, I found you through Happy Hour Friday. SO glad I did, I'm constantly killing plants when I transplant them (I suck as a gardener but really want to learn). Hopefully your water trick will help me out this weekend when I fill my big planters. Thanks so much for sharing! :)
KC @ The Real Thing with the Coake Family
Great tips! Thanks! I've had many a plant die a few days later, so hopefully this will help. Thanks so much for linking up at the Real Family Fun link party! Hope to see you next week.
KC
Peggy~PJH Designs
What great tips Heidi. Thanks I need all the help I can get in the garden. Thanks for sharing at Transformed Tuesday.
Hugs,
Peggy~PJH Designs
Jamie @ Love Bakes Good Cakes
Great tips, Heidi! Thank you so much for sharing at last week's All My Bloggy Friends :) I can't wait to see what you share this week!
Danielle @ Poor and Gluten Free
Great tips, Heidi! I'm featuring this tonight on Waste Not Want Not Wednesday (I've been a bit behind these past two weeks :( ) Thanks for sharing!
Jenna @ A Savory Feast
These are some great tips! Thanks for linking up with Hump Day Happenings. See you next week!
Megan Walker
I really want to start a garden once I have the space. Thanks for the tips!
Teri@The Freshman Cook
How did you know I was looking for information like this? The past couple years I have started plants inside to have them die on me not too long after transplanting them. I love this info and I copied it to keep for when it is time to plant outside. Thanks so much! I would love if you would share this at Celebrate It, Blog Link Party! It opens on Thursday at 9pm and runs through Monday at midnight. Thanks again!
Heidi
So glad I could help, Teri! Happy gardening! It's spring in my area, and I just transplanted my first plants this weekend. Yipee! I'll try to remember to pop over to your party tomorrow.