
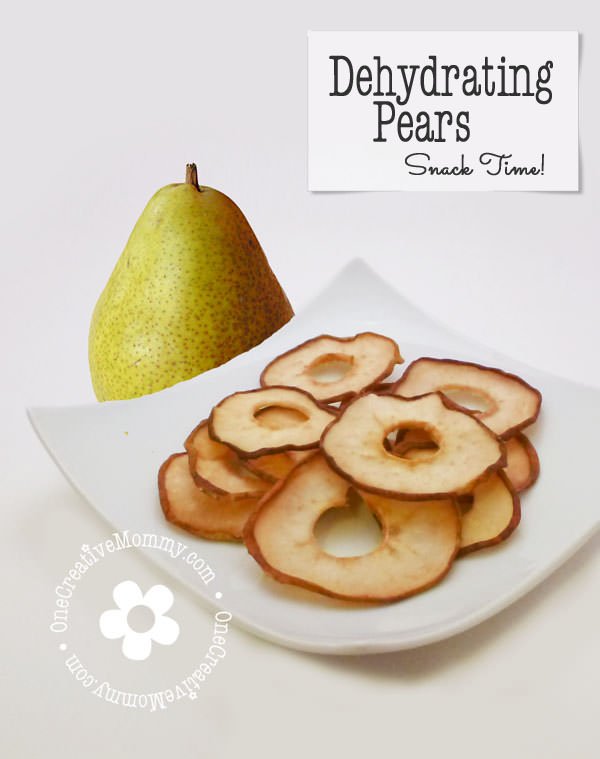
I love Fall. I love the colors, the crisp air . . . and getting tons of pears and apples for really cheap!!! Have you ever tried home dried pears or apples? To me, they are like candy! I think I could eat them all day. So . . . . lets get started with the candy-making. Here's my quick and easy method for dehydrating pears.

I used a dehydrator, a really cool pear/apple corer, a food slicer, and lemon juice. That's it. (You can do this without the corer, dehydrator and slicer. They just make life a lot easier!) Here we go!
- Prepare a large bowl with one cup of lemon juice for every one quart of water. (I put mine in my salad spinner--using the spinner part like a strainer and the bowl part to hold the juice. That way, I could easily lift all of the pears out of the bowl at once.) Wash and core a few pairs at a time.
- Place your slicer over the bowl and slice the pears directly into the lemon juice. (I use the slicer on the thickest possible setting.) Once the bowl is filled (it will probably only take about four pears), let the slices soak in the water for ten minutes.
- Remove the slices and place them on the dehydrator trays. Repeat with more pears until your trays are full. Follow the directions on your dehydrator to determine the drying time and temperature.
- Repeat with more pears until you have so many that you think they will last all year (but that will only last a few weeks once your kids get their hands on them!).
If you kept your hands clean, you can even save the lemon water and use it to make a refreshing pear lemonade. (You will want to strain out the tiny pear bits.) Just add sugar and water to taste.
*This is the first year that I have used the slicer. I normally hand slice the pears vertically--making slightly pie-shaped wedges. Since the slices are uneven, they dehydrate with a chewier center. I miss that, but not enough to take the extra time. I absolutely loved this speed method!
To make them last longer, store the finished dehydrated pears in the fridge. (Mine never last very long!)

*Want to learn to make Pear Fruit Roll Ups? This post used to contain directions for making them, but the recipe and directions have been moved to a separate post. (I have left the images so that people who pinned them on pinterest can still find this post and be directed to the new one, here.)


Want to try some of the products I used?
Let me just say again, you do not need any special tools to dehydrate pears. I'll admit, the dehydrator is pretty helpful, but you can dehydrate in the oven. The dehydrator is super easy, though!!! I love it. This was the first year I used the slicer and the corer. That corer is my new favorite toy! It made things so easy. I use a peeler/corer/slicer when I make apple slices, but it doesn't work well for pears. It also doesn't make the slices as thick as I like.
I hope this is helpful to you! If you like this idea, please "like it," "pin it," "tweet it" or share it in some way so that others can enjoy it too.


Winnie
I prefer apples, but who cares? These look like something no-one can resist.
Wonderful snack and I also think they'd be wonderful for dinner-paryy
Carissa
That's it! I'm buying a dehydrator. We love pears over here and I love that you could enjoy them all through the winter
Jessi @ Practically Functional
Yum! Those would make awesome snacks! Thanks for sharing at The Fun In Functional!
Jessi @ Practically Functional
Just wanted to let you know that I featured this on my blog today! You can check out the feature and grab a button here: http://practicallyfunctional.net/2012/09/the-fun-in-functional-link-party-18/
Jan
Looks delicious!!
Jan @Door251
Jamie @ Love Bakes Good Cakes
Good morning, Heidi!! I would love for you to share this post and any other Fall related post you have, at this week's It's Fall Y'all ~ Linky Party. Hope to see you there!
Rachel
YUMMY!! I have one of those big dehydrators that only has racks inside of it. I'm wondernig if I could get away with using a baking sheet inside of it to make the fruit rolls. My kids would LOVE these and I love how they are all natural without any sugar!
Little Susie Home Maker
Great! I want to try the fruit roll ups!
Susie
Jill @ Create.Craft.Love.
Great recipe and tutorial! Can't wait to try this!! Thanks for sharing at the Pomp Party! Hope to see you back next week! Pinning!
Margaux
Visiting from Delicate Construction link-party. My kiddo LOVES pears but they are so sticky and messy! This would be a great way to have them as "to-go" snacks and for running errands. I'd love if you came and shared at my healthy food link party :) http://www.youngnesters.net/2012/09/snacktime-saturday-week-3.html
Christina at I Gotta Create!
I have not dried pears but this makes me want to!
Thanks so much for linking up at I Gotta Create! <3 Christina
Ewa
I would love to try one:))
Emily
We used to dry all kinds of goods when I was a kid, I love this post!
Lisa @ Flour Me With Love
This is a great idea! I don't buy my kids fruit roll-ups because of the sugar. I look forward to breaking out my dehydrator and trying this. Thanks so much for sharing at Mix it up Monday :)
Heidi Fowler
I use apple juice with no sugar added, so this is totally sugar-free. (Natural sugar only.)
Debi @ Adorned From Above
Hi Heidi,
This is a great tutorial. I keep meaning to try making my own. I will have to put it on my list of todos. Thank you so much for sharing with Wednesdays Adorned From Above Link Party last week. This weeks Link Party is opened at
http://www.adornedfromabove.com/2012/09/how-to-make-natural-tinted-lip-balm-and.html
from Wednesday until Sunday.
Hope to see you there.
Debi Bolocofsky
Adorned From Above
http://www.adornedfromabove.com
Kathie
I need one of those dehydrators! My kids would love these pears & fruit roll ups! Any idea of how long or what temp. to do these in the oven? Thanks for sharing this with us at Gettin' Krafty!
Lois Greene
In the oven set to lowest temp. Hopefully your oven goes to 170 or less. Leave the oven door open a bit. If you can put a fan above the door to blow away the hot air would be good. It should take a few hours. Check them often to see how dry they are. Good luck.
Carrie
Those look delicious!! Thank you for sharing at Sharing Saturday!!
Aimee - It's Overflowing
Yum! I've always wanted a dehydrator! LOVE! XO, Aimee
Maria
These sound great! We make a lot of dehydrated apples in the fall, but have never done pears! What a great idea, I'll have to try it! Thanks for sharing!
andrea cammarata
SOOOOOOO love these! A BIG YUM!!!! being a vegetarian -- this is MY KIND OF SNACK!!!! : ) hugs and thanks for sharing your thrifty creation with us over at Junkin Joe! HUGS!!!
Lisa
We had a dehydrator growing up, and LOVED it! It made for such yummy snacks.
Meg @ Sweet Twist
I love dried fruit...this makes me want to make some now.
Julie Moore
I have never had dehydrated pears, but they look delicious! I will have to see about making them some time. Thanks for linking this up to the Back-To-School link-up, too! :)
Clare
My kiddos love apple so they'd probably really enjoy some dehydrated candy apples - I might have to keep my eye out for one of those machines.
Thanks for linking up to this week's Super Mommy Club Party - I'm featuring this in my Apple Tot School post this coming Saturday.
Heidi Fowler
I think they'd love it, Clare! I've done it with apples and pears, and we love them both.
Cindy (Vegetarian Mamma)
Thanks for sharing! I need to get a dehydrator! Thanks for linking up at our Gluten Free Fridays party! I have tweeted and pinned your entry to our Gluten Free Fridays board on Pinterest! :) I can't wait to see what you share this week! Its LIVE!
Cindy
Heidi Fowler
Thanks, Cindy. If you don't want to invest in a dehydrator, you can do it in your oven. It just heats up your house a lot more!
Lois Greene
I just finished slicing and am off to the dehydrator which is always plugged in and ready to rock and roll. I just took off the green grapes which make the most unbelievable raisins. For some reason I had not thought of pears until I read your post. My new best friend since I dehydrate so much is a vacuum sealer. I can't wait to taste the pears. Thanks for the idea!
Jill
1 cup lemon to 1 quart water??? WAY too much lemon! I looked at other recipes and see it is 1 cup to a GALLON, or 1 Tablespoon to 1 quart!! I just messed up on a bit of work...please verify the measurement.
THANK YOU
Heidi
Hi, Jill. Did you try using my measurements? I haven't made these in a very long time, but I'm pretty sure those are the measurements I used. I guess everyone does it differently.