

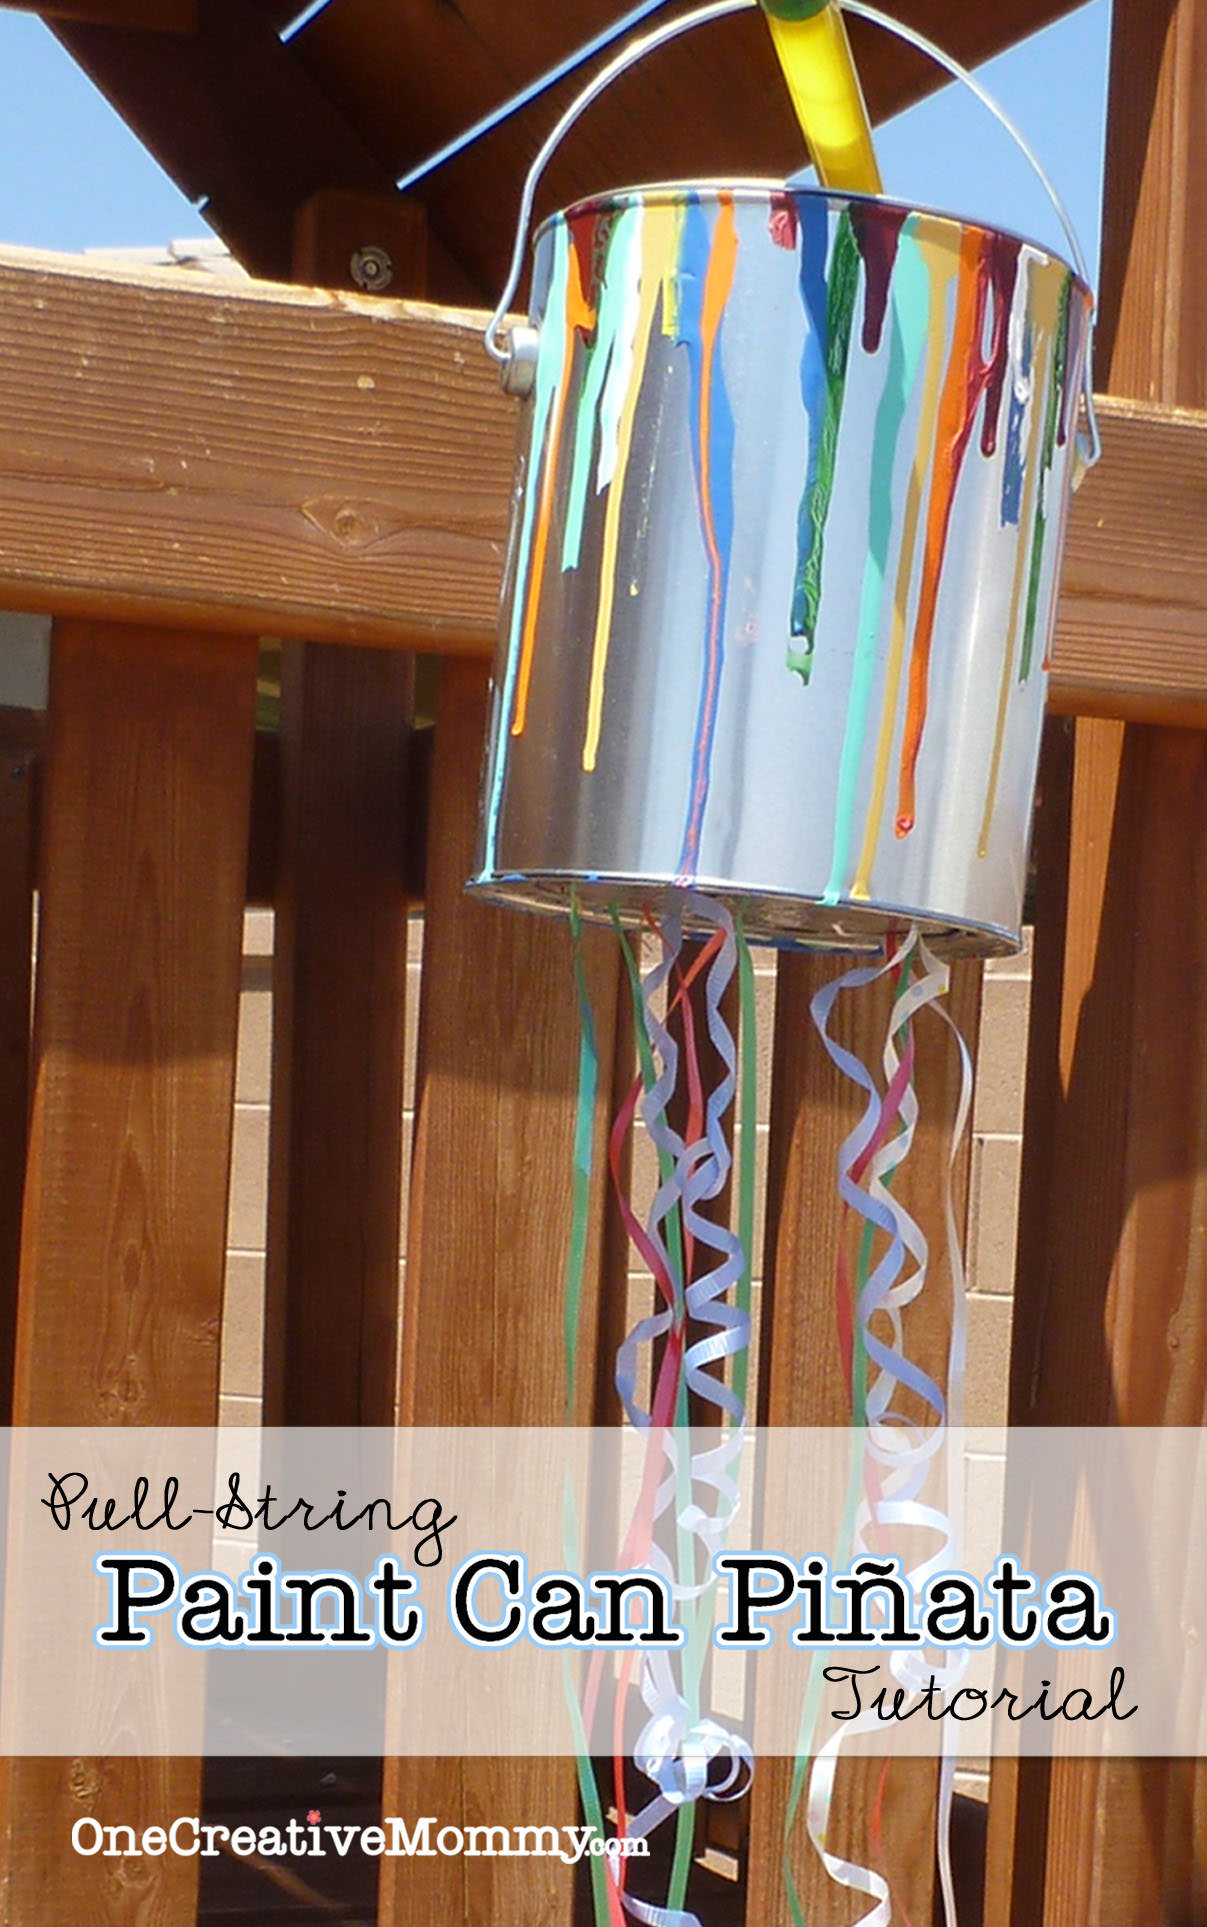
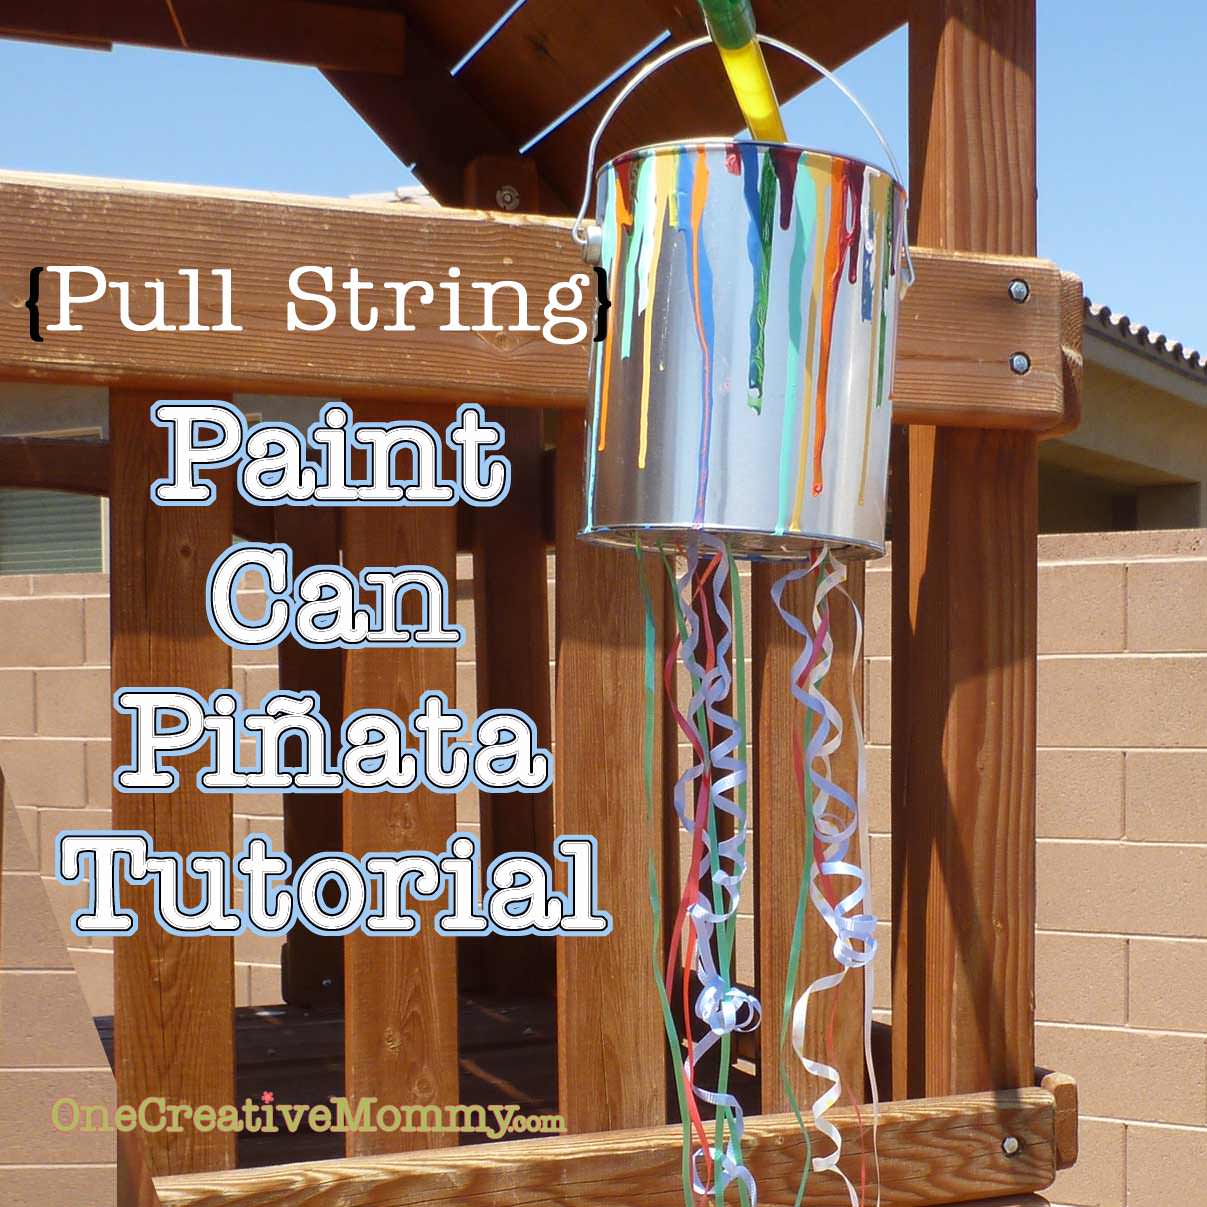
I finally have time to post more projects from my Boo's Artsy Birthday Party. Here's a tutorial for her Paint Can Piñata. As long as you can get your hands on some tin snips, this is an easy and inexpensive project.
Pull-String Piñata: This type of piñata is for younger children. There is no bat involved, and every kid gets to feel like they were the one that exploded the piñata. The piñata is filled with candy, but instead of hitting it with a bat, each child holds a ribbon and pulls on it when you say, "Go." A few of the ribbons are attached firmly enough to a trap door that--when pulled--they open the trap and the candy spills out. No one gets hit in the head, and you get to use the piñata again for another party! (If you are worried about some kids getting tons of treats while others get almost none, simply fill a ziplock bag of candy/toys for each child, and fill the piñata with the bags--instead of with loose candy. Each child gets a one bag. --Happy kids. No tears!)
Materials needed:
- One unused paint can (you can buy them at home improvement stores for $4-$5)
- Part of a cardboard box--at least as large as the bottom of the paint can, plus 3 or so inches
- Ribbon streamers (I'm a recycler. All of those streamers are previously used.)
- Leftover house paint and/or acrylic paint
- Duct Tape
- Tin snips (or anything else that you can use to cut the paint can)
- Candy for filling!
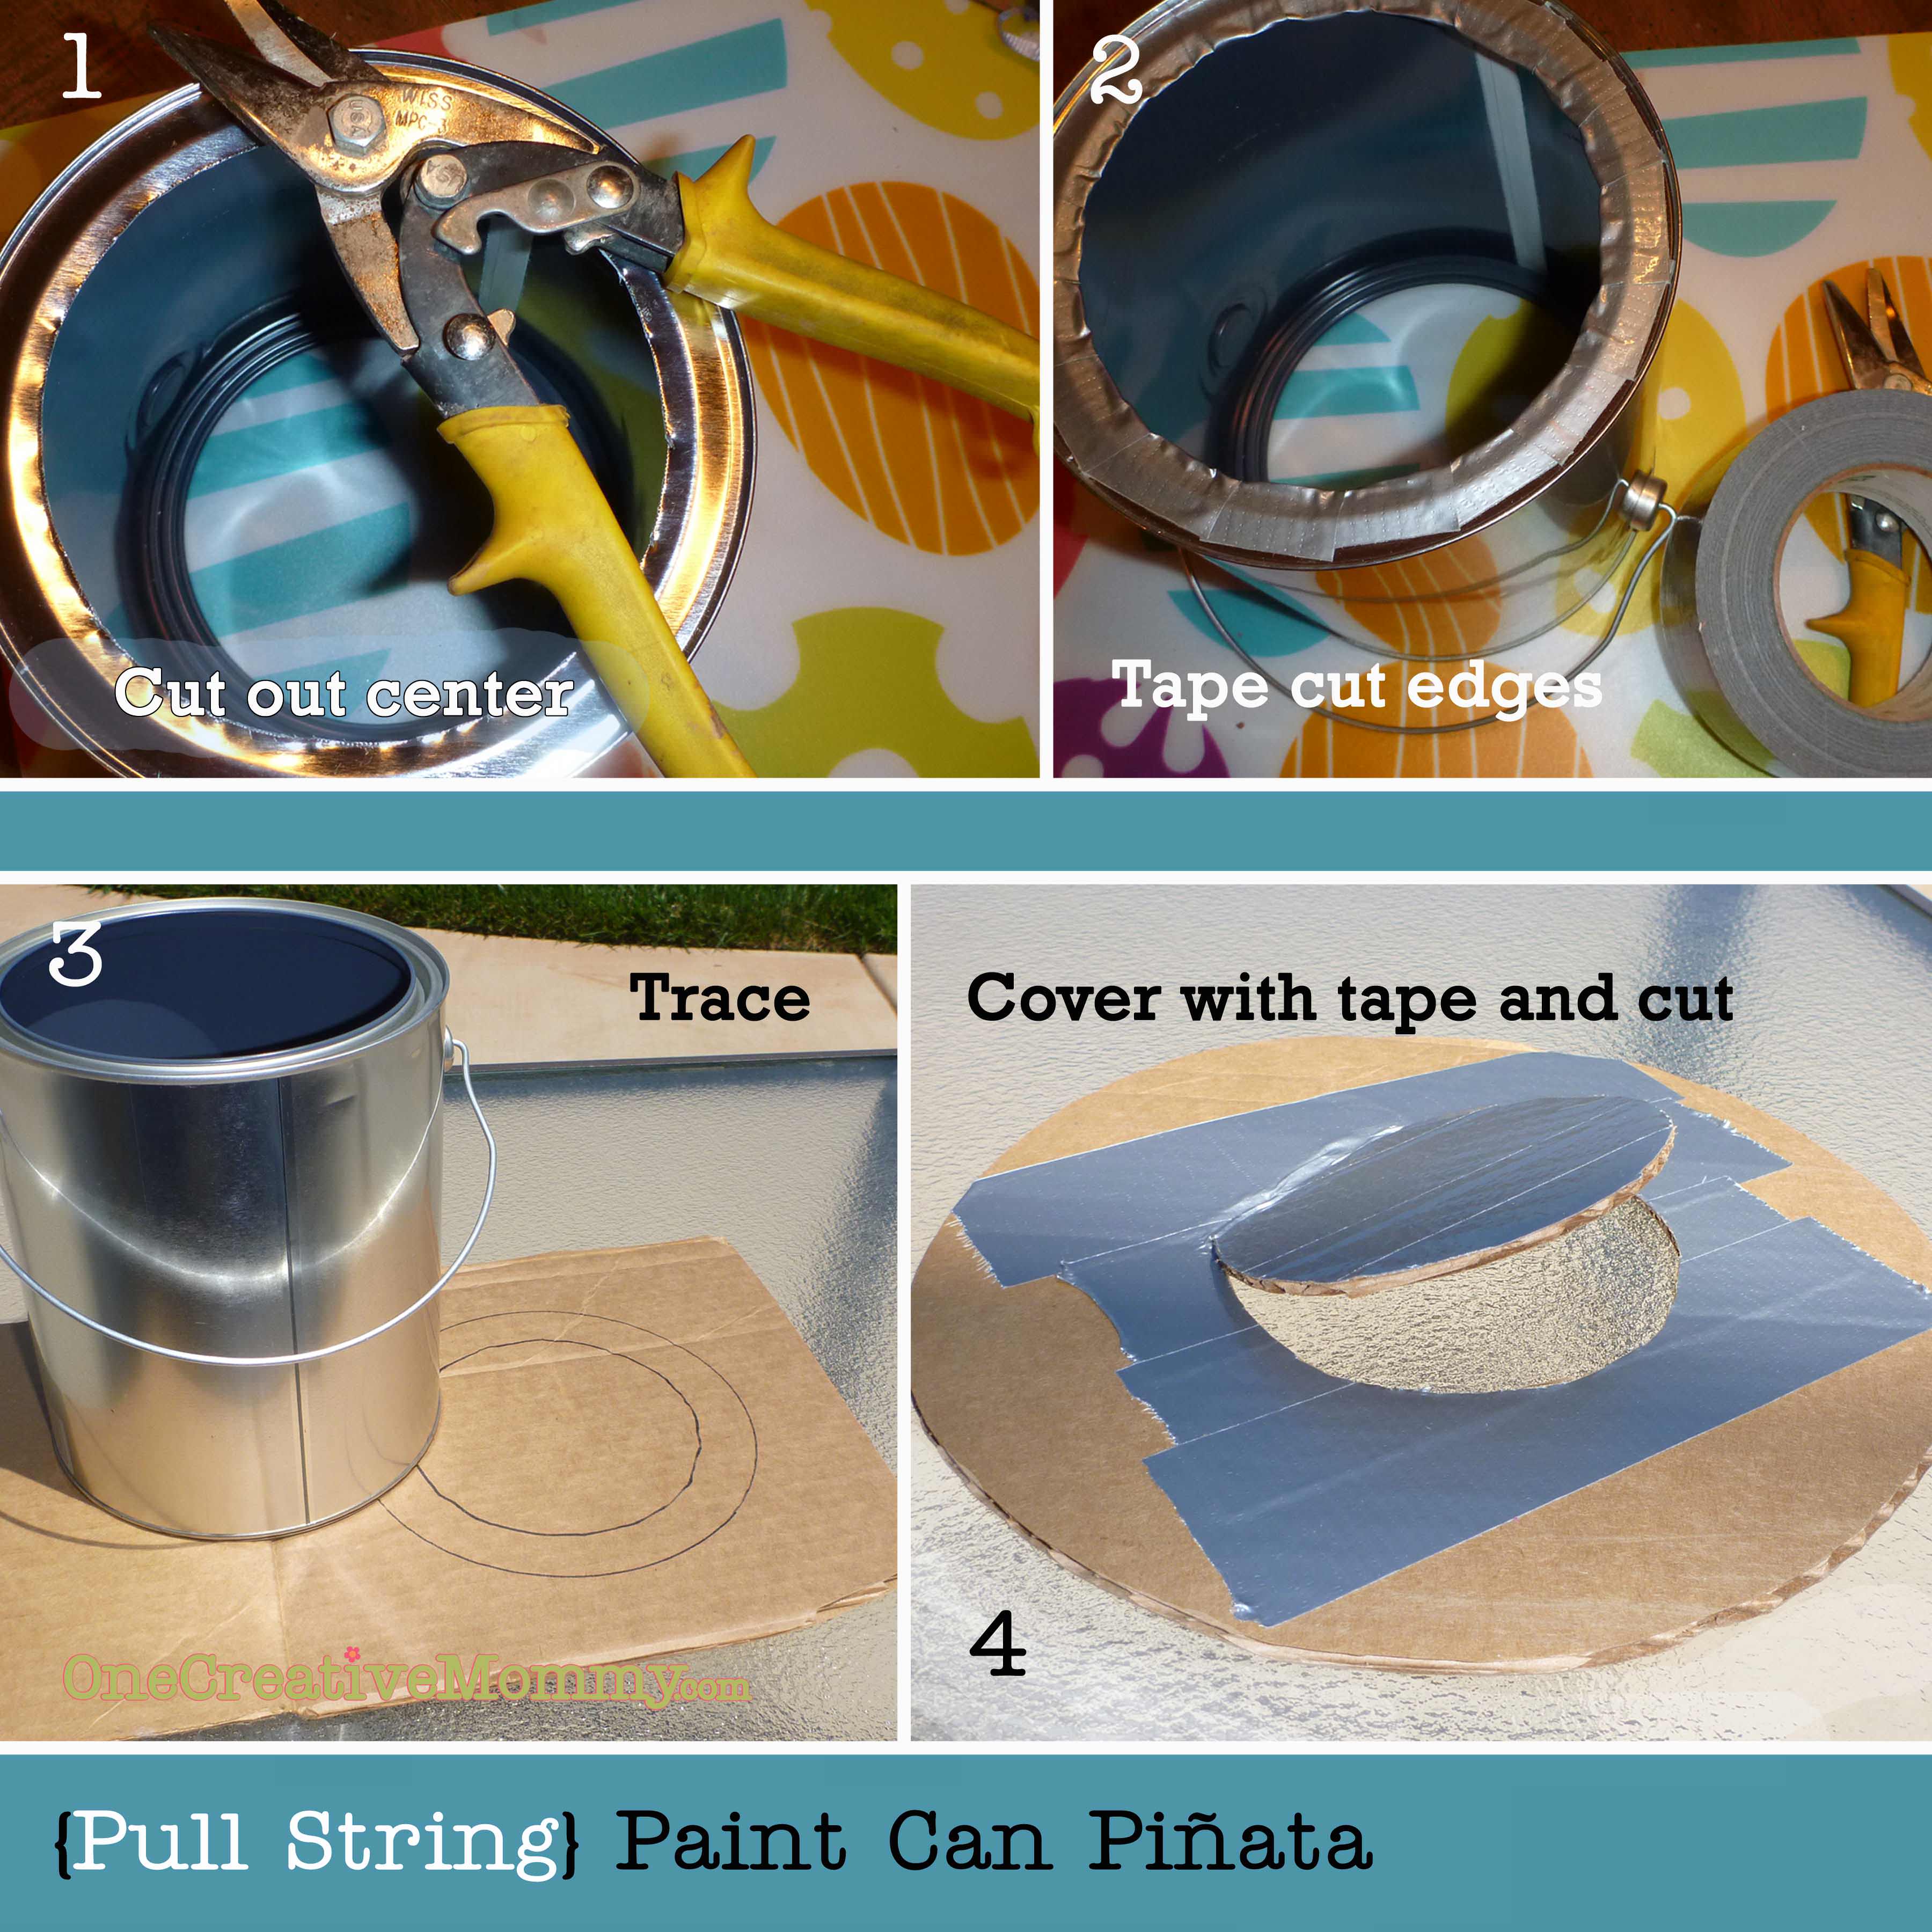
Turn the paint can upside-down so that you are looking at the bottom. Using tin snips, cut out the center (the paint can has handy concentric circles on the bottom that you can use as a guide). Immediately cover the cut edge with duct tape. (Your children and your fingers will thank you! No need for slicing fingers!)
Place the can on top of your cardboard and trace around the outside of the can and around the inside of the hole you just cut. Cover the back with duct tape, and flip it back over so that you can see your traced lines. Move about ½ toward the center from your inside circle, and cut out a round hole--leaving ⅓ of the circle uncut. (This will fold back to make your trap door where the candy will come out.) You can cut along your center circle instead, but it might be a tight squeeze for the flap to open up.
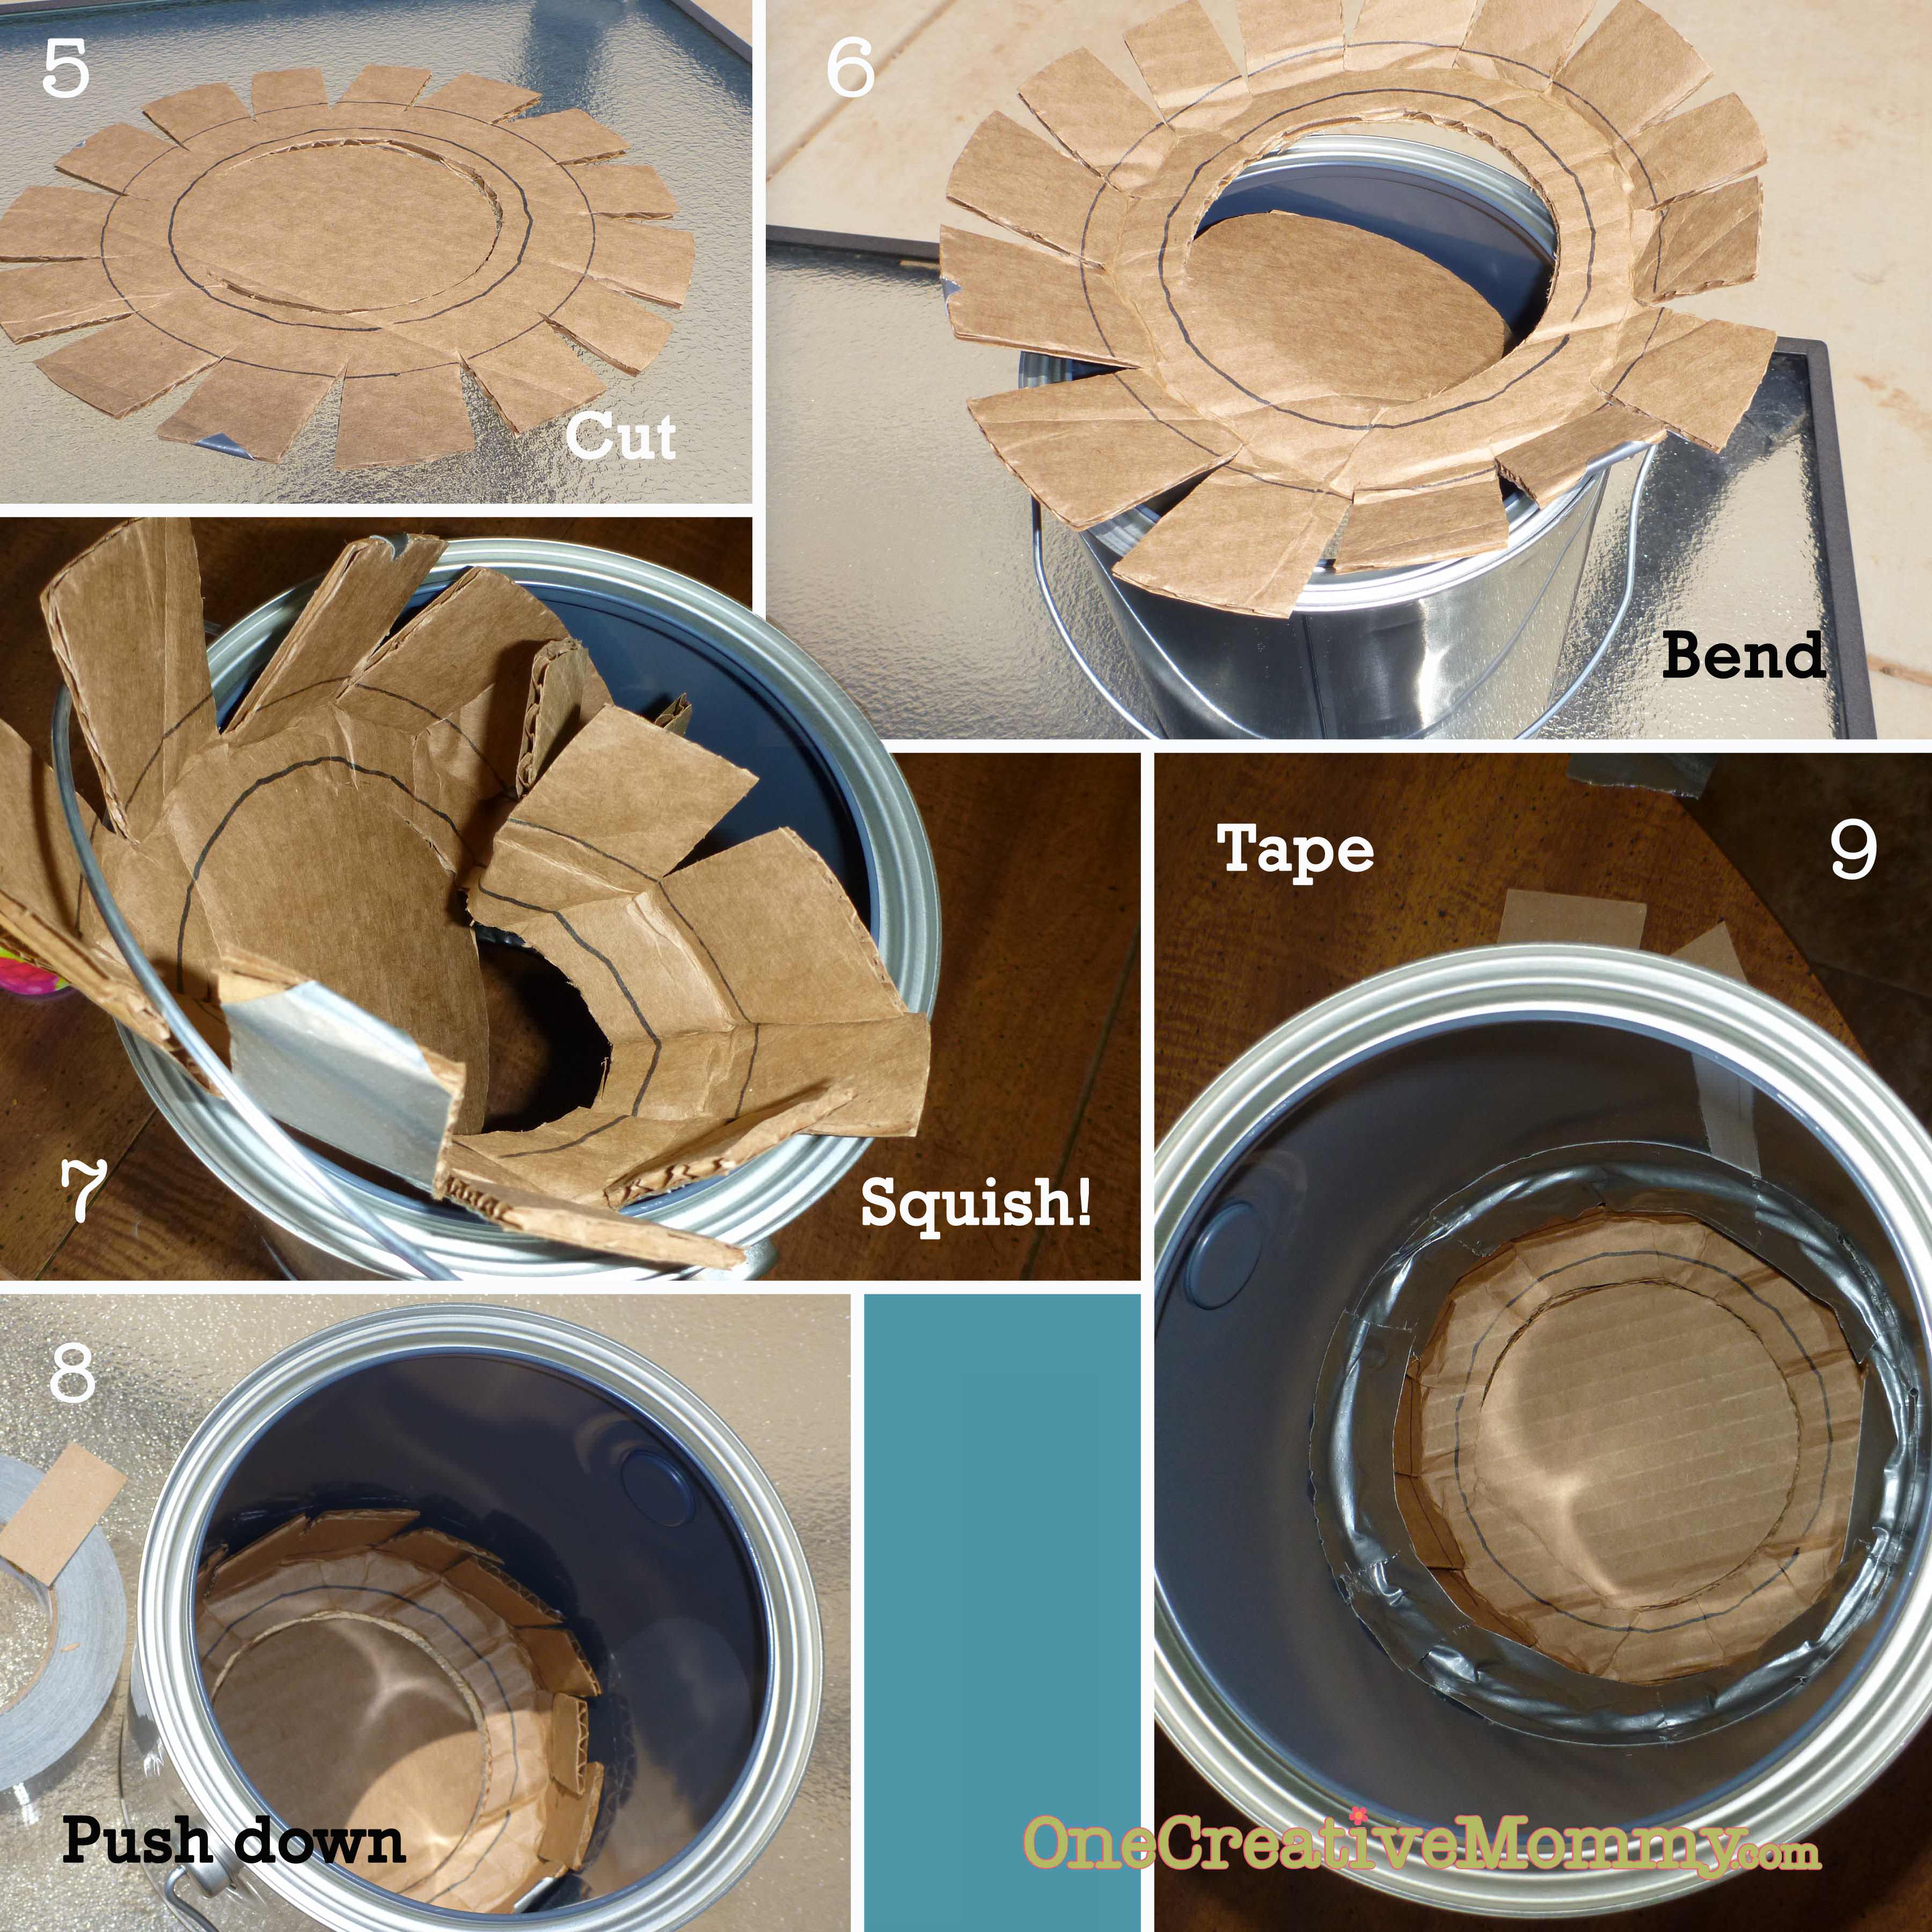
Trim the cardboard into a large circle (leaving about 2 inches from the traced outside edge of the paint can). Cut notches into the circle, slightly overlapping the outside circle. Place your "sun shape" on top of the paint can and fold and squish it until you can get it inside the can. (Don't worry--it can squish a lot without being damaged.) Push the squished sun down into the can and center the cut flap over the hole in the bottom of the can. Test your flap to make sure it opens! Now, use one hand to push the cardboard down as far as you can, while you use the other hand to tape around the inside--holding the cardboard in place.
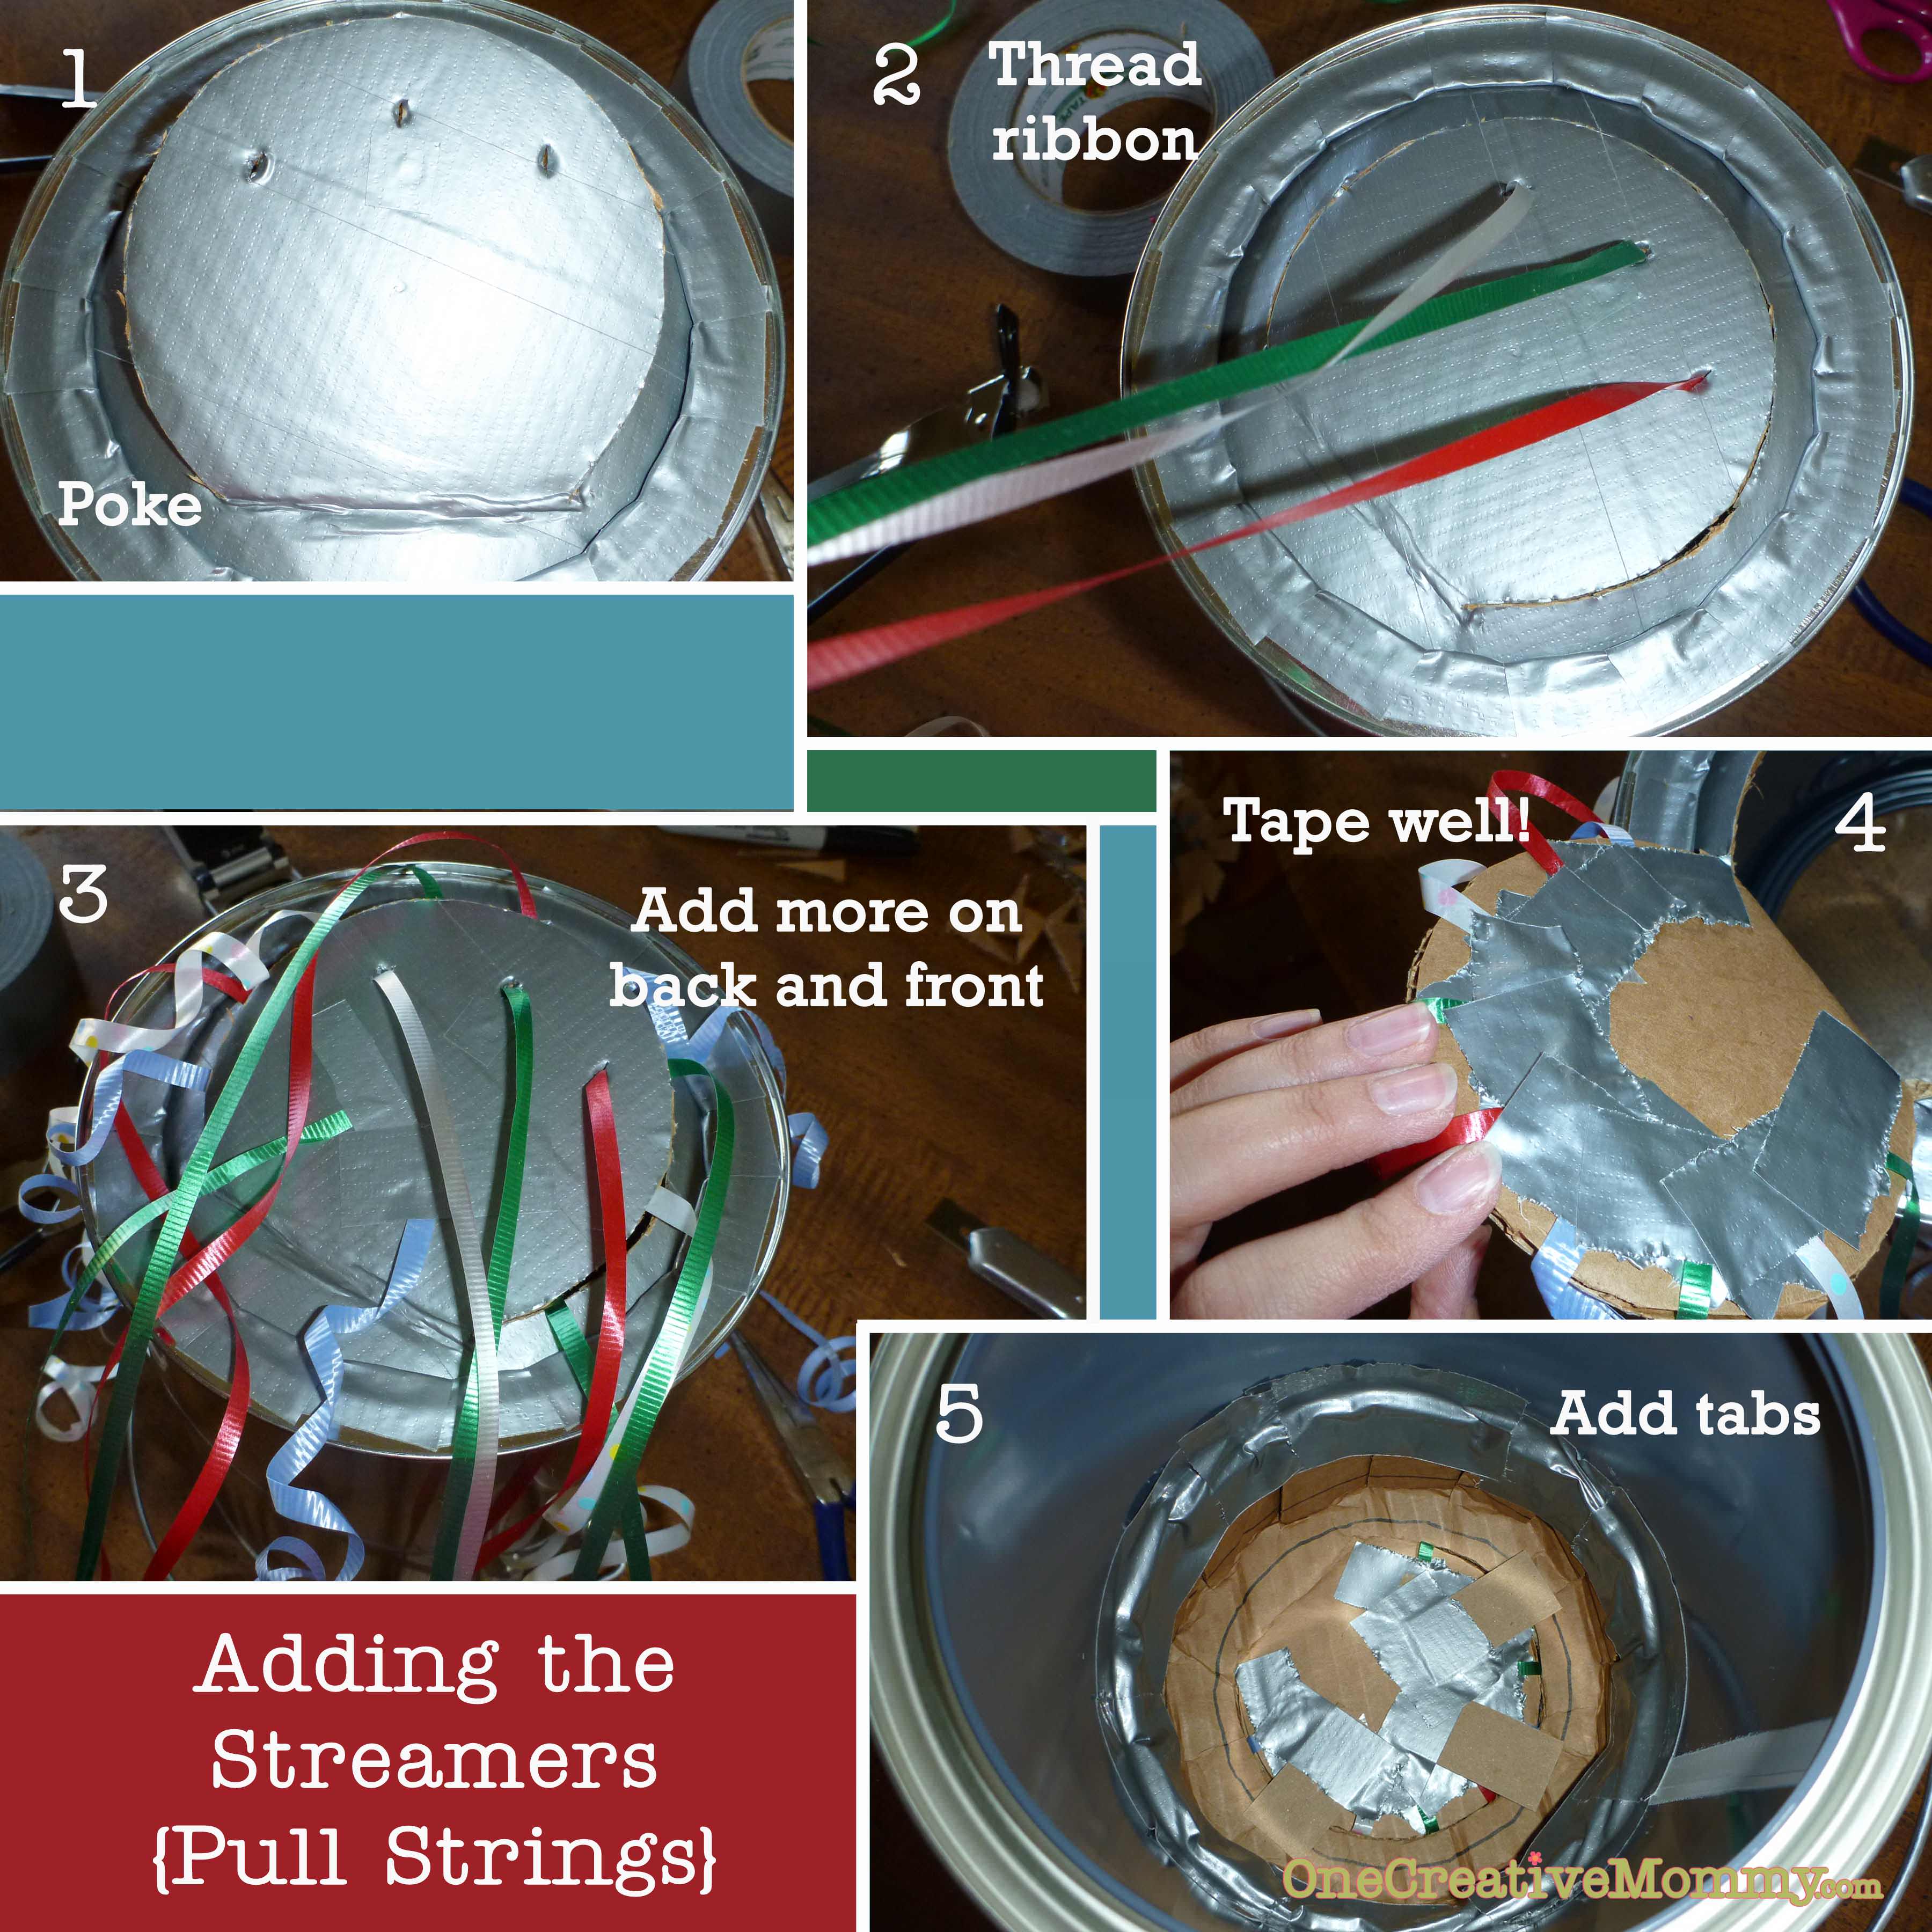
Now you will attach the pull strings. You only need two or three strings firmly attached that will actually pull open the trap. I chose to attach three. Poke three holes into the front of the trap--away from the part that folds. Thread one ribbon through each hole and knot on the inside of the can. Tape over the knots. Attach the rest of your ribbons however you would like (one per child). I taped some to the outside center of the flap and others on the outside edges (I taped those inside the can). Make sure the ribbons are not loose! Tape well.
Cut three 1 x 3-inch rectangles from thick cardstock (I used the back of a notebook). Lay them inside the can, across the cut edge of the trap door. Tape them onto the trap door. The untaped side should overlap the edge of the trap door--keeping it closed. (You can see the tabs a little better in the top right image below.)
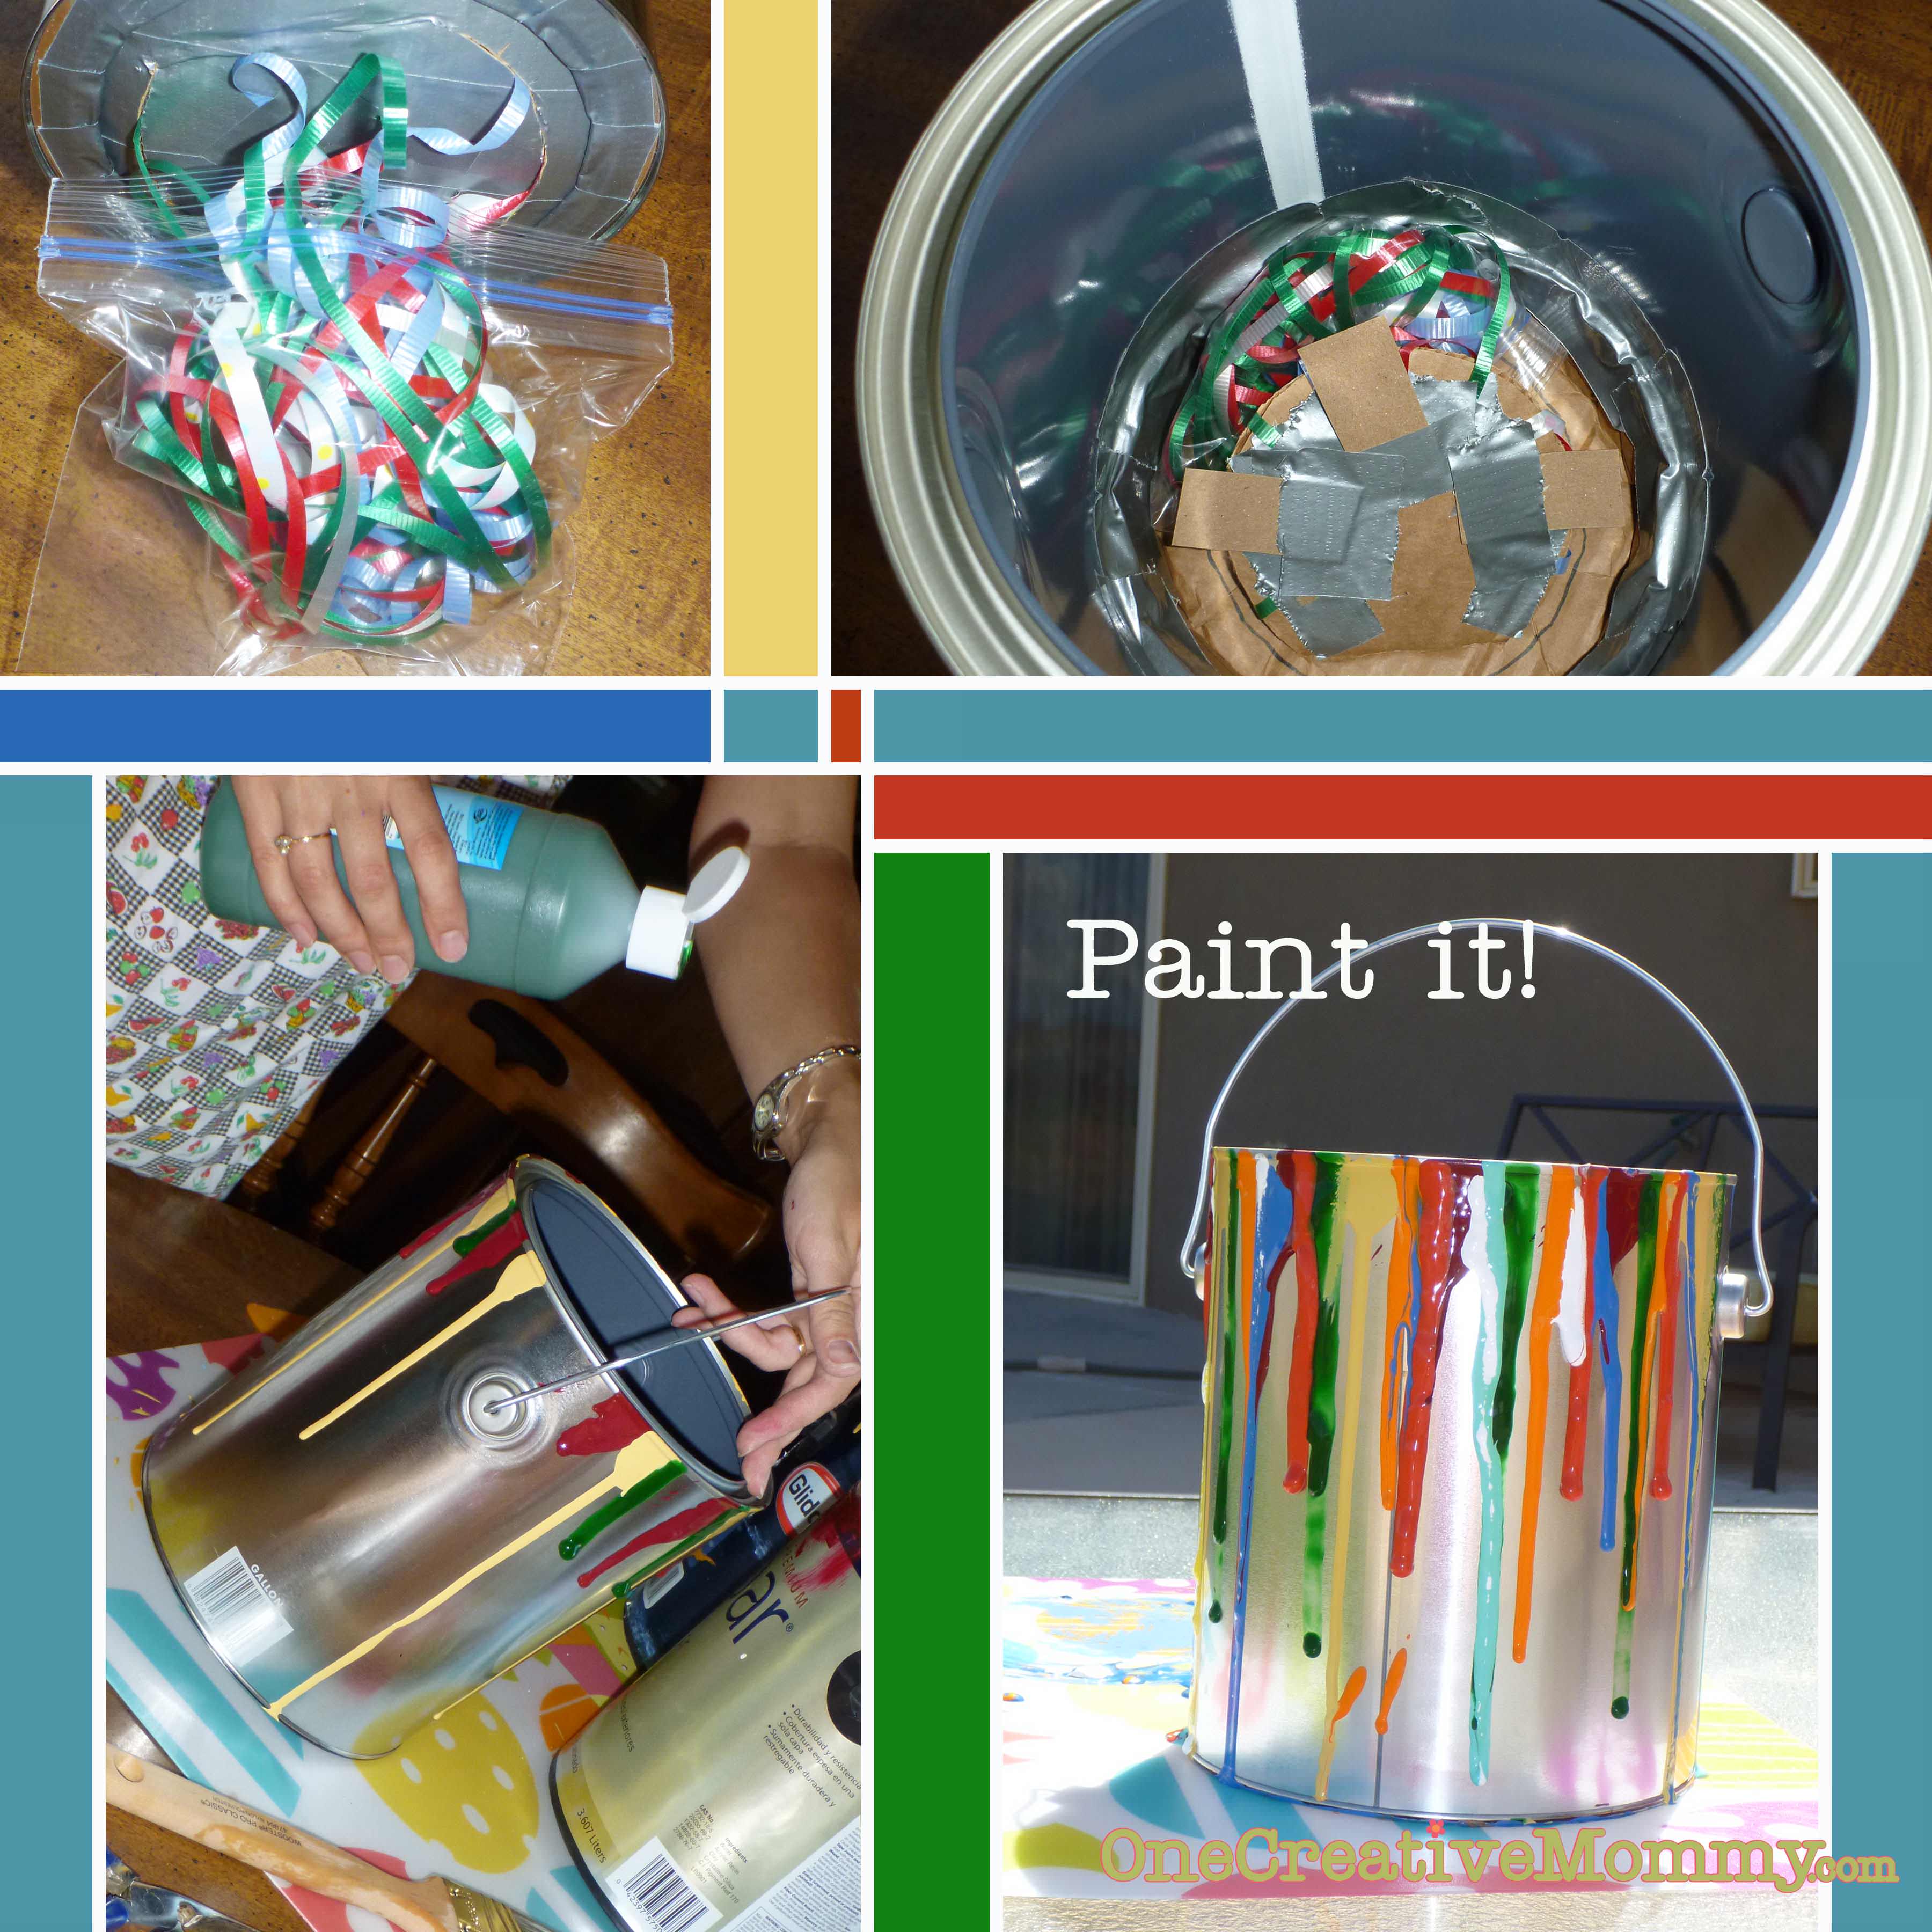
Now the fun part! It's time to paint. So that you don't get paint all over the ribbons, collect them in a plastic bag and tuck them inside the piñata. Using house or acrylic paint, tip the paint can and drizzle paint down the sides. I originally used all types of paint. (In the picture, I am squirting tempera paint.) Tempera paint does not work. It dries funny on the metal and peels off easily. Leftover house paint worked the best, with acrylic craft paints coming in second. (Fabric paint didn't work either.)
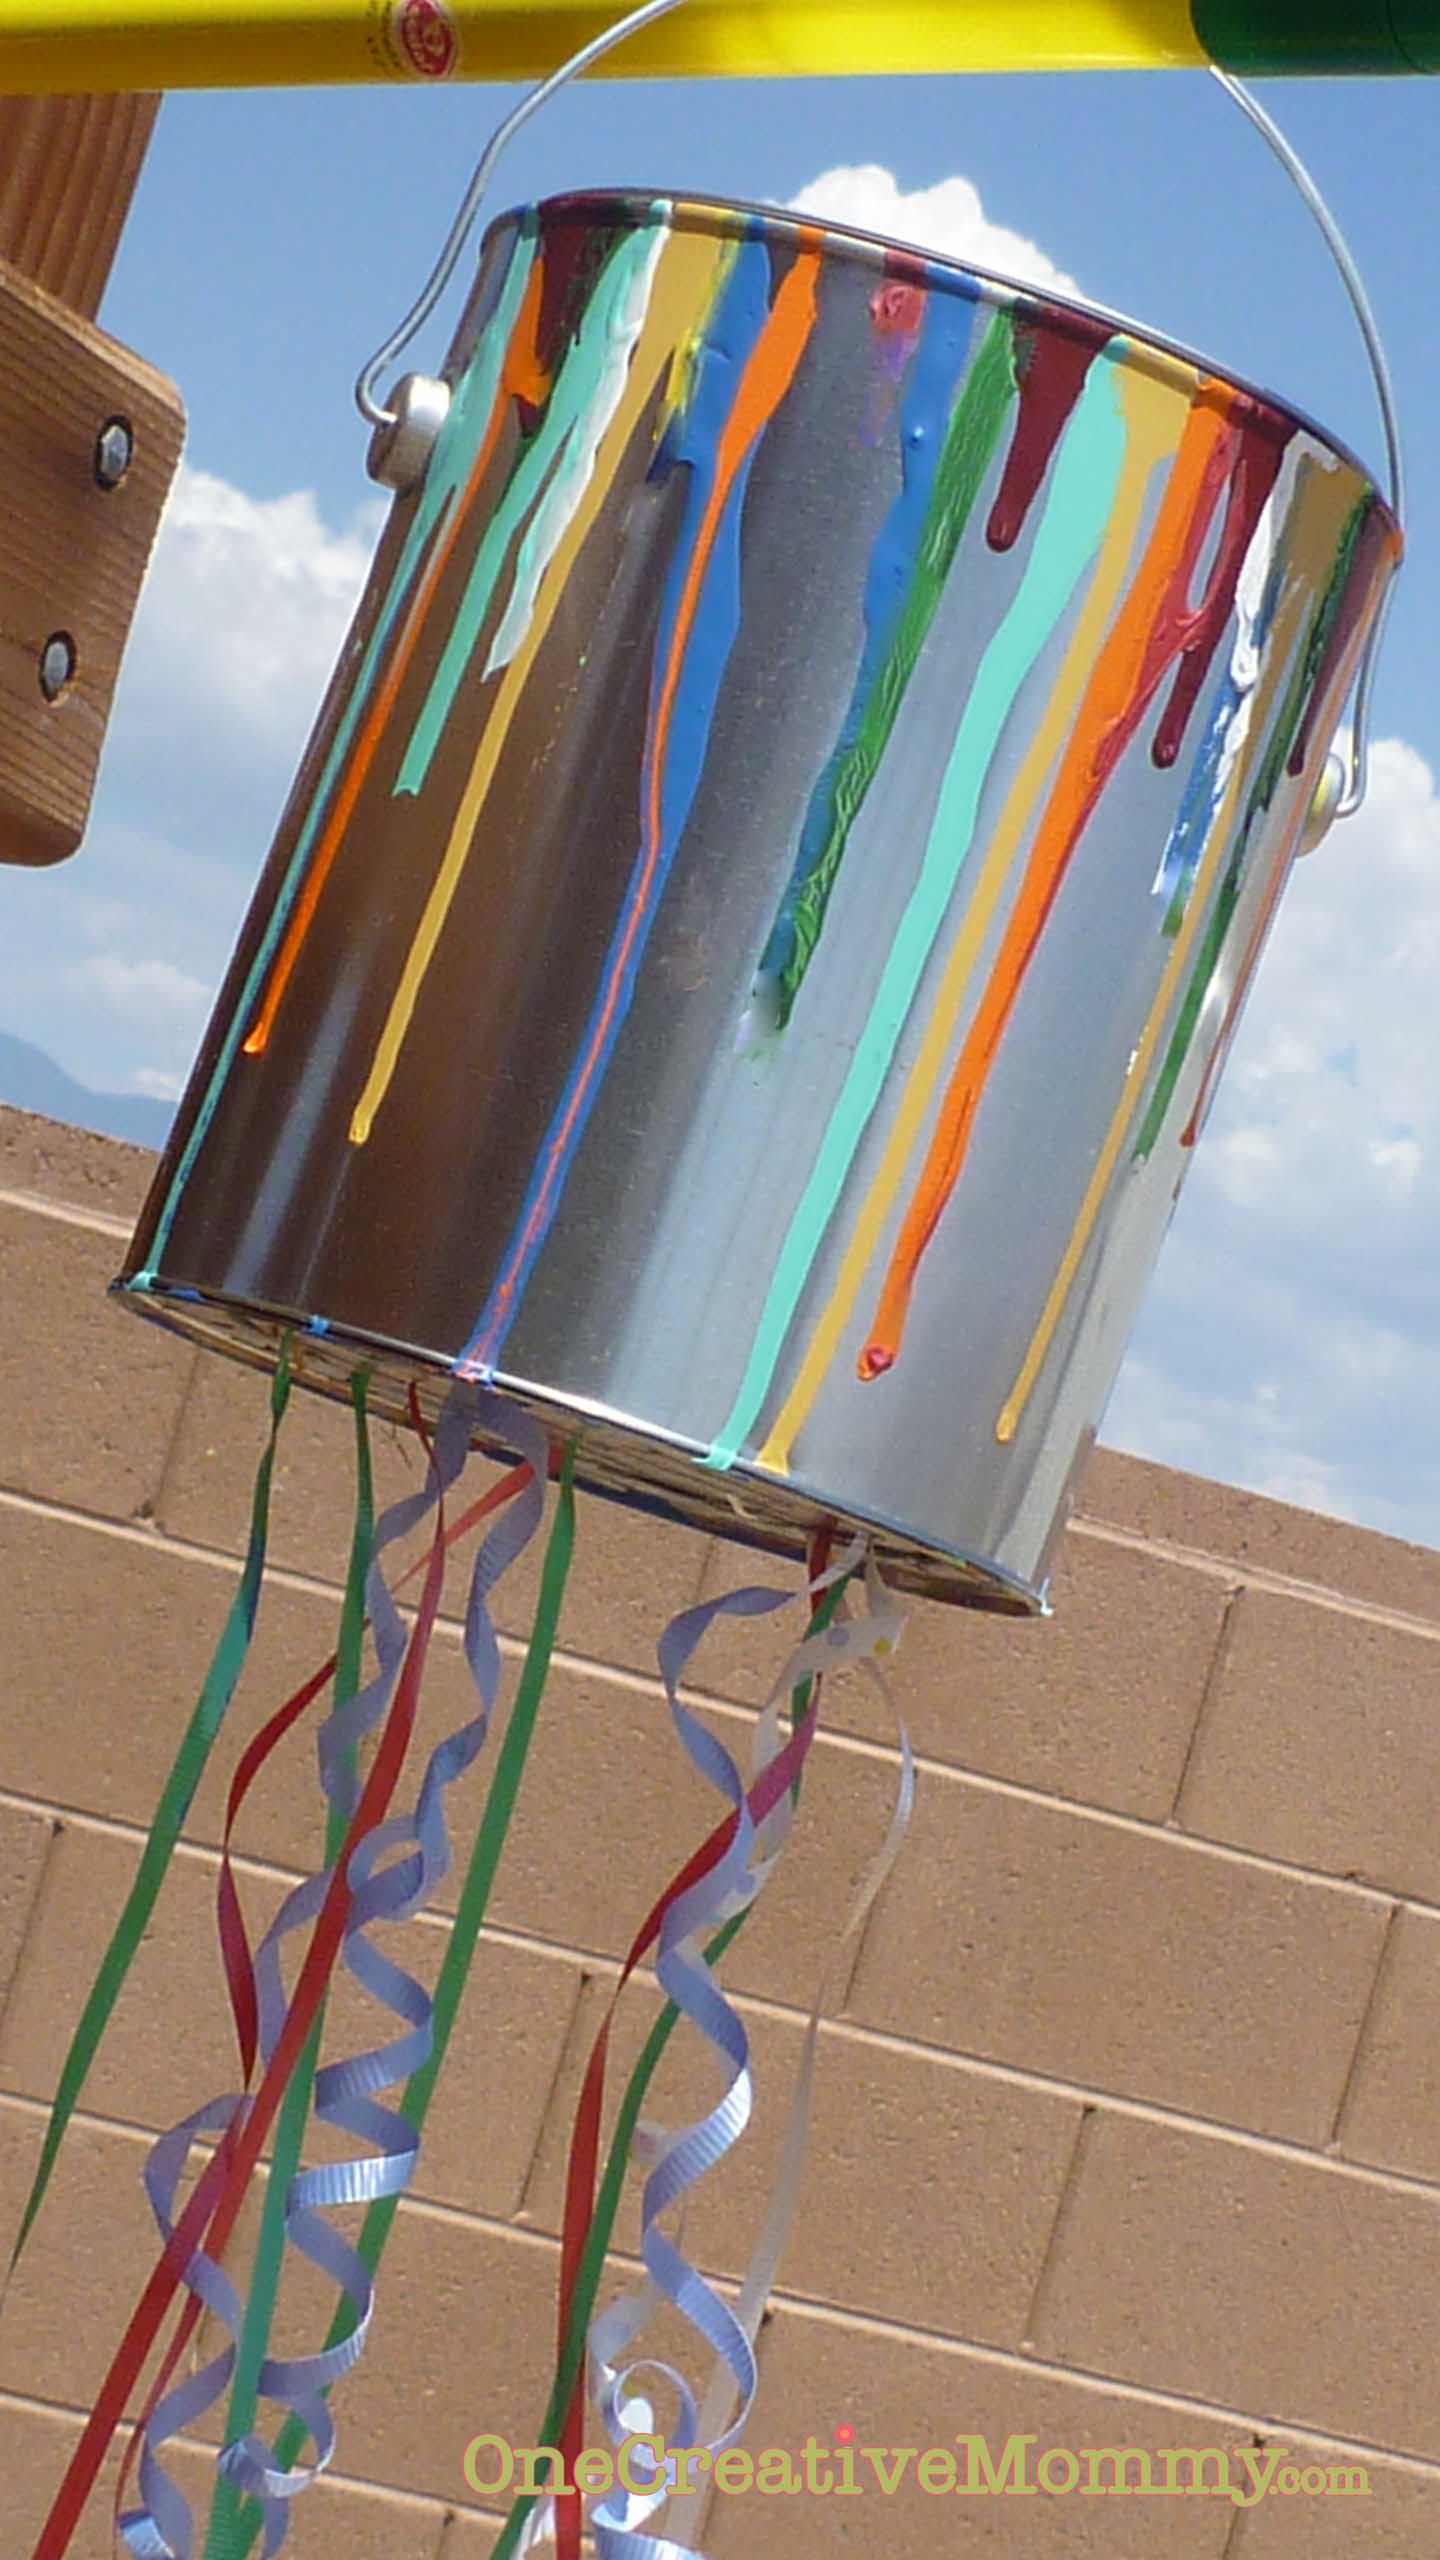
Put the can in the sun to dry, and you are done! Fill it up and get ready to party!
I have tons of artsy party ideas to share. Here are the posts I have finished so far: (Images are linked.)










Christina at I Gotta Create!
Brilliant idea and so much fun!!
<3 Christina at I Gotta Create!
Wildly Original Round Up party is open!
Heidi Fowler
Thanks! On my way.
Clydia Mangold on Facebook
Hi! Visiting from THREE MANGO SEEDS! :D
Nicole@Show Off Friday
That looks awesome! It looks like it would be a lot of fun and I really like the streaks of paint down the sides!
Kathie
What a fun idea! I love this. So much safer! By the way, I think I fixed my pinterest button issue (yay!)! Thanks for linking up!
Jessi @ Practically Functional
This is too cute! I love the little drips down the side, and that's a brilliant idea about putting the candy in individual baggies so it's "fair"! Thanks for sharing at The Fun In Functional!
Jessi @ Practically Functional
Just wanted to let you know I featured this today over on my blog! You can check out the feature and grab a featured button here: http://practicallyfunctional.net/2012/08/the-fun-in-functional-link-party-14/
K Coake
That is such a cute idea! I have never seen that before. Looks like fun... I like the paint dripping down the sides.
Joyce
What a wonderfully cute idea! I also favor your way of making sure every child feels part of the "pinata experience" and gets an equal amount of treats. In the past I have used your idea of individual treat bags. There were different age groups present so we put name tags on them and that worked too - the youngest kids didn't get anything that was a choking hazard.
Julie @White Lights on Wednesday
This looks like way too much fun. I wanted to do a pinata at my son's party this year, but I was worried his brother would run away from an adult and get clocked. Loving that you get the same effect without the worry. I'd love for you to share at my link party. http://www.whitelightsonwednesday.com/2012/08/wednesday-whatsits-23.html
Jill
what a fun party idea! It looks fantastic!
Thanks for linking to a Round Tuit!
Hope you have a fabulous weekend!
Jill @ Creating my way to Success
http://www.jembellish.blogspot.com/
Mackenzie
This is so awesome! I love it; although I bet the kids loved it even more! :) Thanks for sharing last week on Saturday Show & Tell at Cheerios and Lattes. You are a featured favorite this week! Can't wait to see what you share this week!
Mackenzie :)
Kim (TheMoney-Pit)
Pull string pinatas are so great for little kids! I am always a nervous wreck when blindfolded kids of any age are swinging a stick around, but with little kids.. Yikes! And I never ever considered making one of my own! Great tutorial!
Heidi Fowler
Thanks! I'm on my way to visit your site.
Sharon @ Elizabeth & Co.
That's so clever and fun!
The Sunshine Grove
I had a pull string pinata when I was a kid! Very cool DIY idea.
Jamie @ Love Bakes Good Cakes
What a cute idea! Love this :) Thanks for sharing at All My Bloggy Friends last week! I can't wait to see what you share tomorrow! :)
Nichi - The Mandatory Mooch
Great idea!! Thanks so much for sharing at Tasty Thursdays on The Mandatory Mooch. I hope you will link up again. The party will be live with features tomorrow night. http://www.mandatorymooch.blogspot.com
Thanks, Nichi
Julie @White Lights on Wednesday
You've been featured! Thanks for linking up at Wednesday Whatsits. :)
http://www.whitelightsonwednesday.com/2012/08/wednesday-whatsits-24.html
Christina at I Gotta Create!
You're a STAR at I Gotta Create! Featuring you: http://igottacreate.blogspot.com/2012/08/week-15-wildly-original-party-features.html
Thanks so much for linking up!
<3 Christina
Debi @ Adorned From Above
This is such a cute idea. Thank you so much for sharing with Wednesdays Adorned From Above Link Party last week. This weeks Link Party is opened at http://www.adornedfromabove.com/2012/08/free-bee-sweet-hat-pattern-crocheted.html
Hope to see you there.
Debi Bolocofsky
Adorned From Above
http://www.adornedfromabove.com
Kim@madeinaday
I featured you today!
Kim~madeinaday
Heidi Fowler
Thanks so much! I gave your site a shout out!
Randomly Fascinated
Thanks for linking up to Friday Fascinations! This is such a great post that I featured you! Come on over and get a button!
http://domesticrandomness.blogspot.com/2012/09/friday-fascinations-3-features.html
Ruthie
How fun is this!! Fun idea. Pinned! Please come share it at my Super Saturday Show & Tell http://www.whatscookingwithruthie.com I'd love to have stop by... xoxo~ Ruthie
Megan @ The Pink Flour
I love the idea of the paint can! My cousins' grandma use to make pinata like these for their birthdays and I always loved them :)
Kelly@ Here Comes the Sun
Such a creative idea!
Amber
I'm so excited to do this at my 5yr olds party! Last time we did a piñata she ended up bawling due to everyone beating the poor animal to get candy (she was 2 and thought the cow was her friend). We are doing a paint party, so this is perfect, no one (or animal, lol) will get hurt!
I didn't know if each child pulled a string at a time, or do they all pull together at the same time? It looks as if one pulled, it would open, please help clarify this for me, thanks!
Alyssa
Great idea! I am featuring this on an Art Party Roundup on my site with a link if you don't mind.
Heidi
That would be just fine, Alyssa. Thanks! I'm glad you like it. Thanks for taking the time to comment.