

It's time for another art party project post: Paint Pallet Sugar Cookies!
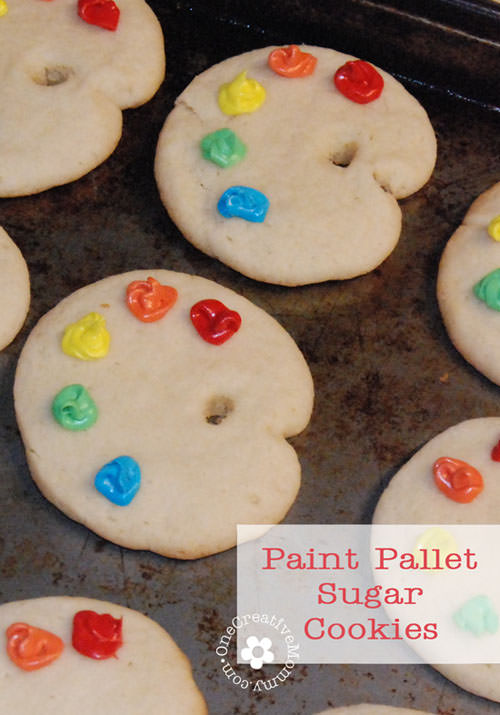
A few days before Boo's Art Party, I came across a post by J at WhatHappensAtGrandmas.com. She posted about a fantastic Clothesline Art Show that she organized for her grandchildren. Not only was the entire Art Show idea fantastic, but there was this great little treasure hidden toward the end of the post--paint pallet cookies! I knew they'd be perfect for Boo's party. I contacted J and found out that she used a cookie cutter to shape her cookies. Since I didn't want to spend more money, and I didn't have time to wait for the cutter to come in the mail, I had to get creative! Here's what I did:
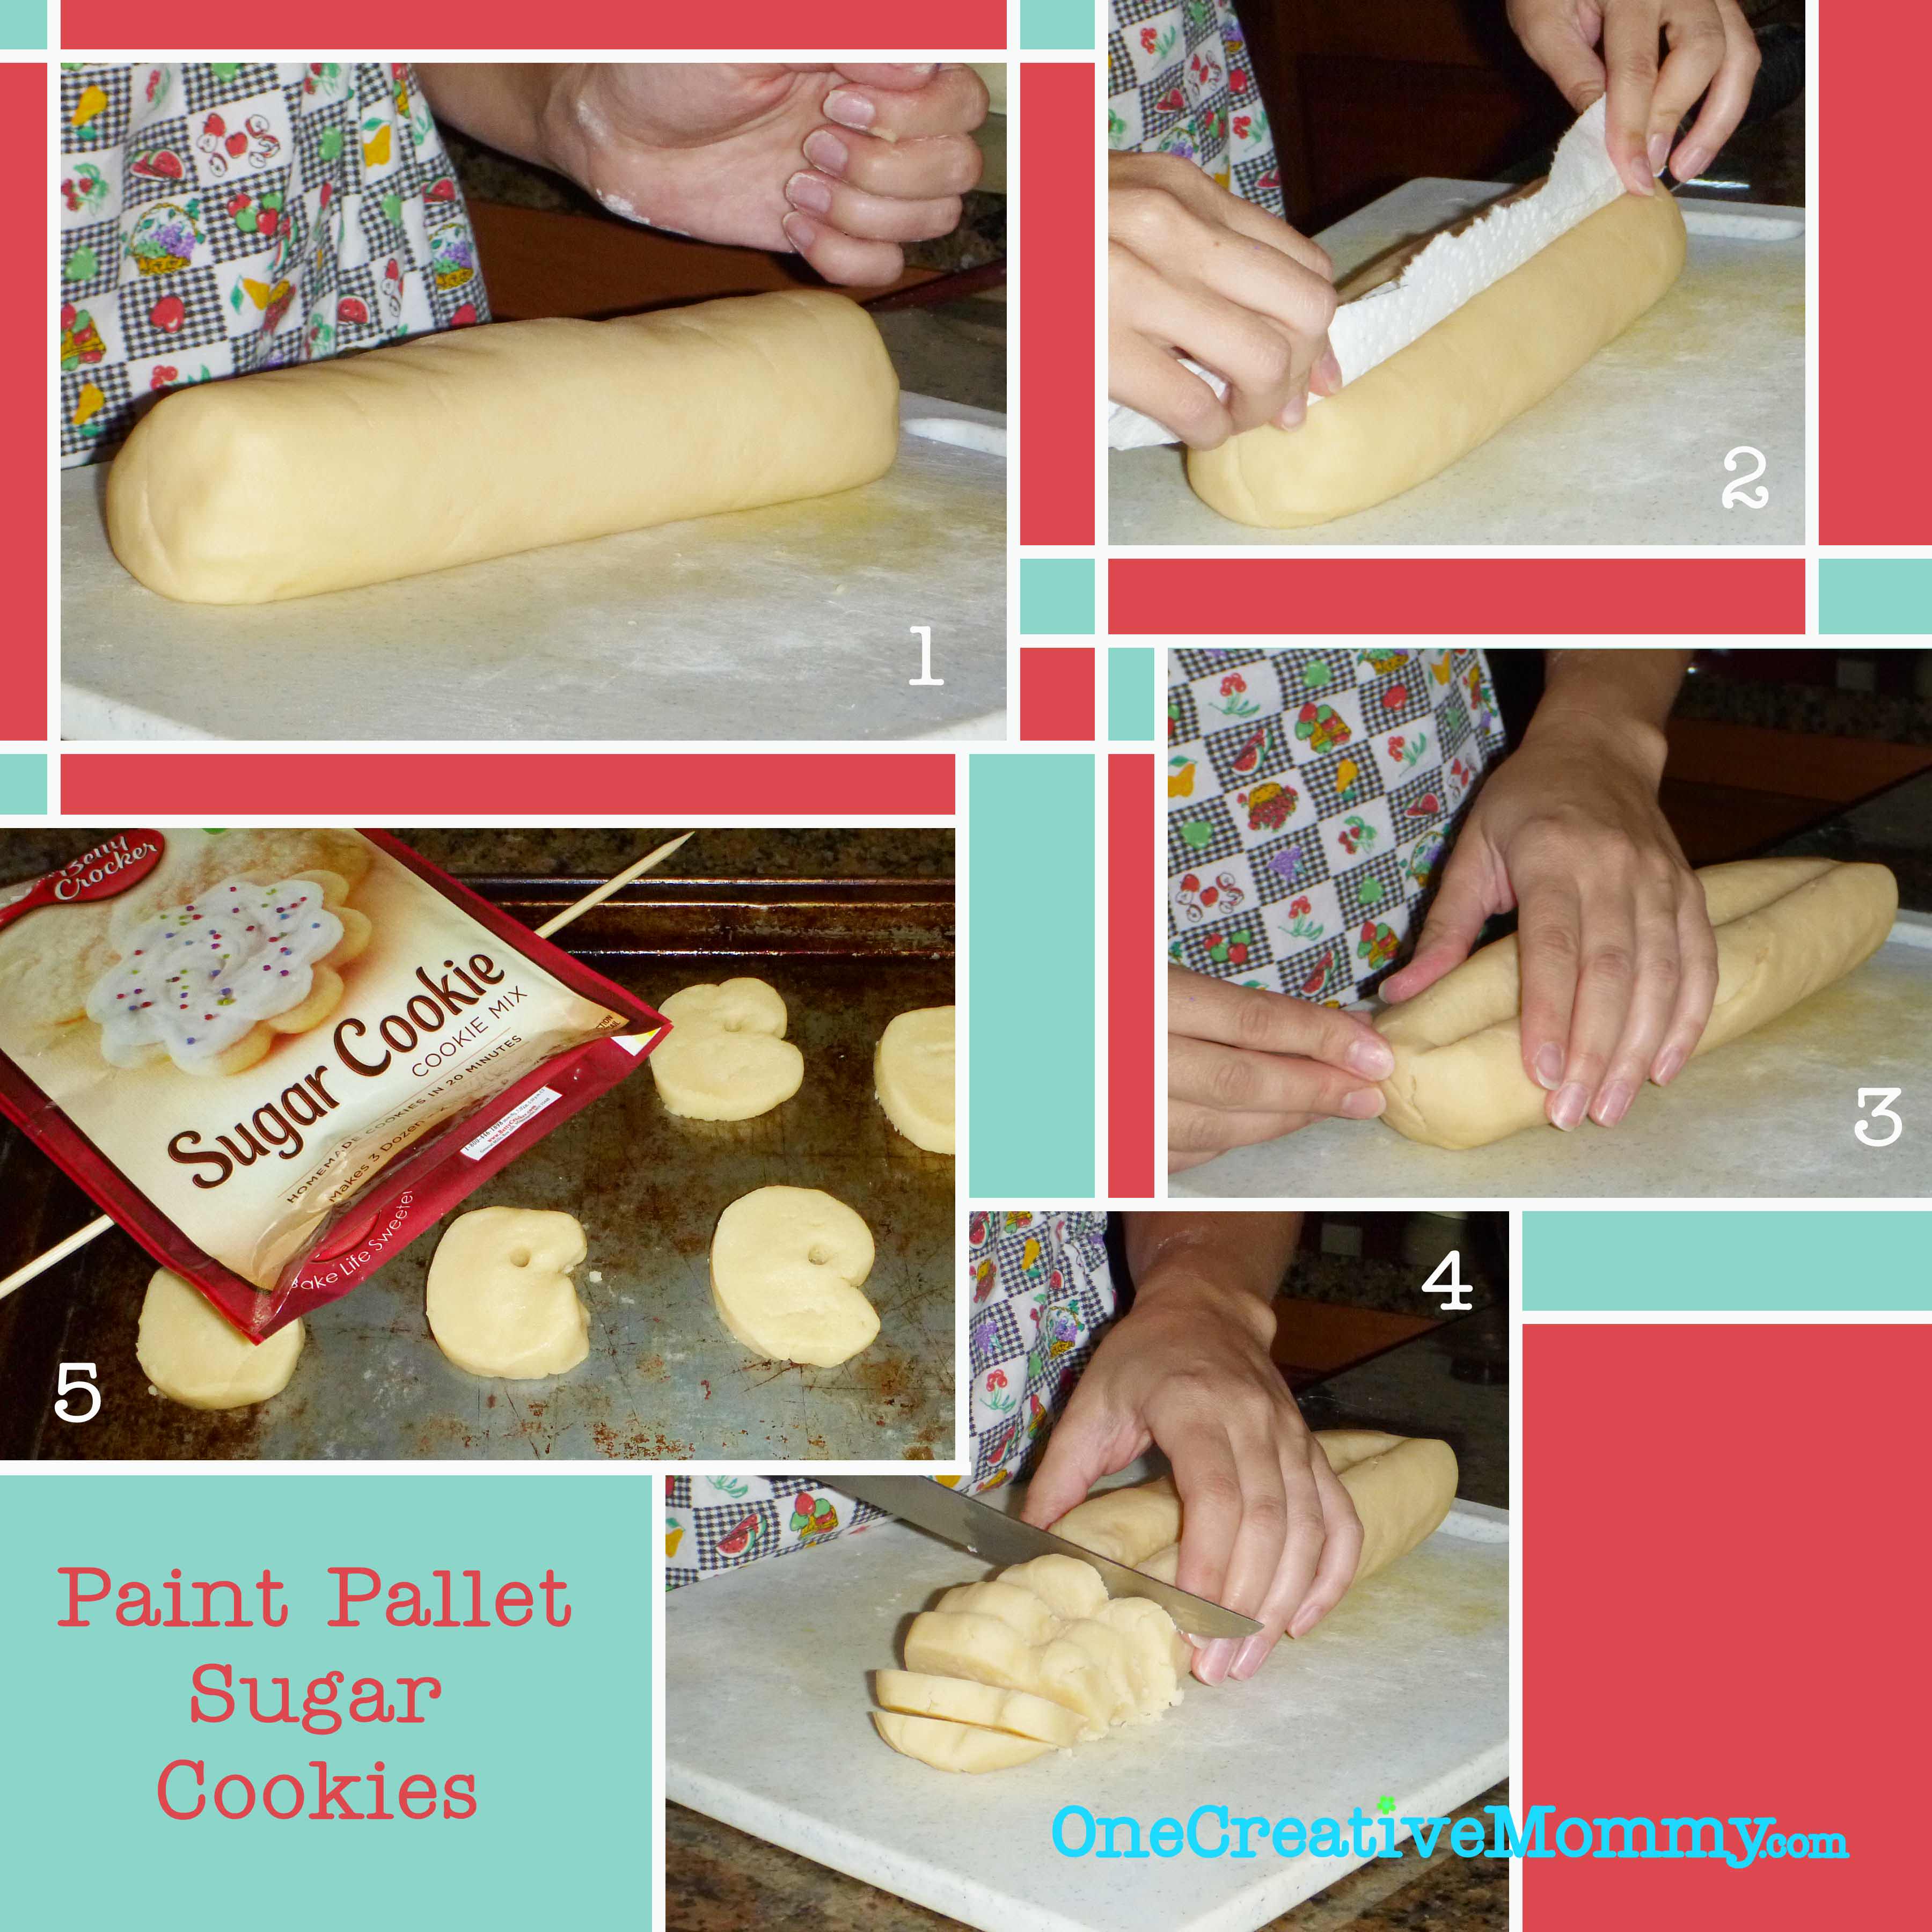
- Prepare your favorite recipe of sugar cookie dough, and roll it into a tube. (I used a cookie mix from Betty Crocker--it was the night before the party, and I still had tons of projects to finish! Turns out that Betty Crocker makes yummy sugar cookies!) Refrigerate the dough for about 10 minutes so that it will keep its shape as you work with it.
- Use some type of rod (I wrapped my knife sharpener in paper towels) to press a dent into the top of the dough. This dent will mimic the notch in the paint pallet. Make your dent much larger than you think it should be. I made mine just the right size--but it shrank when the cookies baked. I should have made it deeper. Refrigerate the dough again so that you can cut it.
- Slice the dough into ¼" cookies and lay the shapes on a cookie sheet. (Grease or don't grease the pan--depends on your recipe.) Use a wooden skewer (the kind for grilling) or a flattened straw to poke a hole into the dough just above the notch. Again, this hole will shrink. Make it bigger than you think you will need.
- Bake the cookies according to your recipe, and allow them to cool before you remove them from the cookie sheet. If your holes have disappeared, you can quickly make a new hole if you do it immediately after removing the cookies from the oven. If they start to cool, it's too late to use the skewer. You may be able to punch a hole with an unflattened straw, though!
Now the fun part--frosting!
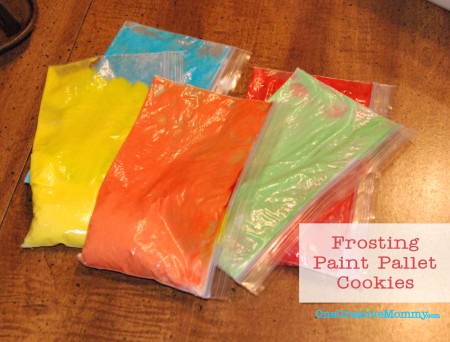
If you have fancy bags and tips for frosting . . . thicken your frosting with powdered sugar and go to town. If not, read on. You will need zip-top bags, gel food coloring, homemade or store-bought frosting, and powdered sugar. (I used funfetti frosting because I wanted the sprinkles for the cake.)
Divide the frosting into five bags (about ¼ cup/bag). Add a large squirt of food coloring and several large scoops of powdered sugar to each bag. Seal the bags--letting as much air out of the bags as possible. (If there is a lot of air in the bag, it will be harder to mix.) Squish the bag to mix it all up. (My kids loved this part.) Continue adding powdered sugar until your frosting is pretty thick. You could mix the frosting outside of the bags, and then add it when you're ready to frost, but where's the fun in that? (Besides, then you have more bowls to wash!)
Cut a very small notch in one of the bottom corners of the ziplock. It's easy to make it bigger, but impossible to make it smaller!
Be sure that your cookies are completely cooled, and lay them back out on the cookie sheet or large plate. Beginning at the top or bottom corner of a cookie, gently squirt a dab or swirl of frosting. Continue with each cookie, and then move onto the next color. Repeat with each color, and you are done!
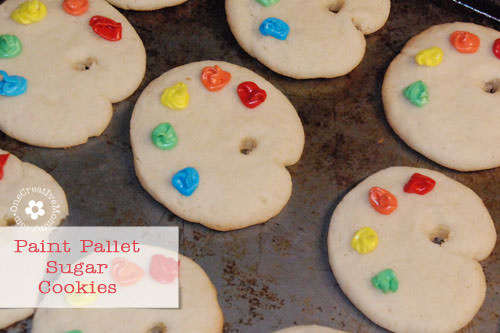
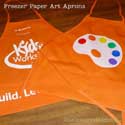
I am kicking myself that I forgot to take a picture of the finished plate of cookies. (I'm certain there is a computer memory card hiding somewhere that includes pics of the finished cookies and of the frosting process.) They definitely did not turn out perfectly like J's, but the kids loved them anyway, and I thought the homemade, imperfect look was just fine. They matched the kid's art aprons perfectly!

Thank you, J, for the inspiration, and for answering my emails. Your grandchildren sure are lucky to have you! Be sure to check out whathappensatgrandmas.com for this fantastic Clothesline Art Show. Here's a little preview:

Want to see my other art party posts so far? (Images are linked.)









Joyce
Heidi, Thank you so much for your generous and kind acknowledgement of my art show!
You made a wonderful adaptation of the cookies! Your aprons are very clever too, and I can tell by the picture that those little girls had a great time at your creative event. I am going to subscribe now so I don't miss a single idea of yours. We might have to offer the paint can pinata at next year's art show! I love it! And I am always glad to help in any way I can. Bless you!
Joyce
Heidi Fowler
You are so kind! You made my day. Thank you.
Gail
What a great idea. I love the little cookie paint pallets. Great idea. Gail (BibleLoveNotes.com)
Heidi Fowler
Thanks so much! I'm on my way to check out your site!
Dorothy @ Crazy for Crust
Oh my gosh this is awesome! Totally pinned so I can brainwash my daughter into her next birthday theme.
Heidi Fowler
I'm glad you like it. I'm headed over to check out your site. Thanks for commenting.
Tonna @ Navy Wifey Peters
cute cookies!
Heather@Creative Family Moments
These are so cute! And the perfect thing if you're 'art mom' at school!
Trish - Mom On Timeout
What a super fun idea! Love this! Thanks so much for sharing at Mom On Timeout!
Nicole
These cookies are so adorable & what a great party theme. This will be perfect for my daughters birthday party ... She Loves painting & crafts :)
Heidi Fowler
Be sure to come back. I'll be posting more activities from the party soon. Thanks for visiting and commenting!
Nici ~Posed Perfection
These are adorable! I did an artist themed party for my daughter last year and it was a big hit. I just made an artist pallet cake, but the cookies would have been great to have too. Great job! Have a lovely week!
Blessings,
Nici
Erin @ Making Memories
Your cookies are so cool!
Stephanie
LOVE these!!! I've pinned, tweeted and facebook liked them! I've got to make these for my next painting party.
Thanks for sharing on Chic on a Shoe String
Stephanie @allartful.com
Nicole@Show Off Friday
Those are so creative and cute!
Jill @ Create.Craft.Love.
Those are so stinkin' cute! I love how they turned out! Makes me want cookies for breakfast. Thanks for sharing at the Pomp Party! Pinning!
Heidi Fowler
I think I probably had a few for breakfast!
cassie
i love this idea! SO darn creative! pinning. :)
andi winslow
I love your cookies.....................and what a special grandma who helped all those little girls to such a cookie party ................andi
Raejean
Super cute cookies! I wonder if I can talk any of my kiddos into having an art party?
Randomly Fascinated
those cookies are absolutely adorable! I love the idea of an art party!
I would love to have you link this up to my linky party! http://domesticrandomness.blogspot.com/2012/08/friday-fascinations-3-everything-linky.html
Heidi Fowler
I'm on my way over!
Randomly Fascinated
Thanks for linking up to Friday Fascinations! Don't forget to come back and link up to this week's party! http://domesticrandomness.blogspot.com/2012/08/friday-fascinations-4-everything-linky.html
Kathryn Griffin
How perfect! Thank you for sharing this at Make it Pretty Monday party at The Dedicated House. Hope to see your prettiness again on Monday. Toodles, Kathryn @TheDedicatedHouse
Nichi - The Mandatory Mooch
Wow, these look delightful. My little artists would love these. This recipe will be FEATURED on Tasty Thursdays this week on The Mandatory Mooch. I hope you will link up again. The party will be live tonight. http://www.mandatorymooch.blogspot.com
Thanks, Nichi
Crystelle
How fun!
I bet those girls enjoyed that party...
:-)
just keep swimming
We did an art party for my daughter two years ago and it wasn't nearly as cute as this. These cookies are precious!
I found you at Too Cute Tuesday.
Britni
I LOVE these, Heidi! They are too cute!
Jessi @ Practically Functional
Those are just too cute! Thanks for sharing at The Fun In Functional!
Evelyn
Your cookies were featured at Freedom Fridays this week:)
Thank you so much for sharing at Freedom Fridays:)
Kathie
Such a cute and fun idea! I love the "paint" on the pallets! The aprons look awesome too! Thanks for sharing at Gettin' Krafty!
Jill
Great idea for those cookies!
Thanks for linking to a Round Tuit!
Hope you have a fabulous weekend!
Jill @ Creating my way to Success
http://www.jembellish.blogspot.com/
Jamie @ Love Bakes Good Cakes
These are the cutest thing! You have so many great ideas, Heidi! I have an 11 yr old who is an aspiring artist - he would love these! Thank you for sharing at All My Bloggy Friends last week. I can't wait to see what you share this tomorrow!
K @ Claiming Our Space
Your cookies turned out so cute. Thanks for sharing on Tout It Tuesday. Hope to see you tomorrow!
Debi @ Adorned From Above
Hi Heidi,
This is a great tutorial, and these cookies are so cute. Thank you so much for sharing with Wednesdays Adorned From Above Link Party last week. This weeks Link Party is opened at
http://www.adornedfromabove.com/2012/09/simple-anti-aging-moisturizer-and.html
from Wednesday until Sunday.
Hope to see you there.
Debi Bolocofsky
Adorned From Above
http://www.adornedfromabove.com
Susan
I saw these cookies on Delightful Order's link party. They're absolutely adorable.
Evelyn
These clever little cookies were shared on my Facebook Page today:)
http://www.facebook.com/MyTurnForUs
Have a wonderful weekend!