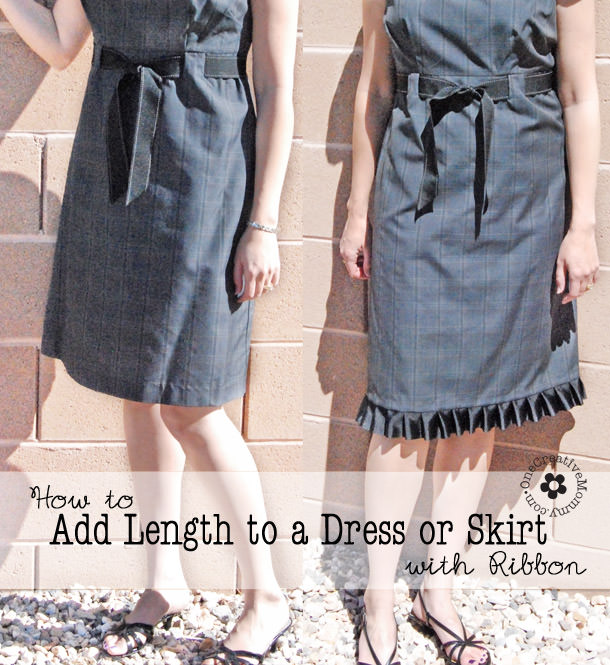
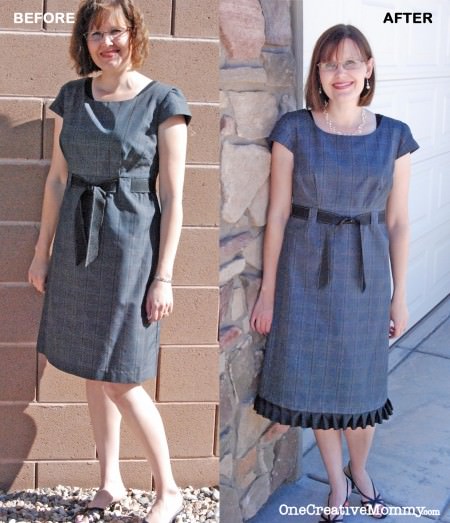
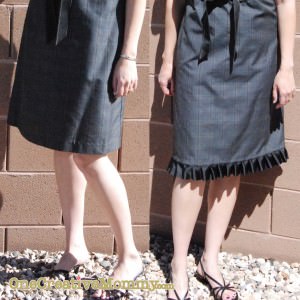
I found a great dress at Ross for $14.99. Unfortunately, it was too short. The dress was just a little shorter than I wanted standing up, but when I sat down, it got really short. There was about 1 ½" of fabric in the hem, so simply lowering the hem would add some length, but not enough to fix the sitting problem. Following is a tutorial of how I solved the problem and turned my dress from "too short" to "too cute!"
Skill Level: Beginner. (I'm not a seamstress. Judging by the fact that I was able to make this work on the first try, I'd say a beginner can handle it. It may look hard, but it's really quite simple.)
How to Add Length to a Dress or Skirt
Materials:
- Wide grosgrain ribbon–enough to go around the bottom of the skirt twice (plus a little extra–just in case!) (Grosgrain ribbon matched the belt of my dress, but you can use any type of wide ribbon.)
- Matching thread
- Hem tape (optional)
- Seam ripper
(If you are buying from a fabric store chain, don’t forget to google a coupon! I got everything for half off, so my supplies added less than $5 to the price of my dress.)
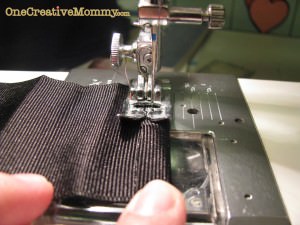
Step 1: Before you start to pleat the ribbon, use a lighted match or lighter to seal the edge of the ribbon and keep it from fraying. Run the flame quickly down the right edge of the ribbon. This will melt the edge of the ribbon just a little bit. Now fold the ribbon under about ¼" and stitch down the edge.
I think I've mentioned this before, but the best thing about my tutorials is that I make all the mistakes for you so that you don't have to make them! I actually didn't do step one until I had finished all the pleats and pinned them to the dress. Doing this first would definitely have made things easier!
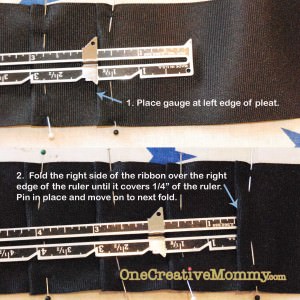
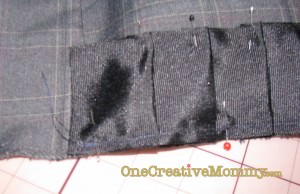
Step 2: Pin some sample pleats into the ribbon and hold them up to the dress to decide the width of the pleats you would like. I chose to pleat every 1 ¾″, with a ¼″ overlap (making the pleats appear every 1 ½″). For even pleats, use a seam gauge or ruler. Place the movable edge of the gauge at 1 ¾″ and set it against the left-most edge of the ribbon. Fold the ribbon back over the ruler to the ¼″ mark and pin it down. Move the edge of the gauge to the left edge of your completed pleat and continue pinning pleats across the entire ribbon.
Step 3: Stitch across the top of the pleats to hold them in place. Using a seam ripper, remove the stitching from the hem of your dress and iron out the crease. (If you're like me, you'll have to take a few minutes to remember where in the world you keep the iron! My iron does not get used very often.)
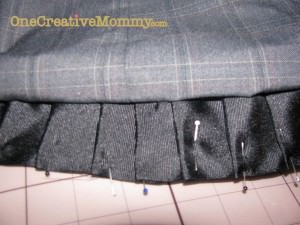
Step 4: With the dress right-side out, and starting from the center of the back of the dress, pin the ribbon to the dress. The ribbon will be upside-down, with the edge you stitched meeting the bottom edge of the dress. The edge of the ribbon that you stitched back will be showing. (Remember, I forgot that step, so that's why it isn't in the picture.) Unless you want to do some really complicated math, you will likely have one odd size pleat at the end. I chose to put it in the center of the back of the dress. If you would rather have it on the side, start pinning from the side of the dress instead of from the middle.
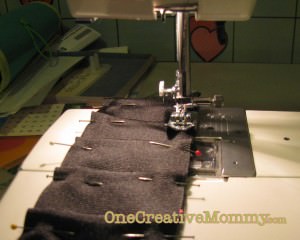
Step 5: Here's where you have to get creative! Unless you are willing to do the math it would take to determine the exact size of pleat that would fit evenly around the skirt, your last pleat will be a slightly different size than the rest. Cut off the excess ribbon, leaving a little extra to play with. Unpin the first and last pleat from the hem and experiment until you get the smaller (or larger) pleat right in the center of the back of the dress. Try folding in different ways until you are happy with the look. (Don't forget to leave a little extra ribbon to fold under. Repeat step 1 on the unfinished edge of the ribbon. (You will have to unpin a little to get the ribbon under the sewing machine.) Repin the finished pleats. (The image above is of my center pleats. They are not stitched down--just pinned and then folded back to show the small pleat.)
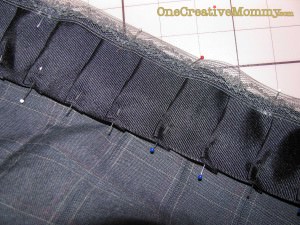
Step 6: Pin your hem tape over the edge you pinned to the skirt. Pin it so that half of the width covers the pleated ribbon and half is hanging over the edge. (You can skip this step, but it will make the hem of your dress more comfortable and make it easier to do the final hemming.)
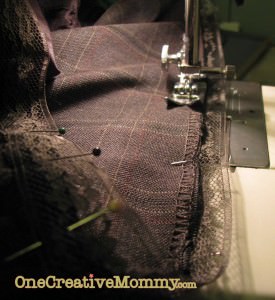
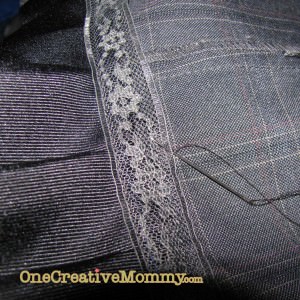
Flip the dress so that the hem tape is against the bottom of the machine. This will allow you to follow the edge of the hemline with your machine. Stitch all three layers together. (I wanted to add maximum length, so I stitched as close to the edge as I could, using the width of the presser foot as my guide.) Fold down the ribbon and carefully iron the edge of the dress to flatten out your seam. Warning! I know from experience that your ribbon can melt. Be very careful which setting you use on the iron.
Step 7: Couch stitch the loose edge of the hem tape to the dress. If you want your pleats loose like mine, go ahead and take out the pins. If you want the pleats to lay flat, very carefully iron in creases before you remove the pins. Remember not to melt the ribbon! You're done!
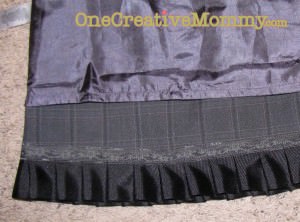
In case you wonder how much length I was able to add, here's a picture of the inside of the finished dress. I'm guessing the original lining stopped about an inch above the hemline. I easily added a few inches!
I'd love to hear if this worked for you!




Haley
This is awesome! Turned out great!
Jacqueline
I've done this before with pleats or ruffles from material at the bottom of skirts/dresses. Thanks for the idea of using ribbon!
Shannon
What a great idea--it turned out perfect!!
Shannon@SewSweetCottage
Kathryn Siegwart
Very creative! I'm planning on doing a similar thing to the bottom of a new dress that's just a little too short. Love the way the ribbon matches the belt-it looks even better than the original!
(Found you through Hooking up with HOH, btw) ;)
Evelyn
I love the idea of using a matching ribbon to the belt & the pleated look adds personality to the dress. I’d even think about similar ribbon pleated on the cap sleeves, since I don’t like short sleeves on my arms or maybe sewing pleates flat around the neckline to tie it all in.
Heidi
Those are great ideas. Thank you. Too bad I don’t fit into that dress anymore, or I might give it another makeover!
Marianne
This is wonderful!! My mom was a fantastic seamstress, and taught me a few 'tricks of the trade' to adjust clothing. She would really enjoy this one. You did a BEAUTIFUL job with this, and I have to say that the dress looks so much more sophisticated with the added pleated hem. Truly, you really did give the dress life.
Thank you for sharing this. This should really come in handy. By the way, I'll share an adjustment my mom taught me to do when a sleeveless scoop neck top hangs too long under the arms. Pull the cloth up from the shoulder (as much as you need to fit properly under the arm) and fold toward the front. Sew in place, and add a button. Repeat other side. Now it looks as if the tank top is buttoned at the shoulders and the fit is more modest and secure.
Blessings for the day,
Marianne
Lauren
This is such a great idea. Thank you so much for sharing at Off the Hook.
terry
That's a great idea. I often run into this problem where dresses are just a little too short but lovely otherwise and I've always passed on buy them. This is a great, cute solution. thanks for sharing at our party this week.
Susie @Bowdabra
WOW! this is so wonderful. You did an awesome job with the tutorial. I'm sending the link to my teen who loves these type of projects!
We would LOVE to have you again at our weekly Crafty Showcase (Sat-Thur) with the Featured links on Friday. It would be an honor if you would stop over and link up this fun crafty idea post or any others you want to share!
Have a great weekend!
Susie
http://bowdabrablog.com/2012/06/02/saturday-showcase-craft-projects-4/
kara
WOW! I love this idea and such a great tutorial. Thanks for sharing at DIY Diva Thursdays!!
Debi Bolocofsky
This is a great tutorial, I was wondering if you would link it in my Wednesdays Adorned From Above Blog Hop. Here is the link:
http://www.adornedfromabove.com/2012/06/natural-aftershave-and-wednesdays.html
I would love to have anything that you would like to link.
Sincerely,
Debi Bolocofsky
http://www.adornedfromabove.com
Adorned From Above
Brenna
I love this. I have wanted to do this to save a few skirts and dresses I have, but haven't had the courage. I now feel better about trying it after seeing your tutorial. Thank you so much.
Kelly @ Corner of Main
How perfect! I am almost 6 feet tall, so I can definitely make use of this. =)
mia
can this b done by hand
I haven't ventured into the sewing machine world yet
Heidi
You could try, Mia, but it would be very time consuming and much harder than with a sewing machine.