

What's an art party without trying to copy a real artist? Here's a fun take on Jackson Pollock's splatter art style: Splash Art!
In case you have never heard of Jackson Pollock, here's a little sample and a description of his splatter art style (in his own words):
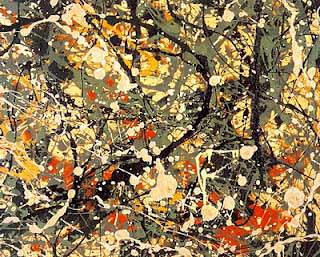
My painting does not come from the easel. I prefer to tack the unstretched canvas to the hard wall or the floor. I need the resistance of a hard surface. On the floor I am more at ease. I feel nearer, more part of the painting, since this way I can walk around it, work from the four sides and literally be in the painting.
I continue to get further away from the usual painter's tools such as easel, palette, brushes, etc. I prefer sticks, trowels, knives and dripping fluid paint or a heavy impasto with sand, broken glass or other foreign matter added.
When I am in my painting, I'm not aware of what I'm doing. It is only after a sort of 'get acquainted' period that I see what I have been about. I have no fear of making changes, destroying the image, etc., because the painting has a life of its own. I try to let it come through. It is only when I lose contact with the painting that the result is a mess. Otherwise there is pure harmony, an easy give and take, and the painting comes out well.
-Jackson Pollock, My Painting, 1956 (Quote from Wikipedia)
Although I would have loved to let the kids drip paint all over a canvas, it sounded a little expensive (and messy), so we improvised.
Materials:
- Small water balloons
- Acrylic paint in lots of colors
- Thumbtacks
- Strong, quick-drying glue
- A solid, light-colored sheet
- Masking tape
- A large piece of plywood, masonite, bead board--whatever you can find for cheap (We used a piece of bead board purchased from Habitat for Humanity Restore that has been sitting in our garage for ages. My hubby can't wait to get rid of it, but I have plans for it! -- Just not the time to complete the plan!)
The Canvas
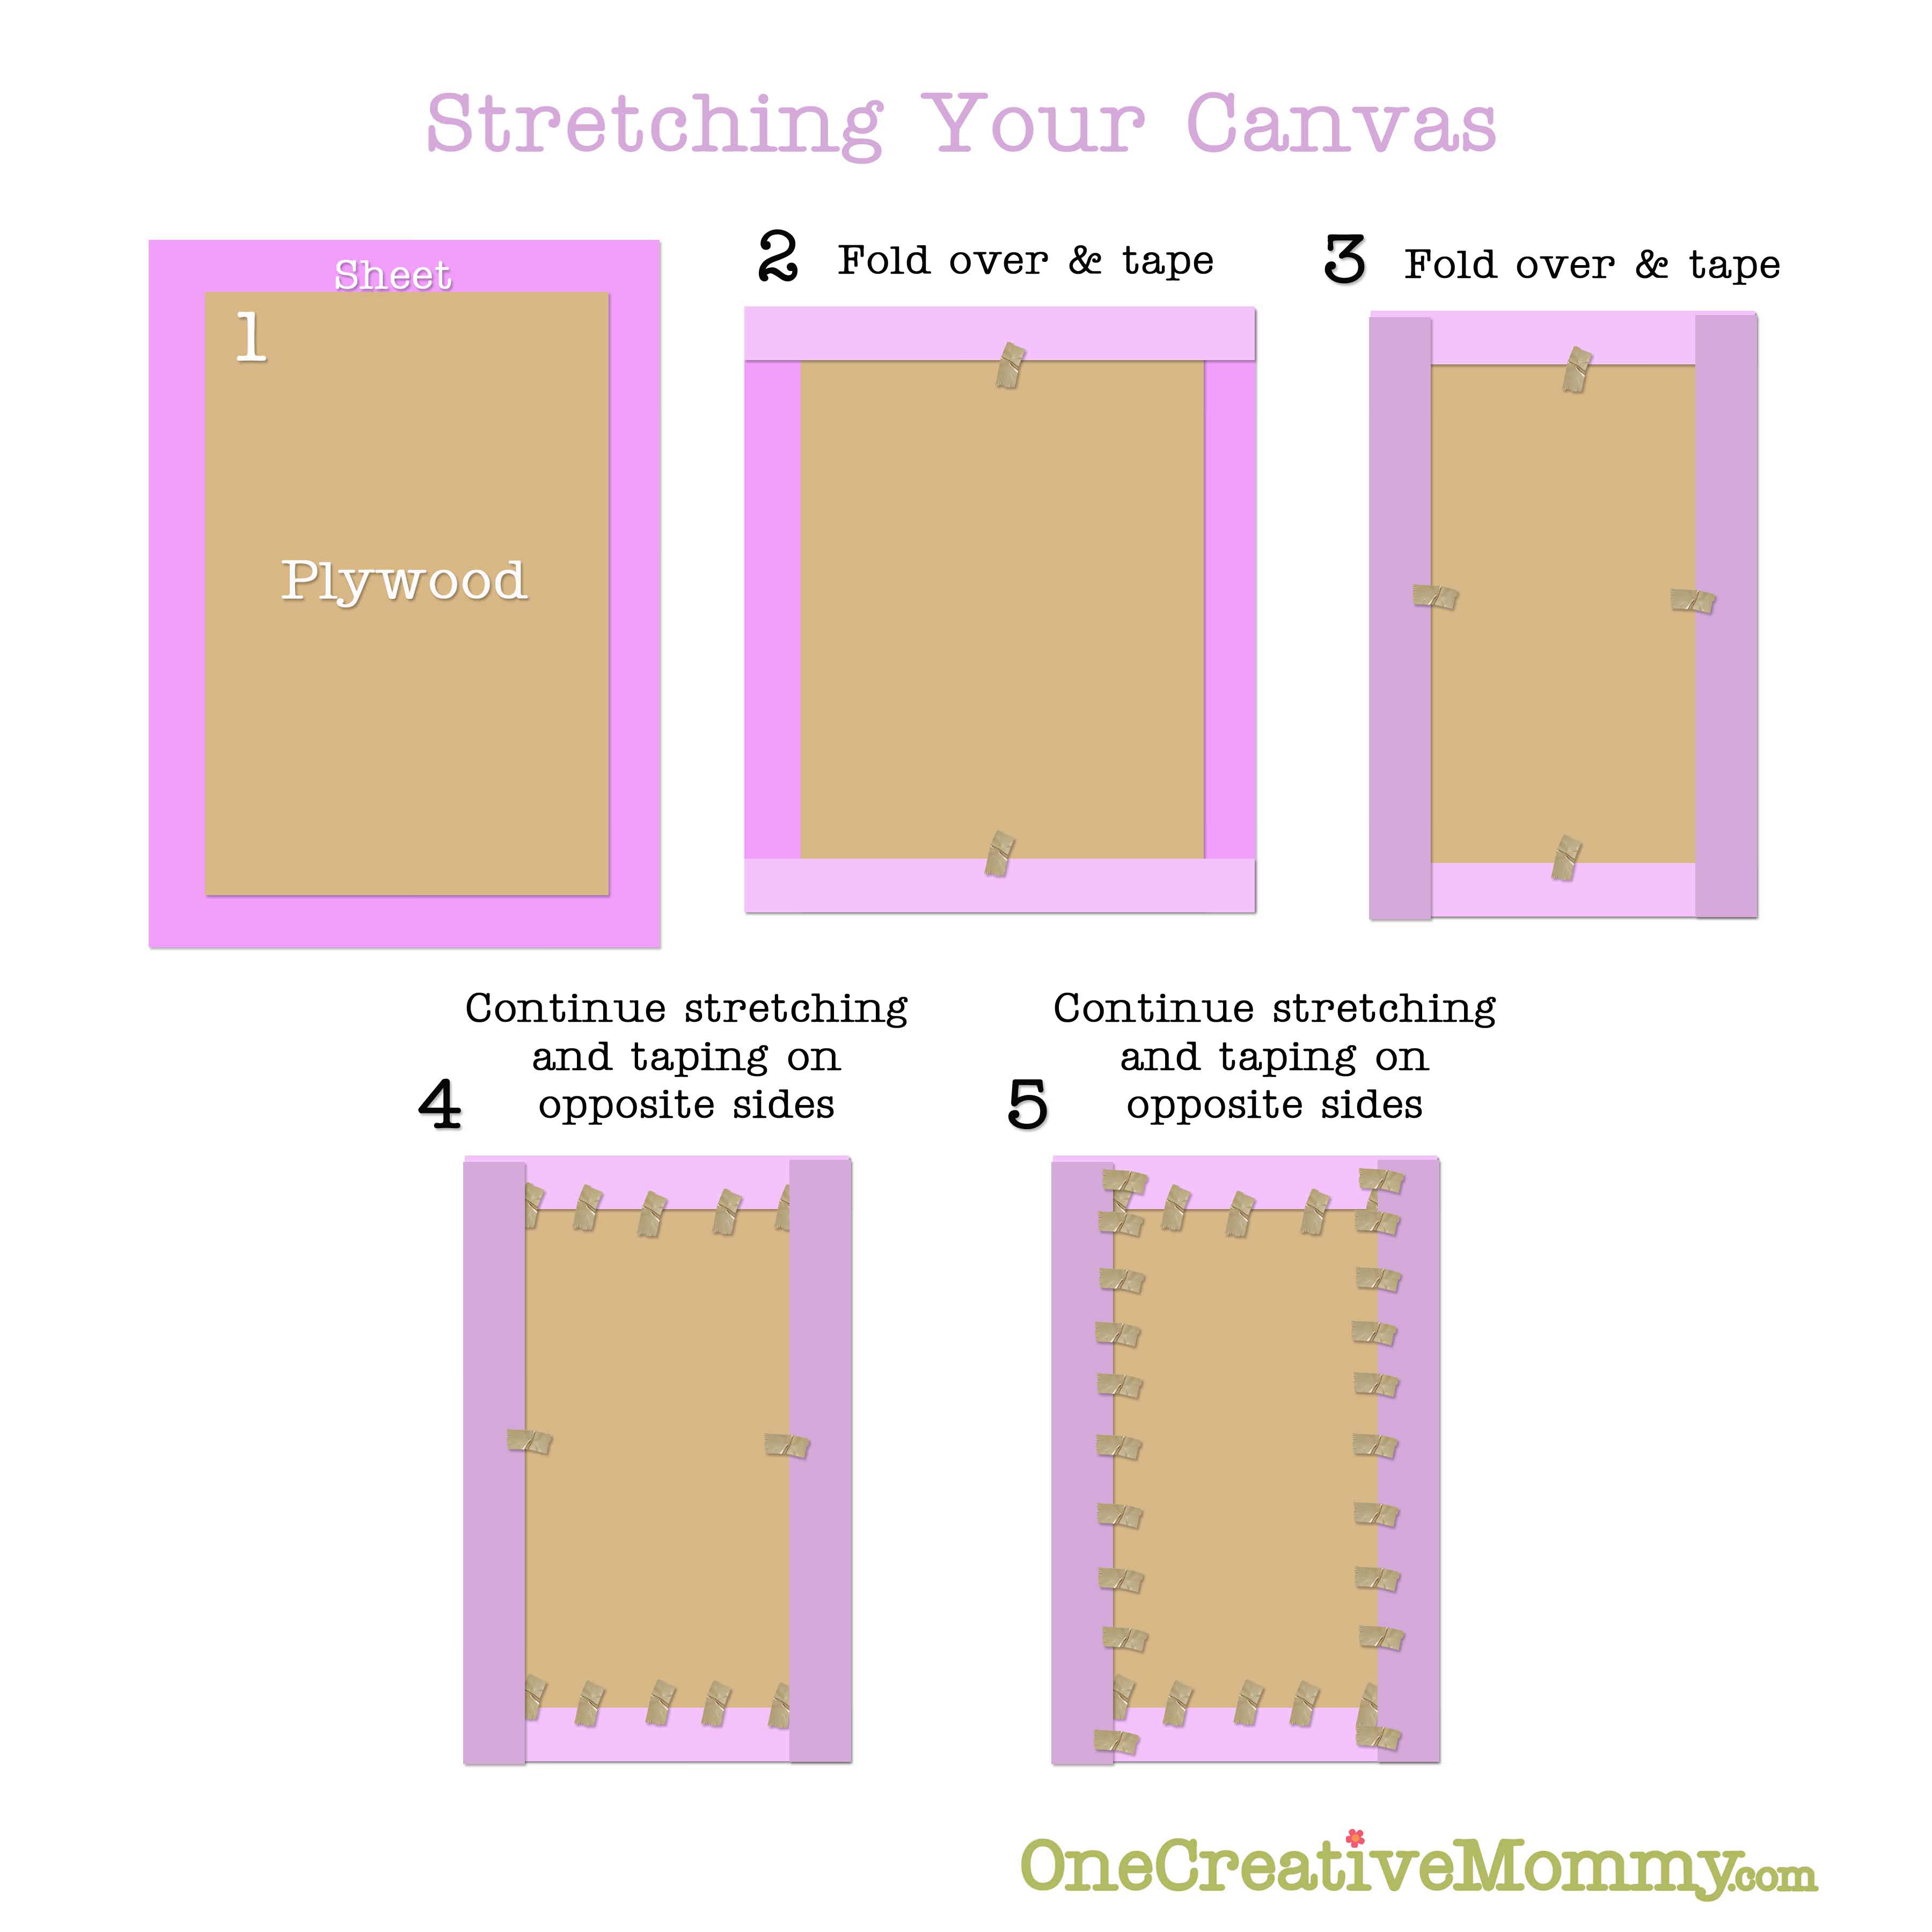
(It helps to have a helper for this part.) In a large, flat space, lay out your sheet and place your plywood/masonite/whatever in the center. You and your helper should be on opposite sides. Beginning in the centers of opposite sides, stretch the sheet tight, fold it over the back of the wood, and tape it down. Switch to the opposite ends of the board and do the same. Continue stretching and taping on opposite sides until you have stretched and taped the entire sheet. (See image below.)
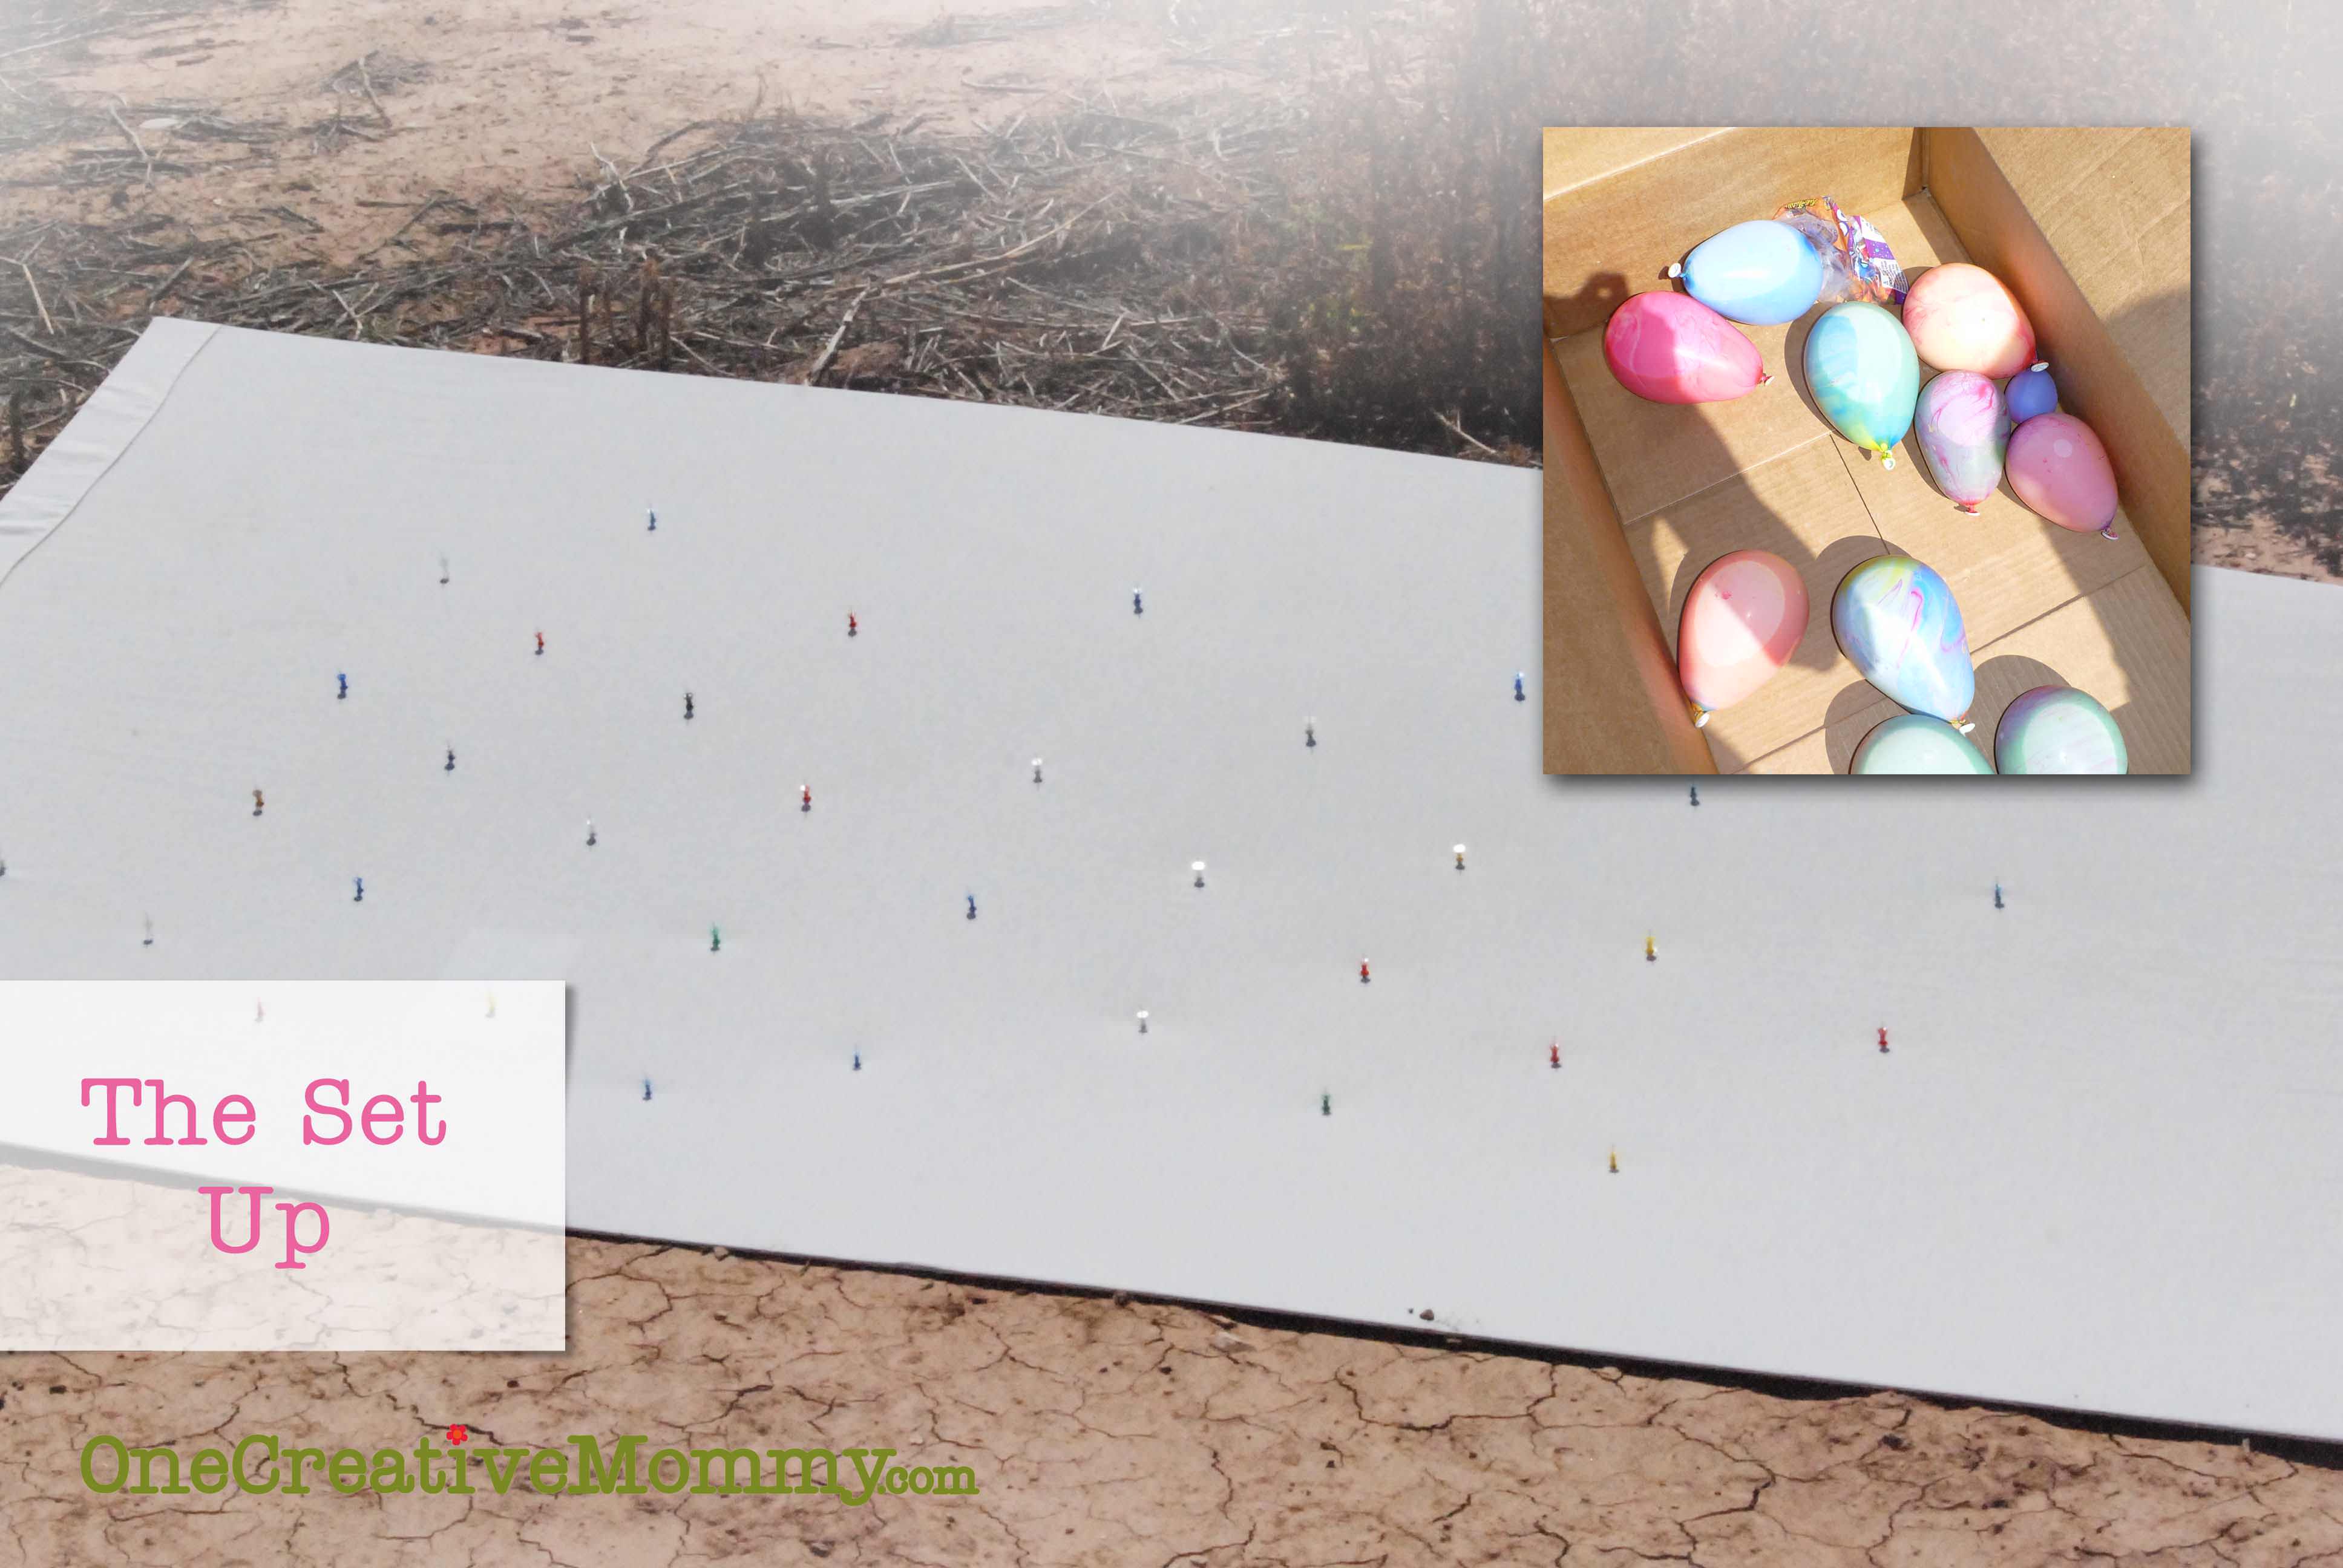
Once you finish stretching the canvas, flip it over and get out your thumbtacks and glue. One at a time, dip the back end of a thumbtack into the glue and stick it--point up onto the canvas. Continue until you have finished the entire canvas. The purpose of the tacks is to help the balloons pop!
The Balloons
Before attaching empty water balloons to the hose, squirt a generous amount of acrylic paint into each balloon. Carefully fill each balloon and tie them off.
The Fun
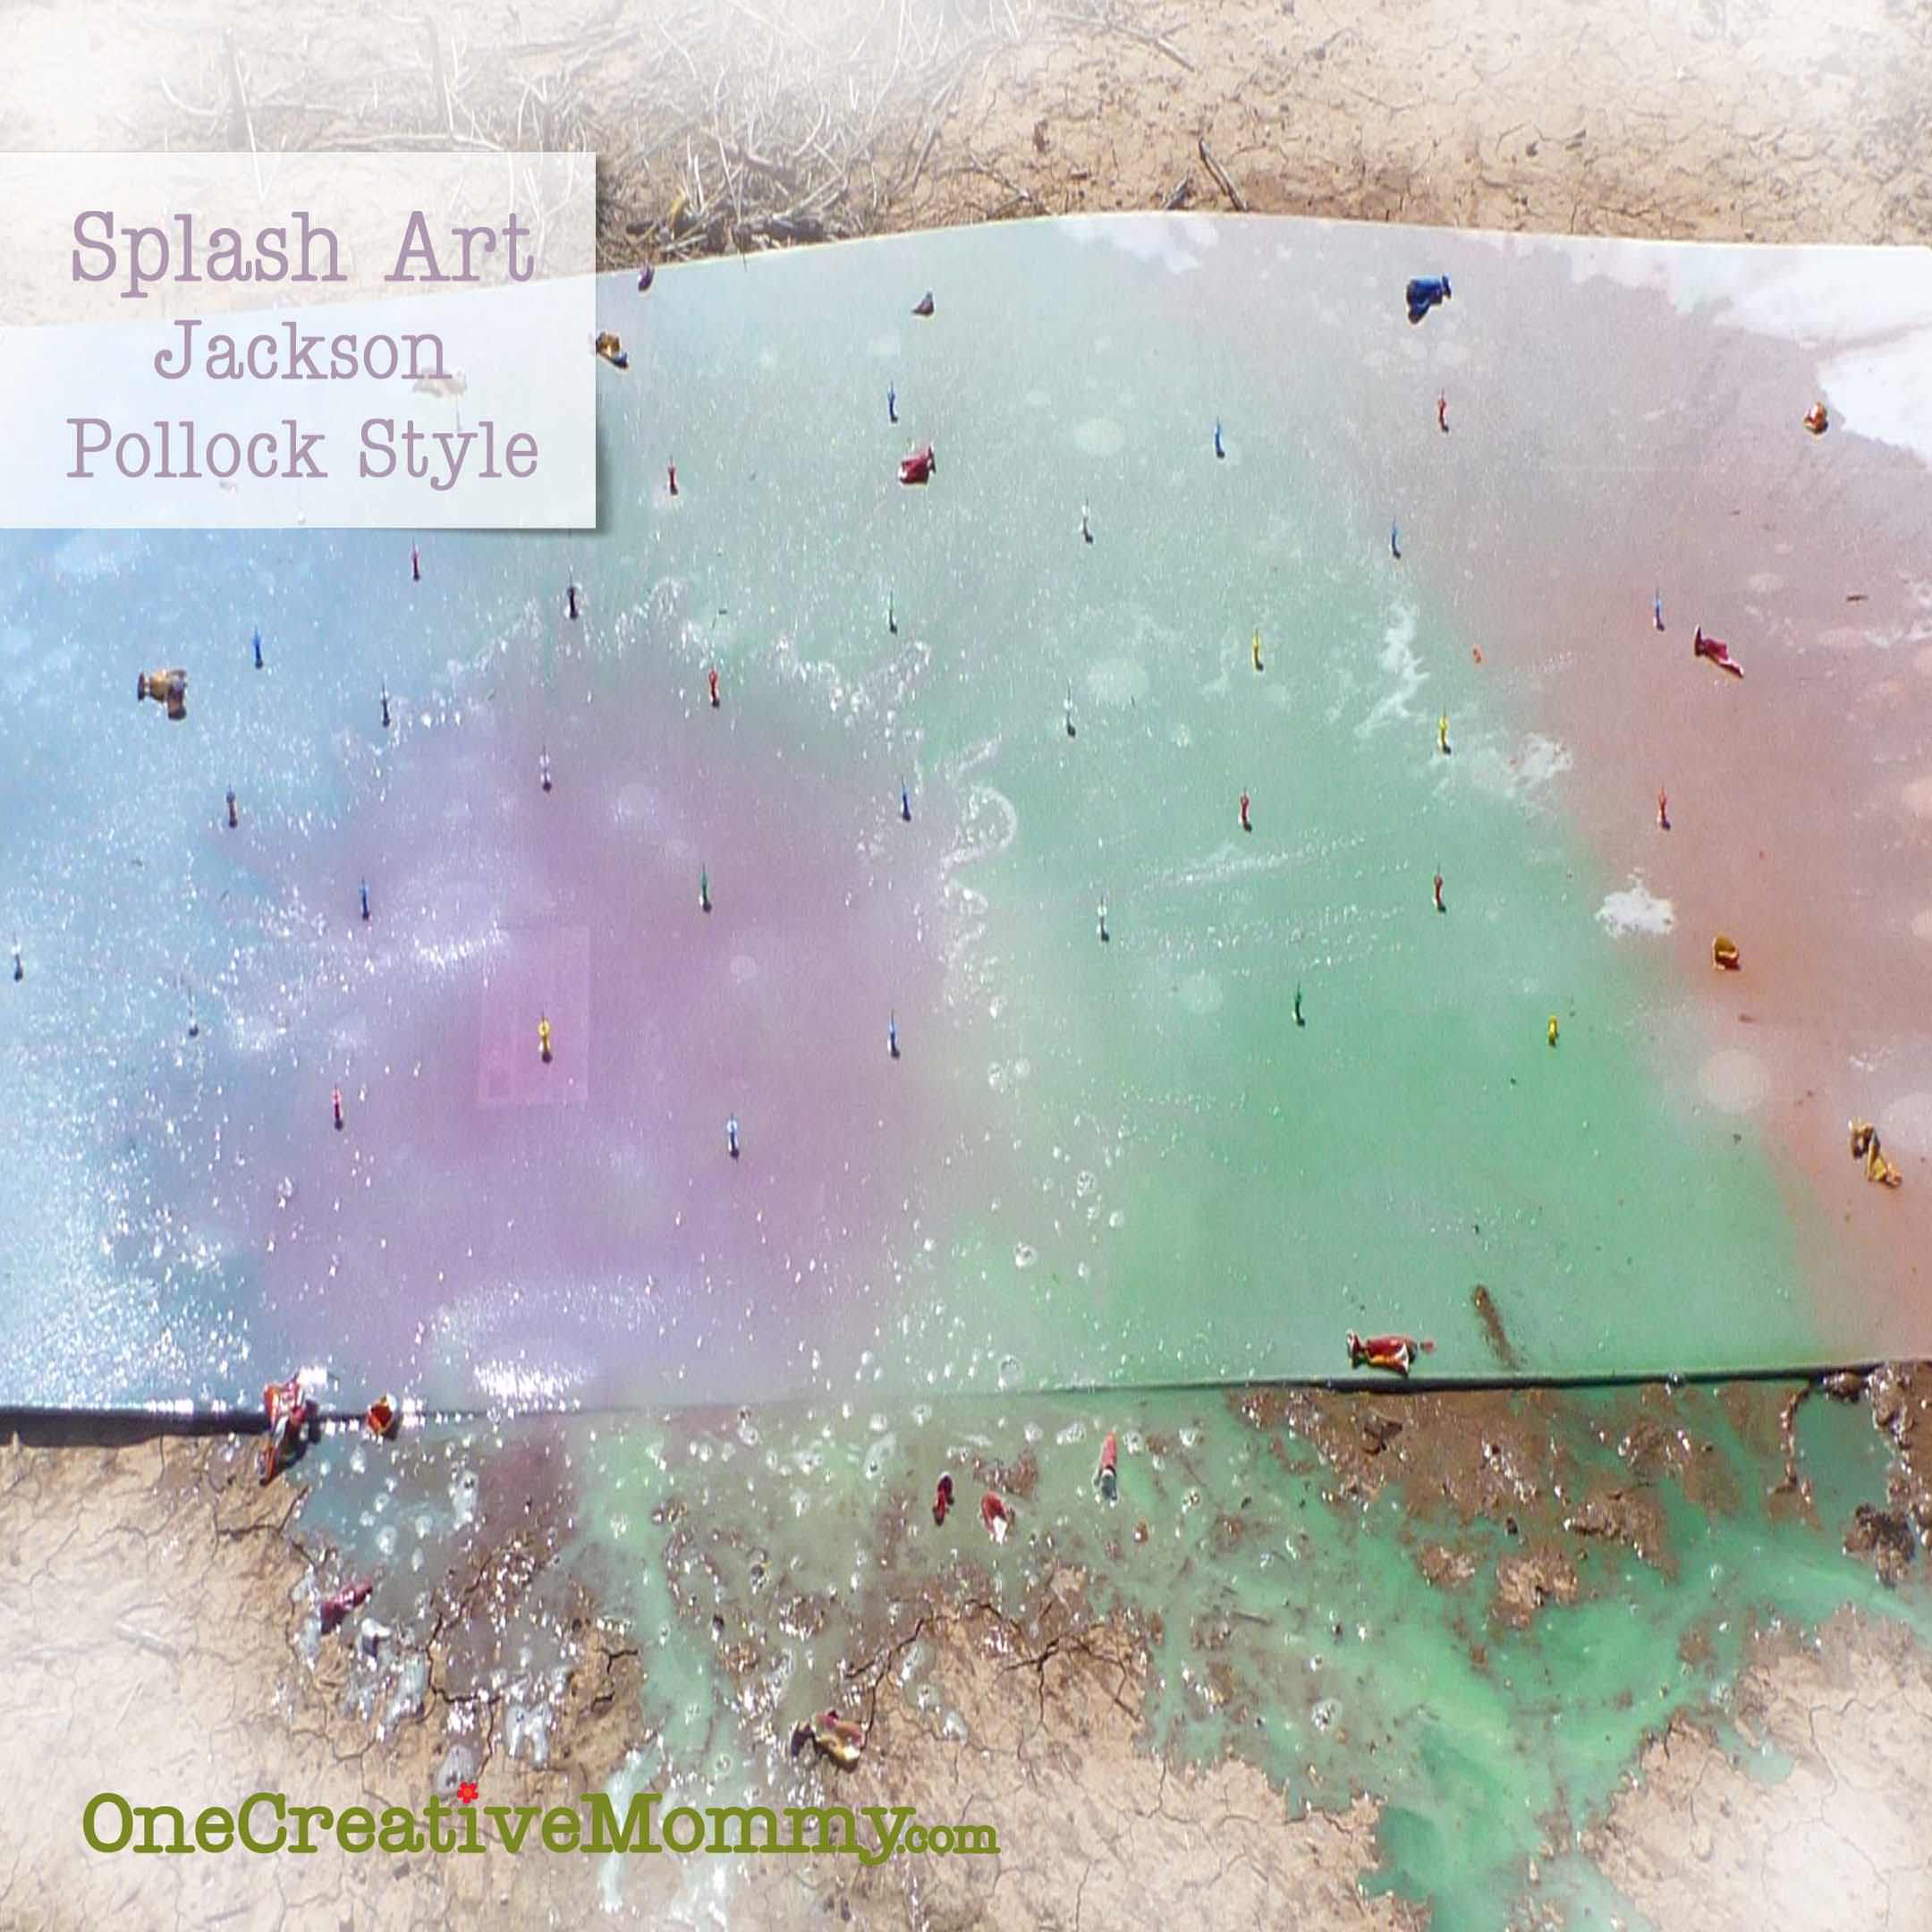
Place your canvas somewhere it's okay to get messy. (This is when an empty field behind your house comes in really handy! Let the kids pick a balloon and fire away! The kids will have to experiment to figure out what method pops the balloon the best. (ie throwing, dropping, etc)
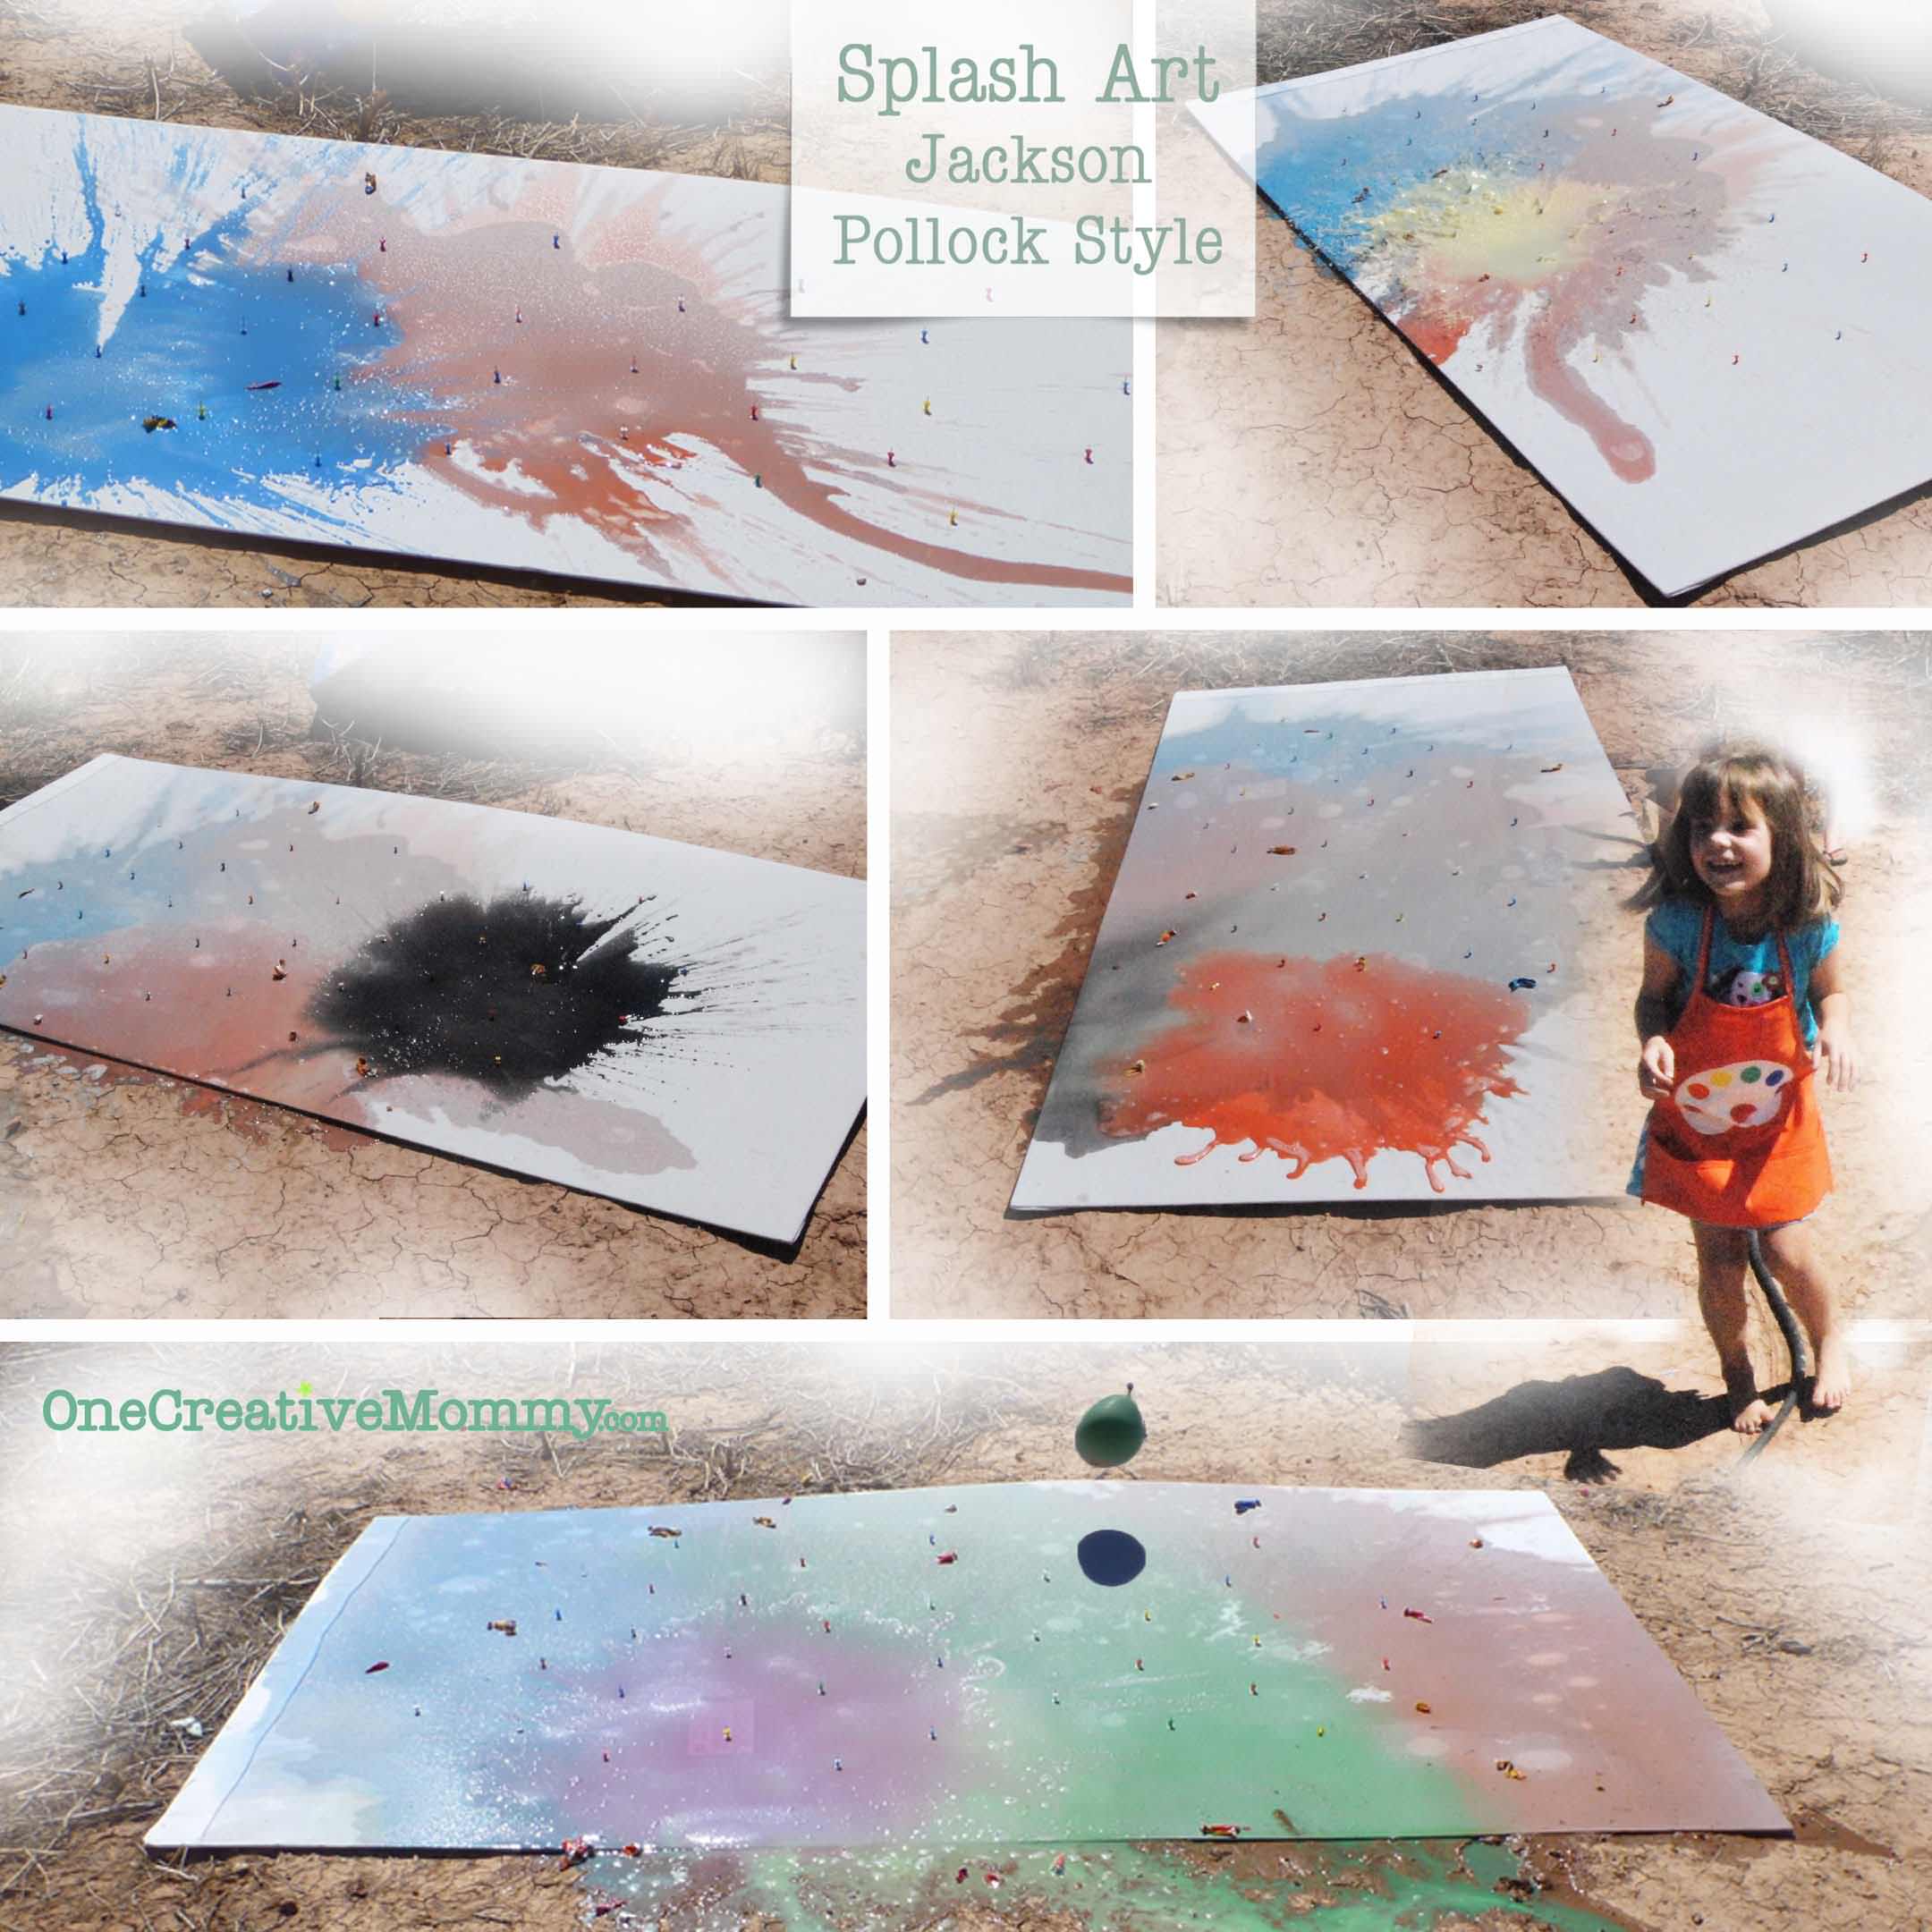
What I would change for next time:
- As you can probably tell from this last image, the paint quickly washes away every time a new balloon pops. This is because the balloons are filled with lots of water, and only a little bit of paint. If I did this again, I would use a lot more paint. Maybe I would try using the extra latex paint I have in the garage. (Since there is little chance that paint will ever be used, and there is tons of it, it would be a cheaper way to use more paint.
- Popping the balloons is tough! Make sure they are filled nice and full.
- More balloons! I would also let a few kids throw balloons at once. It was awfully hot outside to wait for turns!
Have fun!
Want to see my other art party posts so far?

If you enjoy this idea, please "like," "Pin," or "+1" so that others can join the fun! Thanks!









Joyce
This is a wonderful idea! I love the way kids can't help but become familiar with a famous artist while having such a fun, crazy time!
Jessi @ Practically Functional
What a fun idea! I bet they absolutely loved this, thanks for sharing at The Fun In Functional!
Jill
What a fun way to paint!
Thanks for linking to a Round Tuit!
Hope you have a fabulous week!
Jill @ Creating my way to Success
http://www.jembellish.blogspot.com/
Ewa
looks like fun!!!
Katherines Corner
Love it! thank you for sharing at the hop my fiend. XO
Sarah
Hello there!! Just was stopping by you blog via happy go lucky blog hop!! enjoyed visiting and am now following! would love to have you visit me!!
Thanx,
sarahseay92.blogspot.com
Nicole
This looks like so much fun ... & the painting looks great too!
Kathryn Griffin
What fun! Thank you for sharing this at my Make it Pretty Monday party at The Dedicated House. Hope to see you again on Monday. Toodles, Kathryn @TheDedicatedHouse
Kerstie
Looks like so much fun, what a great idea.
Jill @ Create.Craft.Love.
Great idea! Can't wait to try this with my little one! Thanks for sharing at the Pomp Party! Pinning!
Sharon @ Elizabeth & Co.
Oh my goodness, that looks like such fun!
K @ Claiming Our Space
This looks like so much fun! Thanks for sharing on Tout It Tuesday! Hope to see you tomorrow.
Jamie @ Love Bakes Good Cakes
What a great thing to do with kiddos! Thank you for sharing it last week at All my Bloggy Friends - I can't wait to see what you link up at this week's All my Bloggy Friends!
Nichi - The Mandatory Mooch
I love this idea. Gotta try it with my kids!! Thanks so much for linking up to Tasty Thursdays on The Mandatory Mooch!! I hope you will link up again. The party will be live tonight. http://www.mandatorymooch.blogspot.com
Thanks, Nichi
Debi @ Adorned From Above
This is great. It would be really fun to do. Thank you so much for sharing with Wednesdays Adorned From Above Link Party last week. This weeks Link Party is opened at
http://www.adornedfromabove.com/2012/09/reeses-smore-brownies-and-wednesdays.html
from Wednesday until Sunday.
Hope to see you there.
Debi Bolocofsky
Adorned From Above
http://www.adornedfromabove.com
Randomly Fascinated
Love this!
Thanks for linking up to Friday Fascinations! You have been featured, come over and get a button! http://domesticrandomness.blogspot.com/2012/09/friday-fascinations-4-and-5-feature.html